The Saturday market basket overflows with the last of the berries as August turns toward autumn, signaling the right time for a Neapolitan Anniversary Cake.

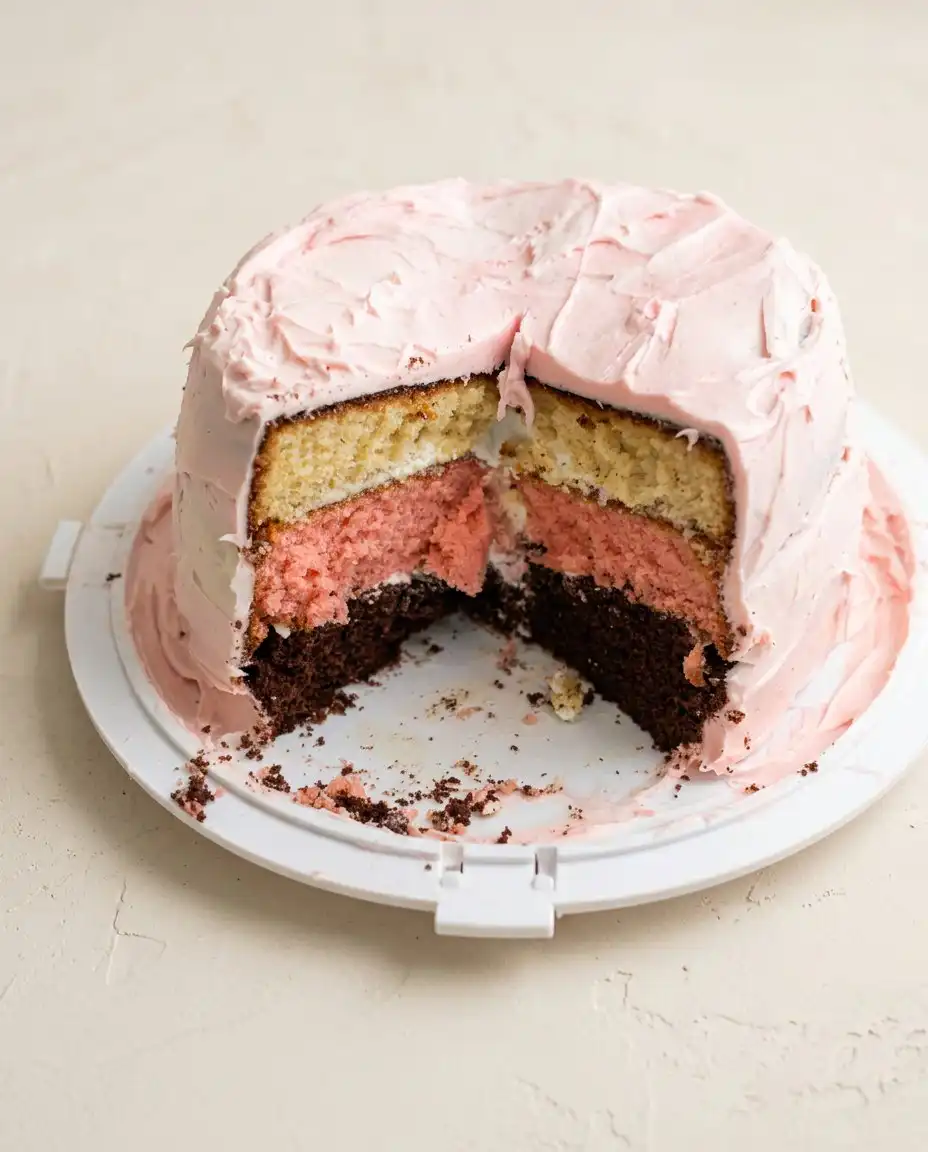
This triple-layered bake brings together the unhurried grace of summer strawberries, the deep comfort of dark chocolate, and the quiet sweetness of vanilla. It is a cake that marks time with honesty, celebrating the layers of a life shared through seasons of growth and harvest. You will find that the crumb is tender and the flavors are distinct, offering a nostalgic nod to childhood scoops while standing tall as a centerpiece. This Neapolitan Anniversary Cake is built with patience and respect for the ingredients that define each beautiful layer.
A Neapolitan Anniversary Cake Worth the Season
Prep: 120 min · Serves: 14 · Difficulty: Medium
- Three distinct flavors in one beautiful slice.
- Uses fresh berries for a real strawberry taste.
- Rich bittersweet chocolate balances the sweet vanilla.
- Stable buttercream creates clean and crisp finish.
- Rustic charm that shines on any table.
This Neapolitan Anniversary Cake is a reminder that good things take time and honest ingredients make the best memories. You might also find joy in baking our strawberry vanilla cake 3 during the peak of the berry season.
Get The Full Cake Recipe
Print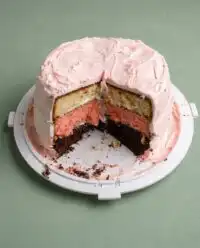
Neapolitan Anniversary Cake
- Total Time: 155 mins
- Yield: 14 servings
Description
Celebrate with this stunning triple-layered masterpiece featuring natural strawberry reduction, rich bittersweet chocolate, and delicate vanilla sponge. This balanced cake offers a nostalgic yet sophisticated dessert experience perfect for any milestone.
Ingredients
- 2 cups fresh strawberries
- 1 cup unsalted butter
- 1/2 cup vegetable oil
- 2 cups granulated sugar
- 3 large farm-fresh eggs
- 3 cups all-purpose flour
- 1 tablespoon baking powder
- 1/2 teaspoon salt
- 1 cup whole milk
- 2 tablespoons premium cocoa powder
- 4 ounces bittersweet chocolate
- 1 teaspoon vanilla extract
- 2 cups powdered sugar
- 1/2 cup heavy whipping cream
- Red food coloring (optional)
Instructions
- Reduce the strawberries. Cook chopped strawberries in a saucepan over medium heat until reduced by half, then cool completely.
- Prepare your pans. Grease three 8-inch round pans and line with parchment paper; preheat your oven to 350°F.
- Cream butter base. Beat butter, oil, sugar, and vanilla together until pale, fluffy, and smooth.
- Add eggs and flour. Incorporate eggs one by one, then fold in flour, baking powder, salt, and milk until just combined.
- Divide the batter. Separate batter into bowls to create vanilla, strawberry (add puree), and chocolate (add melted chocolate and cocoa) layers.
- Bake the layers. Distribute into pans and bake until a toothpick comes out clean, approximately 30 minutes.
- Cool the cakes. Let cakes rest in pans briefly before turning out onto wire racks to cool completely.
- Frost and assemble. Whisk remaining butter, sugar, and flavorings into frostings, then layer cakes and finish with a chocolate ganache drip.
Notes
- Ensure all dairy and eggs are at room temperature to prevent the batter from curdling during mixing.
- Use a kitchen scale to measure flour accurately to maintain the intended tender crumb structure.
- Chill the assembled cake for a short period if the kitchen temperature is causing the buttercream to soften.
- Level cake layers using a serrated knife only after they have cooled fully to avoid tearing the sponge.
- Prep Time: 120 mins
- Cook Time: 35 mins
- Category: Dessert
- Method: Baking
- Cuisine: American
Honest Ingredients
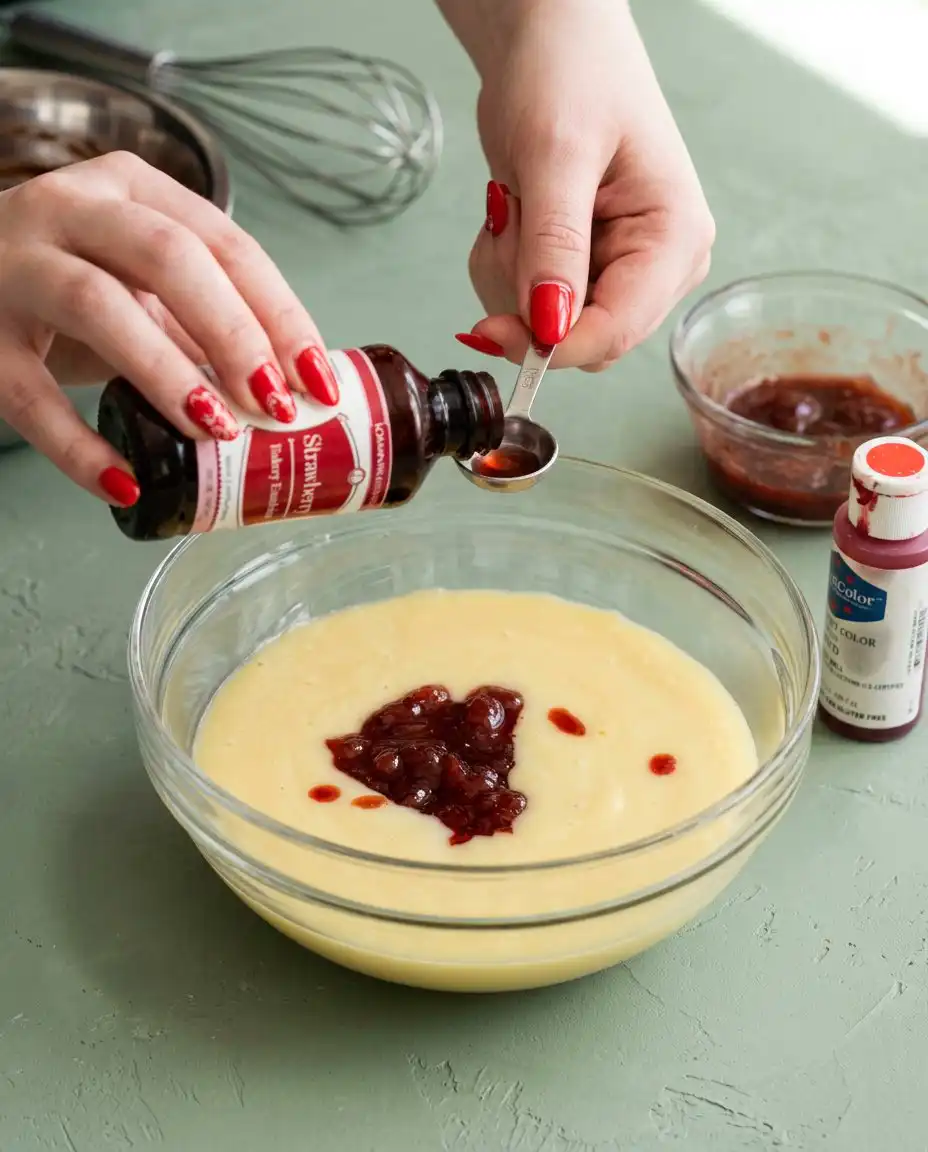
When the fruit is this good, keep it simple. This cake relies on the deep orange yolks of farm eggs and the creamy texture of high-quality butter to create a crumb that is both sturdy and soft. We use real strawberry reduction and premium cocoa to ensure the flavors are authentic rather than artificial.
- Strawberry Puree: Reduced slowly on the stove to concentrate the flavor without adding extra liquid.
- Unsalted Butter: High fat content provides a rich mouthfeel and a stable base for the frosting.
- Bittersweet Chocolate: Chopped finely and melted to give the chocolate layer a sophisticated depth.
- Vegetable Oil: Paired with butter to keep the cake layers moist even after refrigeration.
- Powdered Sugar: Sifted carefully to create a smooth, cloud-like buttercream finish.
- Natural Cocoa Powder: Adds a robust earthiness that contrasts beautifully with the vanilla.
- Heavy Whipping Cream: Used in the ganache and frosting for a silky, spreadable consistency.
| Ingredient | Why It Matters |
|---|---|
| Strawberry Puree | Provides concentrated natural flavor and color |
| Bittersweet Chocolate | Creates a rich and authentic chocolate crumb |
| Whole Milk | Adds moisture and tenderness to the vanilla batter |
| Vanilla Extract | Bridges the flavors of all three cake layers |
The Method, Step by Step
Step 1: Prepare the Strawberry Reduction
Begin by cooking your chopped strawberries in a small enamel saucepan over medium heat until they soften and release their juices. Stir the mixture steadily to prevent scorching as the liquid bubbles and thickens into a deep ruby concentrate. You are looking for the puree to reduce by half, which concentrates the sugars and the perfume of the fruit. Allow this mixture to cool completely on the counter before you even think about adding it to your batter or buttercream.
Step 2: Set the Stage for Baking
Prepare three eight-inch round cake pans by lining the bottoms with circles of parchment paper and lightly greasing the sides. Preheat your oven to 350 degrees Fahrenheit, allowing it to reach a steady temperature while you assemble your tools. A wooden cutting board and a clean linen tea towel should be nearby to handle the pans once they emerge. Sift your flour, baking powder, and salt together in a medium bowl to remove any lumps and set this aside.
Step 3: Cream the Butter for Your Neapolitan Anniversary Cake
Place the softened butter, vegetable oil, sugar, and a generous splash of vanilla into a large enamel mixing bowl. Beat these together for several minutes until the mixture looks pale yellow and holds a fluffy, light texture. Do not rush this part of the process, as the aeration of the butter and sugar is what gives the cake its lift. The sugar should begin to dissolve into the fats, creating a base that feels like velvet under the weight of a spoon.
Step 4: Incorporate the Eggs and Flour
Add the farm-fresh eggs one at a time, mixing gently after each addition until the orange yolks are fully integrated. Scrape down the sides of your bowl with a flexible spatula to gather any stray butter or sugar that escaped the beaters. Begin folding in half of your dry ingredients, followed by a small amount of milk to keep the batter supple. Finish by adding the remaining flour mixture and mixing until the batter is thick and no streaks of white remain visible.
Step 5: Create the Strawberry and Vanilla Layers
Divide a portion of the thick batter into a separate bowl and fold in the cooled strawberry reduction along with a hint of red food coloring. The batter will take on a soft pink hue and smell like a summer garden at high noon. Into another bowl, pour half of the remaining plain batter and stir in a touch of extra vanilla and a spoonful of flour. These two mixtures will become your strawberry and vanilla layers, and they should be spread evenly into their respective pans.
Step 6: Melt the Chocolate for the Final Layer
Melt your bittersweet chocolate over a double boiler or in short bursts until it is glossy and smooth. Fold this liquid chocolate and a sifted scoop of cocoa powder into the final portion of batter until the color is uniform and dark. This chocolate layer is the anchor of the Neapolitan Anniversary Cake and will be slightly denser than its counterparts. Pour this rich batter into the third prepared pan and level the top with the back of a spoon.
Step 7: Bake with Care and Patience
Slide all three pans into the center of the oven and bake until a wooden toothpick inserted into the center comes out clean. The chocolate layer often requires a few extra minutes compared to the fruit or vanilla layers, so watch them closely as the time nears thirty minutes. The edges will begin to pull away from the pans, and the tops will feel springy to a light touch. Let the cakes rest in their pans for a few minutes before turning them out onto wire racks to cool.
Step 8: Build the Frosting and Assemble
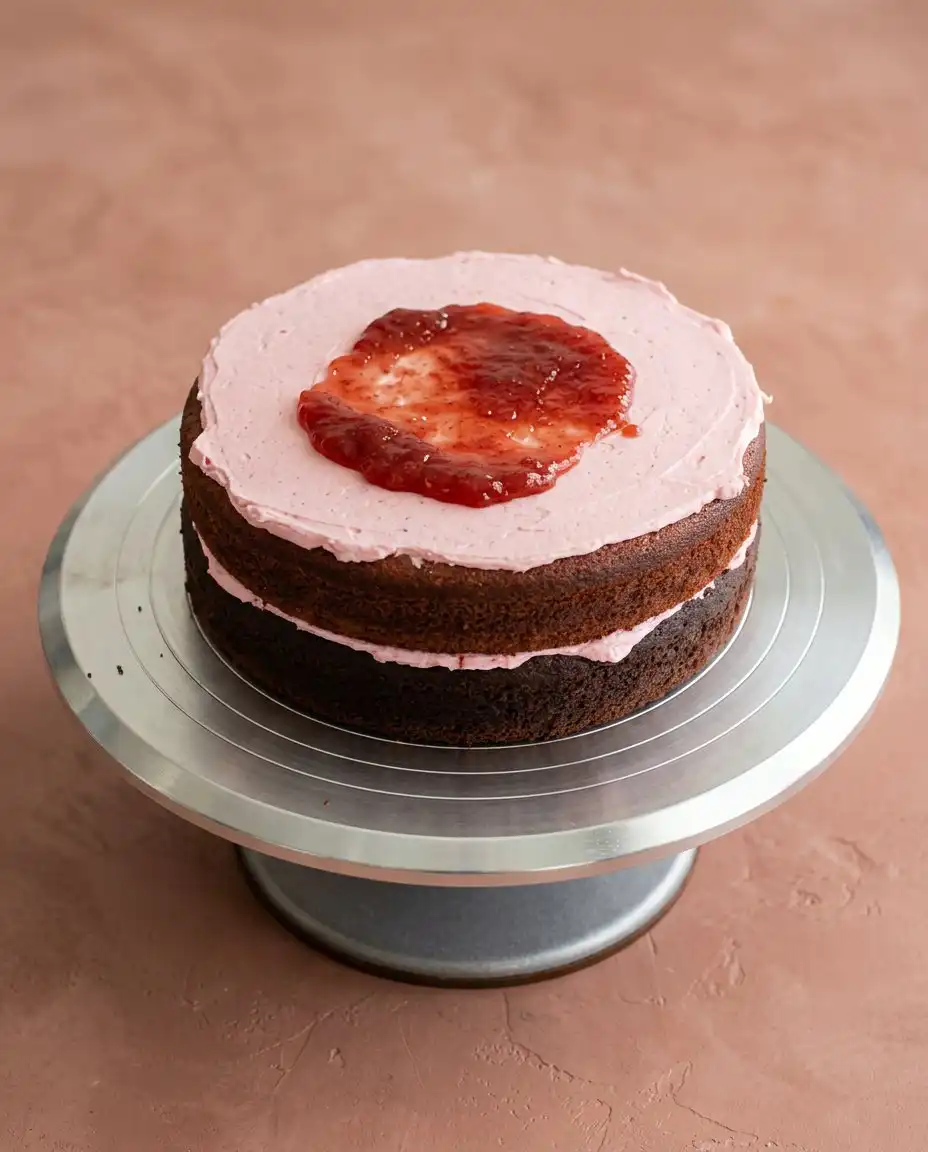
Whisk your butter until it is incredibly smooth before adding the powdered sugar and cocoa for the chocolate buttercream layer. Repeat this process for the vanilla and strawberry frostings, using the remaining fruit reduction to flavor the pink portion. Level the cooled cakes with a serrated knife to remove any domes, creating flat surfaces for stacking. Layer the chocolate, strawberry, and vanilla cakes with their matching frostings, then finish with a slow drip of chocolate ganache over the top edge.
Notes From the Kitchen
Room temperature ingredients are not a suggestion; they are a requirement for a cake this detailed. When your butter and eggs are at the same temperature as the kitchen air, they emulsify into a stable structure that can support the weight of the fruit puree. If you find your batter looks curdled, it is often because the eggs were too cold. To fix this, you can place the mixing bowl over a pot of warm water for a minute to take the chill off.
Measuring your flour by weight rather than volume will ensure your cake layers are never dry or crumbly. A kitchen scale provides the honesty that a measuring cup lacks, as flour can settle and pack down depending on the humidity. For more guidance on achieving a rich chocolate base, you can refer to our chocolate cake recipe which uses similar techniques.
If the frosting feels too soft to hold the layers in place, let it chill in the refrigerator for fifteen minutes before you continue stacking. A warm kitchen can cause the high butter content to melt, leading to a cake that leans or slides. You want the frosting to feel like soft clay—pliant but firm enough to hold its shape under pressure.
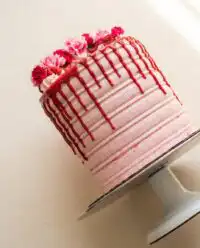
When applying the ganache, make sure it has cooled to a point where it is thick enough to drip slowly rather than run straight to the bottom. You can learn more about the science of a chocolate drip cake to master the perfect finish. A squeeze bottle offers the best control for those who want a specific, tidy look on the sides of their cake.
Always level your cakes after they have cooled completely to avoid tearing the delicate crumb. Using a long serrated knife and a steady hand will give you the flat surface needed for a professional appearance. If you rush this step while the cake is still warm, the steam trapped inside will make the layers gummy and difficult to handle.
Frequently Asked Questions
Can I Freeze Neapolitan Cake?
Yes, you can freeze the individual cake layers or the fully assembled cake with great success. Wrap the un-frosted layers tightly in plastic wrap and then foil to prevent freezer burn for up to three months. If freezing the whole cake, let it sit in the freezer for an hour to harden the frosting before wrapping it securely.
How should I store the leftovers?
Keep the cake in an airtight container or under a glass dome in the refrigerator to maintain its moisture. Because of the fresh fruit reduction and high butter content, it is best eaten within three to four days. Always allow the cake to sit at room temperature for an hour before serving so the frosting softens.
What if my strawberry reduction is too thin?
If your puree has not reached a thick, jam-like consistency after fifteen minutes, continue simmering it on low heat. Excess moisture in the puree will change the chemistry of the batter and may cause the cake to sink in the center. Patience is your best friend when concentrating fruit flavors for a bake like this.
Can I use frozen strawberries instead of fresh?
Frozen strawberries work well for the reduction as long as you thaw them and drain any excess water first. They often have a high water content, so you may need to simmer them slightly longer than fresh berries to reach the correct volume. The flavor will be just as deep and vibrant as using berries from the vine.
Why did my chocolate layer bake slower than the others?
The inclusion of melted bittersweet chocolate and cocoa powder makes that specific batter denser and more moisture-heavy than the vanilla or strawberry. It is common for this layer to need an additional five minutes in the oven to set properly. Always check each pan individually with a toothpick before removing them from the heat.
Can I make the frosting in advance?
You can prepare all three types of buttercream a day or two before you plan to assemble the cake. Store them in the refrigerator in sealed containers and bring them to room temperature before whipping them again to restore their fluffiness. This makes the assembly day much more manageable and less hurried.
Seasonal Variations
You can easily adapt the fruit layer to reflect what is currently ripening in your garden or available at the market. Substituting the strawberries for a blackberry or raspberry reduction offers a deeper color and a more tart flavor profile. If you choose blackberries, be sure to strain out the seeds after pureeing to keep the texture of your Neapolitan Anniversary Cake as smooth as possible. Our chocolate strawberry cake 2 is another excellent way to see how fruit and cocoa interact.
For an autumn version of this bake, you might consider replacing the strawberry layer with a concentrated spiced apple butter. The warm notes of cinnamon and nutmeg pair surprisingly well with the chocolate and vanilla, creating a cozy alternative for cooler months. You can also experiment with using a dark rye flour for the chocolate layer to add a nutty, earthy depth that compliments the bittersweet cocoa. The season should always lead your choices at the counter.
Serving It Simply
This Neapolitan Anniversary Cake is a celebration in itself and requires very little ornamentation when it reaches the table. Place the cake on a plain white ceramic stand or a weathered wooden board to let the colors of the layers be the focus. A simple garnish of fresh, whole strawberries around the base adds a touch of the garden without feeling overdone. For a smaller gathering, you might enjoy serving our strawberry vanilla cake which offers a similar charm.
When it comes time to slice the cake, use a long knife dipped in hot water and wiped dry between each cut. This technique ensures that the layers of chocolate, strawberry, and vanilla remain distinct and do not smudge into one another. A cold cake is much easier to slice cleanly, though the flavor is always most honest when enjoyed at room temperature. Serve each piece with a small fork and perhaps a cup of black tea to balance the sweetness.
A Last Note
Baking for a milestone is an act of quiet love that stays with people long after the last crumb is gone. This Neapolitan Anniversary Cake is more than a dessert; it is a project that rewards your focus and your respect for the season’s bounty. Whether you are marking a first year or a fiftieth, the effort you put into reducing the berries and melting the chocolate is visible in every slice. I hope this cake finds a place of honor at your next gathering and brings a sense of farmhouse warmth to your kitchen.
If you find yourself with extra vanilla batter, you can always use it to practice our classic vanilla cake for future celebrations. Please share your baking journey with us and let us see how your rustic layers turned out. You can find more inspiration and connect with our community on Pinterest, Facebook, or Telegram. Save a slice for tomorrow morning—it goes wonderfully with a quiet kitchen and the rising sun.