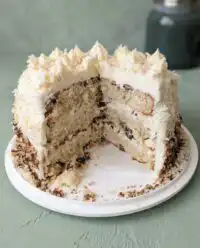
There is a quiet beauty in a chocolate mirror glaze cake that carries the marks of the hand that baked it, reflecting the late autumn window.

As the crisp winds of November sweep across the empty orchard, the kitchen becomes a sanctuary of warmth and slow, deliberate work. This chocolate mirror glaze cake is born from that quiet farmhouse rhythm, combining simple, honest ingredients into a dessert that looks like dark water under a winter sky. While the reflective surface feels elegant, the soul of this cake remains deeply rustic, relying on the rich depth of real cocoa and slow cooling rather than fussy decorations. It is a slow afternoon project that rewards patience with a deeply comforting, chocolate-rich slice that speaks of quiet winter gatherings.
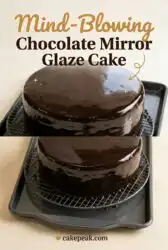
The Beauty of This Chocolate Mirror Glaze Cake
This quiet chocolate bake will bring everyone to the table.
Prep: 60 min · Serves: 12 · Difficulty: Medium
- A rich dessert made with real pantry cocoa.
- The glaze reflects the quiet kitchen light beautifully.
- No fancy tools or complicated equipment needed here.
- A slow bake that honors honest farmhouse ingredients.
- Sweeter memories than a standard chocolate fudge cake.
Get The Full Cake Recipe
Print
Chocolate Mirror Glaze Cake
- Total Time: 2 hours 45 mins
- Yield: 12 servings
- Diet: Vegetarian
Description
This elegant chocolate mirror glaze cake features a rustic sponge foundation enrobed in a professional-grade, reflective cocoa glaze. It is the perfect slow-baking project for those seeking a deeply comforting, high-impact dessert.
Ingredients
- Dutch-processed cocoa powder
- Pure whipping cream
- Gelatine powder
- Caster sugar
- Cold tap water
- Dark chocolate ganache (prepared base)
- Farm-fresh eggs
- Cultured butter
Instructions
- Prepare cake layers. Bake and cool your favorite chocolate sponge, then refrigerate for one hour before leveling with a serrated knife.
- Frost with ganache. Whip dark chocolate ganache until spreadable, coat the cake thoroughly, and use a bench scraper for a perfectly smooth surface.
- Chill the foundation. Refrigerate the frosted cake for at least one hour to ensure the ganache is firm enough to handle the warm glaze.
- Bloom the gelatine. Sprinkle gelatine over cold water in a small bowl and let it sit undisturbed for five minutes until rubbery.
- Whisk cocoa paste. Sift cocoa powder into a saucepan and stir in water until a smooth, uniform paste forms.
- Incorporate remaining ingredients. Gently stir in the cream and sugar, avoiding vigorous whisking to prevent the introduction of air bubbles.
- Boil the glaze. Heat the mixture over medium-high heat until it reaches a boil, then remove from the heat immediately to avoid burning.
- Dissolve the gelatine. Stir the bloomed gelatine into the hot cocoa mixture until completely melted and glossy.
- Strain and cool. Pour the glaze through a fine mesh strainer, cover with plastic film, and cool until it reaches 30°C (86°F).
- Pour the coating. Place the chilled cake on a wire rack and pour the glaze in a continuous spiral motion, allowing it to set before trimming the edges.
Notes
- Ensure the ganache base is perfectly smooth as any surface imperfections will be magnified by the reflective glaze.
- Use a thermometer to check that your glaze has cooled to exactly 30 degrees Celsius for the ideal pouring consistency.
- Strain the glaze twice if necessary to remove any stubborn air bubbles that could mar the glass-like finish.
- Always use a narrow-spouted jug to pour the glaze to maintain better control over the flow and coverage.
- Prep Time: 60 mins
- Cook Time: 45 mins
- Category: Dessert
- Method: Baking and Pouring
- Cuisine: Modern Farmhouse
Honest Ingredients

To make a chocolate mirror glaze cake, we gather simple ingredients from the pantry and let their natural quality speak for itself. This recipe relies on basic, wholesome elements that come together with slow care, creating a deep flavor without commercial additives or fussy shelf-stable syrups.
- Dutch-Processed Cocoa Powder: This deep, dark powder provides the backbone of the reflective glaze and the cake itself. It is treated to reduce acidity, yielding a mellow yet profoundly chocolatey character and a midnight-black color that mimics still water.
- Pure Whipping Cream: Drawn from local dairies, this liquid adds fat and body to our glaze, helping it drape smoothly over the cake sides without tearing. Regular cream works beautifully here, providing a soft mouthfeel that commercial thickeners cannot replicate.
- Gelatine Powder: This simple setting agent is what gives the mirror glaze its reflective clarity. By letting it bloom slowly in cold tap water, we create a stable base that holds the glaze together as it cools over the chocolate ganache.
- Caster Sugar: The small grains of superfine sugar melt quickly in the warm cocoa mixture, leaving no gritty residue behind. Using fine sugar makes sure the texture remains liquid and smooth before the gelatine is dissolved.
- Dark Chocolate Ganache: Made with rich dark chocolate and heavy cream, this acts as the base coat for the glaze. It fills in the natural cracks of our farmhouse sponge, creating a flat surface that allows the glaze to flow evenly.
- Farm-Fresh Eggs: Deep orange yolks from the backyard coop provide structure and moisture to the chocolate sponge. They whip into a thick, pale ribbon that lifts the batter naturally in the oven.
- Cultured Butter: Softened on the kitchen counter, this butter gives our crumb a tender, delicate texture. Its rich fat content carries the cocoa flavor across your tongue with every bite.
| Ingredient | Why It Matters |
|---|---|
| Dutch-Processed Cocoa | Delivers an intense chocolate color and flavor. |
| Pure Whipping Cream | Creates a smooth, pourable texture for the glaze. |
| Gelatine Powder | Provides the reflective hold and structure. |
| Caster Sugar | Dissolves quickly to prevent a gritty texture. |
| Dark Chocolate Ganache | Seals the cake and provides a flat foundation. |
A Slow, Steady Bake

Step 1: Prepare the Chocolate Cake Layers
Start by baking your rustic chocolate sponge according to your favorite recipe. Once the layers are baked and cooled on a linen tea towel, wrap them tightly and refrigerate for at least one hour. Cold cakes are much sturdier and easier to handle when we trim them. Use a sharp serrated knife to gently shave the tops until they are completely level.
Step 2: Smooth and Frost with Chocolate Ganache
Whip your dark chocolate ganache until it is spreadable but still firm. Place your first cake layer on a wooden cutting board and spread a generous layer of ganache over it, then place the second layer on top. Coat the top and sides of the entire cake with the remaining ganache, using a bench scraper to make the surface as smooth and level as possible. Any small bump or dent in the frosting will show through the glossy glaze later, so take your time with this step.
Step 3: Chill the Frosted Cake Foundation
Slide the frosted cake into the refrigerator for at least one hour, or even overnight. This chilling process makes sure the ganache is firm and cold when the warm glaze is poured over it. If the ganache is soft, the warm glaze will melt it, blending the two layers and ruining the glossy finish. While the cake chills, clear your counter space and set up your wire cooling rack over a clean baking tray.
Step 4: Bloom the Gelatine Powder
Measure your cold tap water into a small enamel bowl. Sprinkle the gelatine powder evenly across the surface of the water, making sure no dry pockets remain. Let it sit undisturbed for five minutes until it absorbs the liquid and becomes a firm, rubbery disk. This process is called blooming, and it makes sure the gelatine dissolves evenly into the warm cocoa later.
Step 5: Whisk the Cocoa and Water Paste
Sift your dutch-processed cocoa powder into a medium saucepan to remove any stubborn lumps. Pour in the water and stir with a wooden spoon until a thick, uniform paste forms. Mixing the cocoa and water first prevents dry pockets of cocoa from hiding in the finished glaze. Make sure the paste is smooth before moving on to the next ingredient.
Step 6: Gently Incorporate the Cream and Sugar
Pour a small splash of the pure whipping cream into your cocoa paste and stir to loosen the mixture. Add the remaining cream and caster sugar, stirring slowly and gently with a spatula. Do not use a whisk and do not stir vigorously, as this introduces unwanted air bubbles into the glaze. We want to keep the mixture as still as possible while combining the ingredients.
Step 7: Bring the Glaze to a Brief Boil
Place the saucepan over medium-high heat on your stove. Stand by the stove and watch it closely, stirring slowly to prevent the sugar from burning at the bottom. The moment the dark liquid begins to bubble and boil, slide the pan off the heat immediately. Overheating the glaze can burn the cocoa and ruin the delicate fat structure of the cream.
Step 8: Dissolve the Bloomed Gelatine
Drop the rubbery disk of bloomed gelatine into the hot cocoa mixture. Stir slowly and gently with your spatula until the gelatine completely melts and disappears into the dark liquid. As you stir, the glaze will begin to take on a glossy, reflective quality. Do not worry if a little pale foam appears on the surface, as we will strain this out.
Step 9: Strain the Glaze to Remove Bubbles
Set a fine mesh strainer over a shallow bowl, holding the strainer as close to the bottom of the bowl as possible. Slowly pour the hot glaze through the strainer, minimizing the distance the liquid falls to prevent air bubbles from forming. Once strained, wrap the bowl with plastic wrap, pressing the film directly onto the surface of the glaze to prevent a skin from forming. Let the glaze cool on your counter for about two hours until it reaches 30°C or 86°F.
Step 10: Pour the Chocolate Mirror Glaze Cake Coating
Remove your chilled cake from the refrigerator and place it on a wire rack set inside a clean tray. Give your glaze a final strain into a clean jug to remove any remaining lumps. Starting in the center of the cake, pour the glaze in a continuous, confident stream, moving outward in a slow spiral. Let the glaze drape down the sides of the cake like a dark satin curtain, covering every patch. Allow it to set for ten minutes before using a warm palette knife to trim any drips from the bottom edge.
What I’ve Learned at the Counter

The temperature of your kitchen plays a significant role in how your glaze behaves. If your workspace is too warm, the glaze will take much longer to cool down to the pouring temperature of 30°C. Keep an eye on the ambient temperature, and if needed, move your glaze to a cooler room to help it reach the correct state without solidifying too quickly.
Before attempting this decoration on a chocolate mirror glaze cake, it helps to practice your foundational baking skills. I highly recommend spending some time mastering a simple chocolate cake recipe to understand how different cocoa powders behave in the oven. A sturdy, reliable sponge makes the glazing process much easier, as it won’t crumble or sag under the weight of the dark chocolate ganache.
If your glaze contains stubborn air bubbles that refuse to pop, do not panic. This common issue happens when the glaze is stirred too vigorously or poured from too high a distance. To fix this, you can gently pass a kitchen blowtorch over the surface of the glaze after pouring, which will pop the bubbles instantly, or tap the bowl against the counter before pouring.
The choice of your pouring vessel is just as important as the recipe itself. Always use a glass or ceramic jug with a sharp, clean spout rather than a wide-lipped bowl. A narrow spout allows you to control the flow of the glaze, preventing sudden rushes of liquid that can wash away your smooth ganache base.
For those interested in the deeper chemistry of confectionery coatings, you can read this detailed guide on glaze science to understand how gelatin interacts with dairy. Understanding the balance of proteins and fats can help you troubleshoot why a glaze might set too quickly or remain too runny on a humid day.
When transferring your finished cake from the wire rack to the serving platter, confidence is key. Slide two long, thin offset spatulas under the cake, lift it slowly, and place it gently onto your clean white plate. Use a small butter knife to slide the spatulas out from underneath, taking care not to disturb the clean glaze line at the base.
Frequently Asked Questions
What is a chocolate mirror glaze cake made of?
A classic chocolate mirror glaze cake is made from a blend of water, cocoa powder, sugar, cream, and gelatine. Unlike modern commercial versions, this traditional farmhouse recipe does not use condensed milk or corn syrup. This keeps the flavor intensely chocolatey and helps maintain a natural, glassy shine that lasts for several days on the counter.
Does a chocolate mirror glaze cake have to set in the freezer?
No, you do not need to freeze your cake for the glaze to set properly. As long as your chocolate ganache base is well-chilled from the refrigerator, the glaze will begin to set the moment it hits the cold surface. Letting the cake sit in the refrigerator after glazing will help it firm up completely.
How long does it take for a chocolate mirror glaze cake to set?
The glaze will begin to firm up within ten minutes of pouring, but it takes about two hours in the refrigerator to set completely. During this time, avoid touching the surface of the cake, as even a gentle fingerprint will leave a permanent mark on the reflective finish. Once set, the glaze remains soft and easy to slice.
Why is my chocolate mirror glaze cake not shiny?
A dull glaze is usually caused by pouring it at the wrong temperature or using regular granulated sugar that did not fully melt. If the glaze is too cold when poured, it will set too thickly and lose its glassy sheen. Make sure to use caster sugar and use a thermometer to verify the glaze is exactly 30°C before pouring.
What is the ideal temperature for pouring mirror glaze?
The ideal temperature for pouring this chocolate glaze is 30°C or 86°F. At this temperature, the glaze is fluid enough to run smoothly over the cake but thick enough to cling to the sides. If the glaze is too warm, it will slide right off the cake and melt your smooth ganache foundation.
Why is my glaze sliding off the cake?
If your glaze is sliding off the sides and leaving naked patches, it was likely poured when it was too warm. If the glaze is much hotter than 30°C, the gelatine has not yet begun to thicken, causing the liquid to run off too quickly. Allow your glaze to cool slightly longer on the counter and check the temperature again.
How do you store a chocolate mirror glaze cake?
You can store the glazed cake on your kitchen counter for up to four days, provided your room is cool and below 22°C. If your kitchen is warm, store the cake in the refrigerator without a cover, as the glaze seals the cake and keeps the sponge moist. Avoid wrapping it in plastic, which will ruin the shiny surface.
Ways to Adapt It
For a beautiful autumnal twist, you can infuse your cream with orange zest before making the glaze. Warm the cream gently with the grated peel of a sweet orange, let it steep for twenty minutes, then strain out the solids before proceeding with the cocoa powder. This subtle citrus note pairs beautifully with the deep, dark cocoa and brings a rustic kitchen garden feel to your dessert table, reminiscent of a classic double chocolate layer cake.
If you prefer a warm, spiced character, try adding a pinch of ground cinnamon and a tiny dash of cayenne pepper to the cocoa paste. This creates a Mexican-style chocolate profile that warms the throat on a chilly November evening. The gentle heat of the spices cuts through the rich fat of the whipping cream, making each slice feel deeply comforting and unique.
Adding finely chopped roasted hazelnuts or walnuts around the base creates an elegant, forest-inspired finish. Pressing the nuts gently into the bottom edge of the cake hides any minor glaze imperfections while adding a delightful rustic crunch. This simple touch grounds the glossy finish, connecting it back to the earthy colors of the farmhouse garden.
Serving It Simply
When it comes to presenting this beautiful cake, let the reflective surface be the main event. Serve slices on plain white ceramic plates to contrast with the deep, dark cocoa color. If you are hosting a quiet gathering in late autumn, pair each slice with a hot cup of black tea or dark roast coffee to balance the rich sweetness of the chocolate glaze.
To get clean, professional slices, fill a tall jug with warm tap water and keep a clean linen cloth nearby. Dip your sharp knife into the warm water, wipe it completely dry, and make a single decisive cut into the cake. Clean the blade and repeat this process for every single slice, making sure your guests can see the beautiful contrasting layers of sponge and ganache, much like a classic chocolate mousse cake.
For a truly rustic touch, you can serve the cake alongside a bowl of freshly whipped unsweetened cream or a handful of tart blackberries. The sharpness of autumn berries cuts through the intense richness of the glaze, providing a delightful balance on the plate. Keep the decorations minimal, allowing the honest flavors of cocoa and cream to shine through.

The Quiet Goodbye
There is a deep sense of satisfaction that comes from spending an afternoon at the kitchen counter, slowly working through a recipe that demands your full attention. This chocolate mirror glaze cake is more than just a dessert; it is an invitation to slow down and appreciate the craft of farmhouse baking. The cracked edges of the sponge and the tiny imperfections of the hand-poured glaze are what make it real and beautiful.
As you share this cake with your loved ones, remember that the best bakes are those shared around a crowded table with laughter and warm drinks. If you enjoyed this slow baking journey, you might also enjoy making a classic chocolate ganache cake for your next gathering. It offers a similarly rich chocolate experience with a slightly simpler, more rustic finish.
Please share your baking creations with me, as I love seeing how these recipes come to life in your own farmhouse kitchens. You can find more seasonal baking inspiration and connect with our community on Pinterest or join the conversation on Facebook. Let us keep the art of honest, slow-paced baking alive together.


