In the Cake Peak test kitchen, we view baking as a series of solvable equations, and this recipe is a perfect example of geometric problem-solving. We tested the “square plus round” method extensively to verify that you don’t need a specialty pan to achieve a symmetrical heart shape. By bisecting a round cake and adhering the halves to a square base, we create a flawless canvas for decoration without compromising the crumb structure.

The cake base itself is a sturdy yet tender yellow cake, engineered with a precise blend of all-purpose flour and cornstarch to mimic the protein content of cake flour. This results in a tight, velvet crumb that stands up to the cutting and assembly process without crumbling. It is a reliable, data-backed method for creating a centerpiece dessert using standard equipment.
The Science of Success
This recipe triumphs because it relies on standard 8-inch pans, which provide superior heat distribution compared to novelty shaped pans that often suffer from dry edges and underbaked centers. By using pans you likely already own, we control the variables of heat conduction more effectively.
The inclusion of almond extract alongside vanilla creates a complex flavor profile that cuts through the sweetness of the American buttercream. Furthermore, our testing confirms that the cornstarch substitution interferes with gluten formation just enough to produce a tender bite while maintaining the structural integrity needed for the architectural assembly of the heart shape.
Print
Heart Cake
- Total Time: 1 hour 20 mins
- Yield: 12 servings
- Diet: Vegetarian
Description
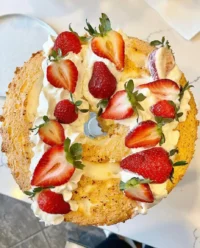
This meticulously engineered heart cake uses geometric principles to create a perfect romantic shape without the need for specialized pans. A tender yellow cake base meets a silky American buttercream for a dessert that is as structurally sound as it is delicious.
Ingredients
- Unsalted butter, softened
- Granulated sugar
- Vanilla extract
- Almond extract
- Large eggs, room temperature
- All-purpose flour
- Cornstarch
- Baking powder
- Salt
- Whole milk
- Powdered sugar
- Gel food coloring
Instructions
- Preheat the oven to 350°F (175°C) and grease one 8-inch square pan and one 8-inch round pan, lining the bottoms with parchment paper.
- In a large bowl, cream together the softened butter, sugar, vanilla, and almond extract on high speed for 3 to 5 minutes until pale and aerated.
- Add the eggs one at a time, beating thoroughly after each addition to maintain a stable emulsion.
- Whisk the flour, cornstarch, baking powder, and salt together in a separate bowl.
- With the mixer on low, add the flour mixture in three parts and the milk in two parts, alternating between them until just combined.
- Divide the batter evenly between the prepared pans and bake for 45 to 50 minutes until the internal temperature reaches 205°F-210°F.
- Cool the cakes in their pans for 10 minutes before transferring them to wire racks to cool completely.
- Prepare the buttercream by beating butter and vanilla, then gradually adding powdered sugar and milk until reaching a fluffy consistency; tint as desired.
- To assemble, rotate the square cake 45 degrees, cut the round cake in half, and attach the halves to the top left and top right sides of the square with frosting.
- Apply a thin crumb coat of frosting to the entire cake, chill for 20 minutes, then apply the final layer of decorative buttercream.
Notes
For the smoothest assembly, ensure the cake layers are completely cold before cutting; chilled cake is much firmer and less prone to tearing. If you prefer a less sweet frosting, you can add a pinch of salt to the buttercream to balance the powdered sugar.
- Prep Time: 30 mins
- Cook Time: 50 mins
- Category: Dessert
- Method: Baking
- Cuisine: American
Ingredient Science

- Unsalted Butter (Softened): We specify unsalted to control the sodium content precisely. Ideally, your butter should be at 65°F (18°C). At this temperature, the fat is plastic enough to trap air bubbles during creaming but firm enough to hold the structure.
- Cornstarch: This is the variable that modifies our protein percentage. By cutting the all-purpose flour with cornstarch, we reduce the gluten potential, resulting in a “short” texture similar to cake flour.
- Almond & Vanilla Extracts: We use a high ratio of almond extract (2 teaspoons) for a distinct, bakery-style flavor. If you prefer a neutral vanilla profile, you can adjust this ratio.
- Eggs (Room Temperature): Cold eggs can shock the butter emulsion, causing the batter to appear curdled. Room temperature eggs emulsify smoothly for a uniform crumb.
- Gel Food Coloring: We recommend gel paste over liquid drops to avoid adding excess water to the buttercream, which can destabilize the emulsion.
The Method
Step 1: Precise Temperature Prep
Preheat your oven to 350°F (175°C). We always recommend using an auxiliary oven thermometer to verify internal accuracy, as oven dials can drift by 25°F or more. Grease one 8-inch square pan and one 8-inch round pan. Line the bottoms with parchment paper, then grease and flour the paper. This mechanical barrier guarantees the cakes release without tearing.
Step 2: The Creaming Phase
In a large bowl, beat the softened butter, sugar, vanilla, and almond extract on high speed. We look for a specific visual cue: the mixture should be pale yellow and aerated, which takes about 3 to 5 minutes. Add the eggs one at a time, beating fully after each addition to maintain the emulsion.
Step 3: Dry and Wet Integration
Whisk the flour, cornstarch, baking powder, and salt in a separate bowl to distribute the leavening agents evenly. Reduce the mixer speed to low. Add the flour mixture in three parts and the milk in two parts, alternating between them (Dry-Wet-Dry-Wet-Dry). Stop mixing the moment the last streak of flour disappears. Overmixing at this stage develops excess gluten, leading to a tough cake.
Step 4: The Bake
Divide the batter evenly between the square and round pans. Bake for 45 to 50 minutes. We test for doneness when the internal temperature reaches 205°F-210°F or a toothpick inserted in the center comes out with only a few moist crumbs attached. Cool in pans for exactly 10 minutes before transferring to wire racks.
Step 5: Frosting Emulsification
While the cakes cool, prepare the buttercream. Beat the butter and vanilla until creamy. Gradually add the powdered sugar, about one cup at a time, followed by the milk. Beat on medium-high for 3-5 minutes to incorporate air for fluffiness. Divide and tint the frosting as directed for the ombré or marble effect.
Step 6: Geometric Assembly
Place the square cake on your board, rotated 45 degrees to look like a diamond. Cut the round cake in half down the center diameter to create two semi-circles. Apply a thin layer of buttercream to the top left and top right sides of the square. Press the flat side of each semi-circle against these frosted sides to form the heart. Frost the entire exterior, starting with a “crumb coat” to lock in loose crumbs, then chill for 20 minutes before applying the final layer.
Lauren’s Lab Notes

- The Crumb Coat is Critical: Because this cake involves cut edges (the bisected round cake), you will have exposed crumbs. Applying a thin, initial layer of frosting seals these in. If you skip this, your final finish will be gritty. Chill the cake until the crumb coat is firm to the touch before proceeding.
- Weighing Flour: If possible, weigh your flour (approx. 120g per cup). If using volume, use the “spoon and level” method. Dipping the cup directly into the bag compacts the flour, adding up to 20% more mass and drying out the cake.
- Troubleshooting Stability: If the round halves slide during assembly, use toothpicks to pin them to the square base while the crumb coat sets in the fridge. Just remember to remove them before serving.
- For more detailed techniques on batter preparation, refer to our guide on Foundational Recipes.
Precision Tweaks
- Chocolate Variation: To convert this to chocolate, replace ½ cup of the flour with ½ cup of Dutch-process cocoa powder. This acidity change may require checking your baking powder efficacy, but generally, the recipe holds up well.
- Berry Infusion: Fold 1 cup of fresh raspberries into the batter just before baking. Coat them in a teaspoon of flour first to prevent them from sinking to the bottom.
- Citrus Zest: Add 1 tablespoon of lemon or orange zest to the butter-sugar mixture during the creaming step. The oils in the zest bond with the butter fat for superior flavor distribution.
- If you are interested in experimenting with cocoa ratios, our Chocolate Alchemy section offers deep dives into cocoa science.
Presentation Notes

To serve this cake cleanly, use a long, sharp knife dipped in hot water and wiped dry between cuts. Because of the unique shape, standard wedges can be tricky. We recommend cutting a grid pattern or slicing rectangular slabs from the center out to maximize the number of servings.
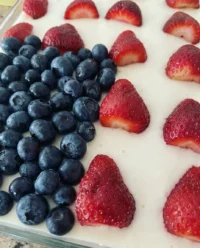
For a balanced flavor profile, serve this sweet butter cake with something tart. A raspberry coulis or fresh berries provide a necessary acid contrast to the rich American buttercream. You can find excellent pairing ideas in our Fresh Fruit Baking category.
The Final Analysis
Mastering the heart cake is a lesson in baking physics and geometry. By controlling temperature and understanding the structural role of ingredients like cornstarch, you can produce a bakery-quality result without specialized equipment. The versatility of this cut-and-assemble method opens up a world of creative possibilities beyond just heart shapes.
We saw a fantastic discussion on this technique recently on Reddit, where bakers shared their first attempts—proof that this method is accessible to all skill levels. If you are ready to tackle more complex structural designs, visit our Celebration Design Studio.
Did you try this geometric baking hack? We want to see your data points! Share your results with us on Pinterest, Instagram, or Facebook.
