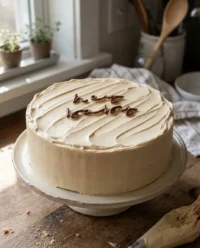
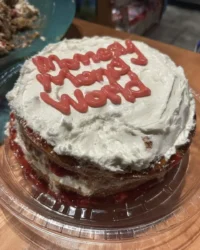
I still remember the collective gasp at my niece’s fifth birthday party when I brought out her cake. It wasn’t just a dessert; it was a magical centerpiece that transformed a simple gathering into a cherished memory. There is something deeply nostalgic and heartwarming about a classic doll cake—it captures that pure, childhood joy we all want to hold onto. Baking isn’t just about the ingredients; it’s about the love we pour into the pan and the smiles we harvest when the slicing begins.

This recipe takes the intimidation out of structured cakes by using a simple, clever method: a standard Pyrex bowl. We are going to achieve that iconic, full skirt shape without needing expensive specialty pans. The result is a moist, golden cake with a tender crumb that supports the doll perfectly, ready to be dressed in swirls of vanilla frosting. It is a fun project that proves you don’t need a professional bakery to create a showstopper.
A Centerpiece That Tastes as Good as It Looks
You are going to fall in love with this recipe because it bridges the gap between a fun craft project and a serious dessert. Unlike many novelty cakes that prioritize looks over taste, this one starts with a reliable, moist yellow cake base that delivers that classic, buttery flavor we crave.
- No Specialty Pans Needed: We use a standard oven-safe bowl to create the perfect dome shape.
- Customizable: You can adapt the colors and doll to match any party theme or favorite princess.
- Stable Structure: The density of this cake is perfect—light enough to enjoy, but sturdy enough to hold the doll upright without crumbling.

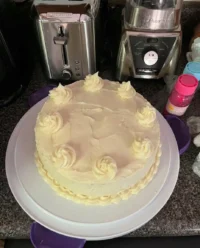
Barbie Cake
- Total Time: 4 hours 20 mins
- Yield: 12 servings
- Diet: Vegetarian
Description
Create a magical birthday centerpiece with this classic Barbie cake that uses a simple glass bowl to achieve its iconic skirt shape. This moist yellow cake is easy to assemble and provides a blank canvas for your favorite frosting colors and designs.
Ingredients
- 1 box (15.25 oz) yellow cake mix
- Ingredients required by cake mix (typically eggs, water, and oil)
- 2 tubs (16 oz each) vanilla frosting
- Shortening, for greasing the bowl
- All-purpose flour, for dusting the bowl
- Pink or red food coloring
- 1 standard fashion doll
Instructions
- Preheat your oven to 350°F (175°C) and thoroughly grease a 2-quart ovenproof Pyrex glass mixing bowl with shortening, then dust generously with flour.
- Prepare the yellow cake mix according to the package directions and pour the batter into the prepared bowl, leaving about an inch of space at the top.
- Bake for 50 to 60 minutes, testing the center with a long skewer until it comes out clean; tent with foil if the top browns too quickly.
- Allow the cake to cool in the bowl for 15 minutes before inverting it onto a cake plate and letting it cool completely for at least 3 hours.
- Wrap the lower half of the doll in plastic wrap, insert her into the center of the cake, and use tinted frosting to pipe a bodice and decorative skirt design.
Notes
For the smoothest frosting application, crumb coat the cake with a thin layer of icing and chill it for 20 minutes before performing the final decorative piping. If you find the doll is too tall for the cake, you can build up the height by placing the bowl cake on top of an additional 8-inch round cake layer.
- Prep Time: 20 mins
- Cook Time: 1 hour
- Category: Dessert
- Method: Baking
- Cuisine: American
The Foundation of Your Cake

To build this beauty, we are keeping things approachable but high-quality. The secret to a great cake mix hack is treating it with the same respect you would scratch ingredients—ensure your eggs and butter (if adding) are at room temperature for the best emulsion.
- Yellow Cake Mix: The reliable base. I prefer a mix that promises a moist crumb, as it needs to bake for a while in the deep bowl.
- Vanilla Frosting: You will need plenty of this—two tubs or a double batch of homemade buttercream. It acts as both the glue and the fashion statement.
- Shortening & Flour: Essential for preparing the bowl. Do not skimp here; we need that skirt to slide out perfectly smooth.
- Red Food Coloring: Just a drop creates a classic pink, but feel free to experiment with gel colors for vibrant gowns.
- The Doll: A standard fashion doll works best. Make sure she is clean and her hair is tied back!
How to Create the Magic
Step 1: Prep the Oven and Mold
Preheat your oven to 350°F (175°C). This is the most critical step: grease a 2-quart ovenproof Pyrex glass mixing bowl thoroughly with shortening. Get into every curve. Dust it generously with flour and tap out the excess. This ensures your “skirt” releases without a hitch.
Step 2: Mix and Pour
Prepare your yellow cake mix according to the package directions (or your favorite scratch recipe). Pour the batter directly into your prepared bowl. Leave a little room at the top for the rise—about an inch or so.
Step 3: The Long Bake
Bake for 50 to 60 minutes. Because the bowl is deep, heat takes longer to reach the center. Test it by inserting a long skewer or cake tester into the very middle; it must come out clean. If the top browns too fast, tent it loosely with foil.
Step 4: Cooling and Inverting
Let the cake cool in the bowl for at least 15 minutes. This allows the structure to set. Then, carefully invert it onto your cake plate so the widest part is at the bottom. Allow it to cool completely—at least 3 hours. Decorating a warm cake is a recipe for sliding frosting!
Step 5: Assembly and Fashion Design
Wrap the doll’s lower half in plastic wrap to keep her clean. Insert her gently into the center of the cake (you may need to carve a small hole if the cake didn’t rise around a core). Tint your frosting and use a piping bag to create the bodice directly on the doll and swirls or rosettes for the skirt.
Jesse’s Secrets for Success

Creating a structural cake like this requires a little extra care to ensure the “crumb” remains tender but the shape holds strong.
- The Heating Core Hack: Since the bowl is deep, the center can sometimes stay raw while the edges burn. If you have a metal flower nail, place it flat-side down in the bottom of the bowl before pouring batter to conduct heat to the center.
- Freezing is Your Friend: Before you start piping the dress, pop the baked skirt in the freezer for 20 minutes. A chilled surface reduces crumbs in your icing and makes piping much easier.
- Plan Your Design: If you are new to piping, sketch it out first or check our celebration design studio guides for easy pattern ideas. Simple rosettes often look more elegant than complex lacework.
- Room Temp Ingredients: Even with a box mix, using room temperature water/milk and eggs ensures a smoother batter and a more even rise.
Make It Your Own
While the classic pink dress is timeless, this method is a blank canvas for your creativity.
- Flavor Twist: Swap the yellow cake for strawberry or funfetti for a surprise inside when you slice it. Just ensure the mix is dense enough to hold the shape.
- The Princess Tiana: Use green and yellow frosting with edible glitter to create a lily-pad inspired gown.
- Snow Queen: Use blue and white frosting with snowflake sprinkles. If you want a different shape entirely for a party, you might look at our heart cake for another lovable option.
- Measurement Note: If using a smaller bowl, adjust baking time down. Always trust the skewer test over the timer.
At the Table

When it’s time to serve, this cake demands a moment of admiration. I like to place it on a pedestal stand to give the “skirt” maximum height and drama. Since this is a sweet, frosting-heavy dessert, serve small slices alongside something refreshing.
- Pairings: A cold glass of milk or freshly brewed Southern sweet tea balances the sugar perfectly.
- For the Adults: If this is a mixed gathering, you might offer a slice of our vintage cake alongside it for those who prefer a less frosting-forward option.
- Slicing: Remove the doll before cutting! Slice the skirt like a standard round cake.
The Final Slice
There is no greater feeling than seeing the joy a homemade cake brings to a child’s face. This Barbie cake is more than just sugar and flour; it’s a labor of love that becomes the highlight of the celebration. Whether you stick to the classic pink or invent your own design, the most important ingredient is the fun you have making it.
If you need more inspiration for character bakes, you might want to try our fun car cake next time. And for another perspective on this classic technique, my friend Matt has a lovely version of a Barbie Cake worth checking out. Happy baking, y’all!
Follow us for more Southern baking inspiration: Pinterest | Instagram | Facebook
