We encountered a common chromatic problem in the test kitchen: mixing blue food coloring with yellow butter almost always results in a teal or green frosting, not the pastel robin’s egg blue we wanted. To solve this, we tested various aeration times and found that beating the butter for exactly three minutes on high speed whitens it significantly by incorporating air bubbles, creating a neutral canvas. This Easter cake relies on that precise technique to achieve its signature look.

Beneath the speckled buttercream lies a tender, three-layer vanilla cake designed for structural integrity without sacrificing moisture. The decoration—a simple cocoa flicking technique and a toasted coconut nest—creates a stunning visual effect that looks professionally finished but is achievable with standard kitchen tools. It is a study in texture, color theory, and flavor balance.
The Science of Success
This recipe works because it prioritizes temperature control and mechanical aeration. By softening the butter to exactly 18°C (64°F), we ensure it can hold the maximum amount of air during the creaming process, which is essential for both the whiteness of the frosting and its silky mouthfeel.
The speckling technique uses a mixture of cocoa powder and hot water to adjust viscosity. We found that a ratio of 1:3 (cocoa to water) creates droplets that are fluid enough to flick off a brush but dense enough to hold their shape on the buttercream surface. This creates a realistic “eggshell” appearance that turns a standard cake into a festive centerpiece.
Print
Easter Cake
- Total Time: 50 mins
- Yield: 12 servings
- Diet: Vegetarian
Description
Create a stunning centerpiece with this professionally finished robin’s egg cake featuring a unique speckled buttercream technique. By precisely aerating the butter for three minutes and using a cocoa-flicked finish, you can achieve a realistic eggshell look complemented by a toasted coconut nest.
Ingredients
- 3 pre-baked 8-inch (20cm) vanilla cake layers
- 340g (3 sticks) unsalted butter, softened to 18°C/64°F
- 750g (6 cups) soft icing sugar, sifted
- 1–2 drops blue gel food coloring
- 1 tablespoon cocoa powder
- 3 tablespoons boiling water
- 2 cups coconut flakes
- 200g small pastel candy eggs
- 1 teaspoon vanilla extract
- 1/2 teaspoon salt
Instructions
- Preheat oven to 160°C/325°F (140°C fan) and spread coconut flakes on a tray to toast for 6–10 minutes until golden, then cool completely.
- Place softened butter in a stand mixer with a paddle attachment and beat on high speed for exactly 3 minutes until the color shifts from yellow to pale white.
- Gradually add sifted icing sugar in three batches on low speed, then add vanilla and salt and beat on high speed for 2 additional minutes.
- Mix 1 drop of blue gel into a tablespoon of frosting, then slowly incorporate teaspoons of this concentrated blue mixture back into the main bowl until a pastel robin’s egg shade is reached.
- Level and frost the cake layers, smoothing the exterior with a bench scraper before flicking a mixture of cocoa and boiling water onto the surface using a clean toothbrush.
- Press toasted coconut around the bottom edge and top of the cake to form a nest, then fill the center with pastel candy eggs.
Notes
To ensure the most realistic speckle effect, practice your flicking technique over a sink or a piece of parchment paper before approaching the cake to control the droplet size and velocity. It is also essential to use gel-based food coloring rather than liquid drops to maintain the thick, stable consistency of the aerated buttercream.
- Prep Time: 40 mins
- Cook Time: 10 mins
- Category: Dessert
- Method: Baking
- Cuisine: American
Ingredient Science

The Vanilla Cake Layers
We use a standard 3-layer vanilla base (20cm/8″). The structure needs to be sturdy enough to support the frosting but tender enough to eat pleasantly. Ensure your layers are completely cool before assembly to prevent the butter in the frosting from melting and sliding.
Unsalted Butter
Precision is critical here. You need 340g (3 sticks), softened to 18°C/64°F. If the butter is too warm, it won’t aerate properly, remaining yellow and dense. If it’s too cold, it won’t emulsify with the sugar. We use unsalted butter to control the sodium level, adding salt separately to taste.
Soft Icing Sugar
Sift 750g (6 cups) of powdered sugar. Sifting is non-negotiable; it removes lumps that can clog piping tips or ruin the smooth finish of the buttercream. The sugar also acts as a stabilizer for the butter emulsion.
Blue Gel Coloring
We use concentrated gel rather than liquid drops. Liquid coloring adds water, which can break the buttercream emulsion. You only need 1–2 drops to achieve the pastel tone if you have properly whitened your butter first.
Cocoa Speckle Mixture
1 tablespoon of cocoa powder mixed with 3 tablespoons of boiling water. The heat helps bloom the cocoa, intensifying the dark color, and creates the correct consistency for the splatter effect.
Decoration
2 cups of coconut flakes (toasted) and 200g of small pastel eggs. Toasting the coconut adds a nutty complexity and a crispy texture that contrasts with the soft buttercream.
The Method
Step 1: Prep and Toast
Preheat your oven to 160°C/325°F (140°C fan). Spread the coconut flakes evenly on a baking tray. Toast for 6–10 minutes, stirring every 2 minutes to ensure even browning. Watch this closely—coconut contains oils that can go from golden to burnt in seconds. Let it cool completely.
Step 2: Aerate the Butter
Place the softened butter in a stand mixer fitted with the paddle attachment. Beat on Speed 8 for exactly 3 minutes. Stop and scrape down the bowl. You are looking for a visual shift from yellow to pale white. This aeration creates the neutral base required for a true blue color.
Step 3: Emulsify the Frosting
Add the sifted icing sugar in three batches. Start on Speed 1 to incorporate, then increase speed. Once all sugar is added, add the vanilla and salt. Beat on Speed 8 for another 2 minutes. The mixture should be fluffy and almost white.
Step 4: Color Correction
Do not add the dye directly to the main bowl. Remove 1 tablespoon of frosting into a small bowl and mix in 1 drop of blue gel. Return 1 teaspoon of this concentrated blue mixture to the main bowl and beat. Repeat until you reach the desired pastel shade. This “tempering” method prevents over-coloring.
Step 5: Frosting and Speckling
Level your chilled cake layers. Spread 3/4 cup of frosting between each layer. Coat the top and sides with the remaining frosting, smoothing it with a bench scraper. For the speckles, mix the cocoa and boiling water. Dip a clean toothbrush into the mixture. Holding the brush near the cake, run your thumb across the bristles to flick droplets onto the surface. Tip: Practice in the sink first to gauge the velocity and distance.
Step 6: Assembly
Press the toasted coconut around the base of the cake to cover the bottom seam. Pile the remaining coconut on top to form a nest. Fill the nest with the pastel eggs.
Lauren’s Lab Notes

Temperature Control is Vital
If your kitchen is warm, the buttercream may become too soft to hold sharp edges. If the butter temperature exceeds 75°F, the fat structure collapses. If this happens, refrigerate the bowl for 10 minutes, then re-whip. Conversely, if your buttercream looks curdled, the butter was likely too cold—wrap a warm towel around the bowl while mixing.
The Toothbrush Angle
When speckling the top of the cake, angle the toothbrush 45 degrees downward, not directly over the cake. This prevents large drips from falling off the handle onto your smooth frosting. We want a fine mist, not a spill.
Flavor Pairing
While this recipe uses a vanilla base, the frosting pairs exceptionally well with citrus. If you are looking for a zestier option, you might enjoy the profile of our lemon rainbow cake, which balances tartness with sweet buttercream.
Tested Variations
Cupcake Format
This recipe yields enough batter for approximately 24 standard cupcakes. Bake at 350°F for 18–22 minutes. The frosting quantity will be sufficient to pipe high swirls on 24 cupcakes. The speckling technique works just as well on individual cakes.
Alternative Nut-Free Nest
If you cannot use coconut due to allergies, we tested using shaved white chocolate. While it lacks the toasted flavor profile, it provides a similar visual texture. Use a vegetable peeler on a block of room-temperature white chocolate to create curls.
Berry Infusion
For a fruitier cake, you can fold 1 cup of fresh blueberries into the batter (toss them in flour first to prevent sinking). This adds moisture and a burst of tartness, similar to the balance found in our blueberry coffee cake.
Presentation Notes

Serving Temperature
Buttercream cakes should always be served at room temperature. Cold butter is hard and waxy, masking the flavor. Remove the cake from the refrigerator at least 2–3 hours before serving to allow the frosting to soften and the cake crumb to relax.
Slicing Strategy
For clean cuts through the layers, use a long, sharp knife dipped in hot water and wiped dry between each slice. This melts the butter in the frosting slightly as it passes through, preventing drag marks.
Pairing
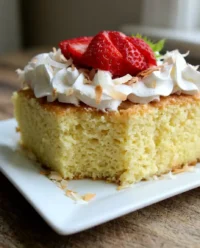
This cake is rich and sweet. Serve it with black coffee or an unsweetened herbal tea to cut through the sugar. If you are planning a large dessert spread, consider offering lighter options alongside it, such as our strawberry tres leches cake.
Mastery Through Science
This Easter cake demonstrates how a few scientific adjustments—aerating butter for whiteness and controlling viscosity for decoration—can yield professional results in a home kitchen. The speckling technique is a fun experiment in fluid dynamics that produces a sophisticated finish without requiring advanced piping skills.
We encourage you to test this method and document your results. For more creative baking projects and design ideas, visit our celebration design studio.
If you mastered this technique, share your success with us! Tag us on Instagram or pin your creation to Pinterest. This recipe was inspired by the techniques found at RecipeTin Eats.

