There is a special kind of magic in the farmhouse kitchen when a birthday rolls around. While I usually stick to rustic galettes and bubbling fruit crisps, sometimes love calls for a bit of structural engineering and a fun car theme cake. This recipe takes the honest, grounded flavors of a classic chocolate sheet cake and transforms them into a sculptural masterpiece that will light up any little one’s eyes.

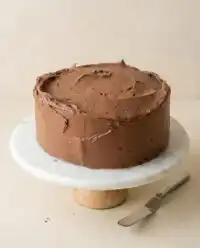
Beneath the playful fondant exterior lies a serious dessert: a moist, rich chocolate cake layered with silky bittersweet ganache. It creates a sturdy base that stands up to carving while remaining tender and delicious. It is a labor of love that proves you don’t need a commercial bakery to create something spectacular right at home.
Why This Recipe is a Keeper
Handmade with Heart
Unlike store-bought cakes that often taste of preservatives, this cake is built on a foundation of real butter, fresh eggs, and high-quality cocoa. The effort you put into the carving and decorating shines through in every bite.
A Sturdy, Delicious Base
Sculpted cakes can sometimes be dry, but this chocolate sheet cake recipe is specifically designed to stay moist. The dense crumb holds its shape perfectly for carving without crumbling away, ensuring your car looks as good as it tastes.
Creative Freedom
Whether you are modeling a vintage truck or a speedy racer, this method gives you the tools to create any vehicle you can dream up. It is a wonderful weekend project that celebrates the joy of making something with your own two hands.
Print
Car Theme Cake
- Total Time: 4 hours
- Yield: 20 servings
- Diet: Vegetarian
Description
Transform a classic, moist chocolate sheet cake into a spectacular sculpted vehicle that is perfect for birthdays. This recipe combines rich bittersweet ganache with structural carving techniques and vibrant fondant for a professional-looking result made right in your farmhouse kitchen.
Ingredients
- All-Purpose Flour
- Unsalted Butter, softened
- Cocoa Powder
- 18 oz Bittersweet or Semisweet Chocolate
- 5 Large Eggs
- Heavy Cream (38% fat)
- Granulated Sugar
- Baking Powder
- Baking Soda
- Salt
- Milk
- Vanilla Extract
- Marshmallow Fondant
- Gel Food Colors
- Silver Luster Dust
- Cornstarch
Instructions
- Preheat oven to 350°F (177°C) and grease/line a 15×17-inch sheet pan with parchment paper.
- Whisk together the flour, baking powder, baking soda, and salt in a medium bowl.
- In a stand mixer, cream the butter and sugar until fluffy, then add eggs one at a time while scraping the bowl.
- Alternate adding the flour mixture and milk in batches, finishing with the vanilla; pour into the pan and bake for 50–55 minutes.
- Prepare the ganache by melting the chocolate and heavy cream in short microwave bursts, stir in vanilla, and refrigerate until spreadable.
- Stack cooled cake sections with ganache layers and use a serrated knife and template to carve the car shape.
- Apply a thin crumb coat of ganache, chill for 15 minutes, then apply a thicker second layer and smooth with a flexible scraper before chilling again.
- Tint the fondant with gel colors, roll it out on a surface dusted with cornstarch, and drape it over the chilled cake, smoothing from top to bottom.
- Trim excess fondant and add details like windows, tires, and bumpers using colored fondant attached with a dab of water.
- Mix luster dust with a drop of alcohol to paint metallic details on the bumpers and lights before serving.
Notes
When carving the cake, keep a small bowl of extra ganache nearby to use as ‘spackle’ for any accidental gouges in the cake’s surface. To ensure the fondant adheres perfectly, you can lightly mist the chilled ganache with a tiny bit of water or use a very thin layer of piping gel before draping the fondant.
- Prep Time: 1 hour
- Cook Time: 55 mins
- Category: Dessert
- Method: Baking and Sculpting
- Cuisine: American
The Farmhouse Pantry

For the Chocolate Sheet Cake
- All-Purpose Flour: Provides the necessary structure for a cake that needs to be carved.
- Unsalted Butter: I prefer farm-fresh butter for that rich, creamy baseline. Make sure it is softened to room temperature.
- Cocoa & Chocolate: We use a mix of cocoa in the cake and 18 oz of bittersweet or semisweet chocolate for the ganache to ensure a deep, not-too-sweet flavor.
- Eggs: Five large eggs give this cake its richness and stability.
- Dairy: Heavy cream (38%) is essential for a smooth, luscious ganache that sets firmly.
For the Decoration
- Marshmallow Fondant: Homemade or high-quality store-bought fondant tastes significantly better than the standard plastic-tasting varieties.
- Gel Food Colors: To tint your fondant without altering the consistency.
- Luster Dust: Silver dust brings the bumpers and headlights to life with a metallic sheen.
How to Build Your Car Cake
Step 1: Bake the Sheet Cake
Preheat your oven to 350°F (177°C). Grease and line a 15×17-inch sheet pan with parchment paper. In a medium bowl, whisk together the flour, baking powder, baking soda, and salt. In the bowl of a stand mixer, cream the butter and sugar until light and fluffy. Add the eggs one at a time, scraping down the bowl as needed. Alternate adding the flour mixture and the milk in batches, finishing with the vanilla. Pour into the pan and bake for 50–55 minutes until a skewer comes out clean.
Step 2: Prepare the Ganache
While the cake cools, make your frosting. Combine the chocolate and heavy cream in a microwave-safe bowl. Heat in short bursts, stirring until completely melted and smooth. Stir in the vanilla extract. Cover and let it set in the refrigerator for a few hours or overnight until it reaches a spreadable consistency.
Step 3: Carve the Shape
Print a template of your desired car (scaled to the size of your cake). Cut your cooled sheet cake into sections and stack them with layers of ganache in between. Using a serrated knife, carve the cake to match your template. Pay special attention to the hood and the slope of the windshield. Don’t worry about perfection here; the fondant will hide minor bumps.
Step 4: Crumb Coat and Chill
Cover the carved cake with a thin layer of ganache to lock in the crumbs. This “crumb coat” is essential for a smooth finish. Refrigerate for 15 minutes to let it set. Apply a second, thicker layer of frosting, using a flexible smoother to create sharp corners and distinct lines. Chill again until firm.
Step 5: Apply Fondant
Tint your fondant to your desired color. Roll it out on a surface dusted with cornstarch. Gently lift it over the cake and smooth it down, working from the top to the bottom. Trim the excess. Use a fondant smoother to polish the surface.
Step 6: Add the Details
Roll out colored fondant (black for windows/tires, silver for bumpers) and cut shapes using your templates. Attach them to the cake with a tiny dab of water. For a metallic look on bumpers or lights, mix silver luster dust with a drop of alcohol and paint it on. Arrange the cake on a board—you can even use leftover frosting to create a road!
Christine’s Farmhouse Wisdom

Chill Before You Carve
A warm cake is a crumbly cake. I always freeze my cake layers for about 30 minutes before carving. It tightens the crumb and makes it much easier to get those clean, sharp lines for the car hood and trunk.
Use a Template
Don’t try to freehand this! Printing a simple side-profile and top-down view of the car ensures your proportions are accurate. It’s like using a sewing pattern—it guarantees success.
Ganache is Your Friend
Unlike buttercream, which can get soft, ganache sets firm. This provides a hard shell underneath the fondant, giving your car unmatched stability. If you’re new to structural cakes, check out our guide on the celebration design studio for more structural tips.
Seasonal Swaps & Simple Twists
Vanilla Bean Base
If the birthday boy or girl prefers vanilla, swap the chocolate sheet cake for a sturdy vanilla butter cake. The ganache creates a wonderful “black and white” flavor profile.
Vintage Truck
Instead of a sports car, use the same stacking method to create a boxy, rustic pickup truck. Fill the “bed” of the truck with chocolate rocks or crushed cookie “dirt” for a farm-style touch. You might even find inspiration from our vintage cake designs.
Dairy-Free Option
Substitute the butter for a high-quality plant-based stick butter and use full-fat coconut milk in the ganache for a dairy-free version that is still rich and decadent.
At the Table

Rustic Presentation
Since the cake itself is the centerpiece, keep the serving simple. I love placing this cake on a large wooden board or a slate platter that mimics asphalt. For a fun touch, serve it alongside “traffic light” fruit skewers (strawberry, pineapple, kiwi).
Slicing the Cake
Sculpted cakes can be tricky to cut. I recommend cutting the cake straight across the middle (door to door) first, then slicing slabs from the middle outwards. For another fun shape that’s easier to serve, you might enjoy making a heart cake next time.
Inspiration
If you are looking for professional inspiration, the Disney cars cake from Lola’s Cupcakes is a cute example, though nothing beats the taste of homemade.
The Simple Truth
Baking a car theme cake is about more than just sugar and flour; it’s about building a memory. Yes, it takes a bit of time to carve and cover, but seeing the joy on a loved one’s face makes every minute worth it. Even if the fondant isn’t perfectly smooth or the bumper is a little crooked, that rustic charm is what makes it real.
For more detailed tutorials on sculpting, don’t forget to visit our car cake page. Happy baking!
Share Your Bakes:

