Last Saturday at the local farmers market, I saw a young baker selling handmade chocolate cream sandwich cookies that looked just like the ones from my childhood. That nostalgic scent of deep cocoa and sweet vanilla cream stayed with me all the way home to the farmhouse. It reminded me how some flavors are truly timeless, transcending the generations and bringing a sense of simple joy to the kitchen table. This Oreo Cake is my tribute to that classic combination, reimagined as a wholesome, three-layer masterpiece that celebrates the honest beauty of home baking.

This recipe isn’t about fancy gadgets or complicated tricks; it’s about taking high-quality ingredients and treating them with care. We use real butter, farm-fresh egg whites for a delicate crumb, and a touch of sour cream to keep every bite moist and tender. When these layers come together with a velvety buttercream and a dark chocolate ganache, you get a dessert that feels both impressive and incredibly grounded. It’s a cake that invites you to slow down, slice a generous piece, and share a story over a cold glass of milk.
A Nostalgic Farmhouse Treasure
There is a specific kind of magic that happens when you combine the deep, dark crunch of chocolate cookies with a light-as-air vanilla cake. This Oreo Cake captures that spirit perfectly. I love this recipe because it doesn’t hide behind excessive sugar; instead, it lets the natural flavors of the cocoa and the richness of the dairy take center stage. The texture is what truly wins people over—you get the soft, pillowy crumb of the cake contrasted with the occasional crunch of chopped cookies hidden inside.
Another reason to fall in love with this cake is its rustic charm. You don’t need to be a professional pastry chef to make this look beautiful. The way the chocolate ganache drips down the sides is meant to be slightly imperfect, which only adds to its authentic, handmade appeal. It’s the kind of cake that looks right at home on a wooden table, surrounded by family and friends. It’s honest, it’s reliable, and it’s deeply satisfying in a way only a homemade treat can be.
Print
Oreo Cake
- Total Time: 1 hour
- Yield: 12 servings
- Diet: Vegetarian
Description
Indulge in this stunning three-layer Oreo cake that pairs a tender, cookie-flecked sponge with velvety buttercream and a luscious chocolate ganache. This farmhouse-inspired recipe celebrates the classic cookies-and-cream flavor profile with wholesome ingredients and a beautiful, rustic finish.
Ingredients
- All-purpose flour
- Granulated sugar
- Baking soda
- Baking powder
- Kosher salt
- Unsalted butter, room temperature
- Egg whites
- Sour cream
- Whole milk
- Vanilla extract
- Chopped Oreo cookies
- Confectioners’ sugar
- Heavy cream
- Semisweet chocolate chips or chopped bar
Instructions
- Preheat your oven to 350°F (175°C) and grease and flour three 6-inch cake pans, ideally using cake strips for even baking.
- Sift the flour, sugar, baking soda, baking powder, and kosher salt into a large bowl to ensure a light and airy texture.
- In a stand mixer, cream the room temperature butter until light and fluffy, then mix in the dry ingredients on low speed until the texture resembles coarse sand.
- In a separate bowl, whisk together the egg whites, sour cream, milk, and vanilla extract until fully combined.
- Gradually add the wet ingredients to the flour-butter mixture, beat for one minute until pale and fluffy, then gently fold in the chopped Oreos.
- Divide the batter between the pans and bake for 25 to 30 minutes, or until a skewer comes out clean, then cool completely on a wire rack.
- Prepare the frosting by beating butter, confectioners’ sugar, and heavy cream; fold crushed Oreos into most of the frosting while reserving a portion of plain white frosting.
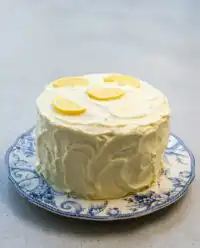
- Assemble the cake by layering the sponges with Oreo buttercream and chocolate ganache, then finish with a ganache drip and dollops of the reserved white frosting.
Notes
To achieve the cleanest slices, chill the cake for at least 30 minutes after frosting so the ganache and buttercream can set firmly. If you find your buttercream is too soft, add extra confectioners’ sugar one tablespoon at a time, or briefly refrigerate the mixing bowl to help it hold its shape for piping.
- Prep Time: 30 mins
- Cook Time: 30 mins
- Category: Dessert
- Method: Baking
- Cuisine: American
What You’ll Need from the Farmhouse Pantry

Gathering your ingredients is the first step in any good bake, and I always recommend starting with the freshest items you can find. When you use quality butter and local eggs, you can really taste the difference in the final result. For this Oreo Cake, we are looking for a balance of stability and tenderness.
- All-Purpose Flour: This provides the structure we need for a tall, three-layer cake. Always measure by weight if you can to keep the crumb consistent.
- Unsalted Butter: Using unsalted butter allows us to control the salt content. Make sure it is at room temperature so it creams beautifully with the sugar.
- Egg Whites: We use only the whites here to keep the cake light and to allow the white and black aesthetic of the cookies and cream to really pop.
- Sour Cream: This is my secret for a moist cake. It adds a lovely tang and a richness that milk alone cannot provide.
- Whole Milk: To help create a smooth batter and a tender texture.
- Chopped Oreos: Don’t crush these into a fine powder for the cake layers; you want small chunks so you get those lovely pockets of cookie throughout the bake.
- Confectioners’ Sugar: For a silky smooth buttercream that holds its shape for those beautiful dollops on top.
- Semisweet Chocolate: A good quality chocolate chip or chopped bar for the ganache will give you that deep, lustrous finish.
The Simple Process of Baking Joy
Step 1: Prep Your Pans and Oven
Before we start mixing, preheat your oven to 350°F (175°C). This gives the oven plenty of time to reach an even heat. Butter and flour three 6-inch pans. I always suggest using cake strips—you can soak them in water and wrap them around the pans to help the cakes bake flat and even, avoiding those tall domes that you’d only have to trim off later.
Step 2: Sift the Dry Ingredients
In a large bowl, sift together the flour, sugar, baking soda, baking powder, and kosher salt. Sifting is a small step that makes a huge difference, as it removes any lumps and aerates the flour, contributing to a lighter, more delicate crumb. It’s these small moments of care that make farmhouse baking so special.
Step 3: Cream the Butter and Mix
In your stand mixer with the paddle attachment, beat the room temperature butter on medium speed until it’s light and fluffy. Slowly add your sifted dry ingredients into the butter. Mix on low speed until the mixture looks like coarse sand. This method, often called reverse creaming, coats the flour in fat and helps prevent the development of too much gluten, keeping the cake tender.
Step 4: Whisk the Wet Ingredients
In a separate medium bowl, whisk together your egg whites, sour cream, milk, and vanilla extract. Whisk until the mixture is uniform. You want to make sure the sour cream is fully integrated so there are no streaks in your batter. The smell of the vanilla at this stage is absolutely heavenly.
Step 5: Combine and Fold
With the mixer on low, gradually pour the wet ingredients into the butter and flour mixture. Increase the speed slightly and beat for about a minute until the batter is fluffy and pale. Now, take a spatula and gently fold in the chopped Oreos. Be careful not to over-mix; we want to keep all that beautiful air we just whipped in. Divide the batter evenly between your three prepared pans.
Step 6: Bake and Cool
Place the pans in the oven and bake for 25 to 30 minutes. You’ll know they are ready when the centers spring back to a light touch or a wooden skewer comes out clean. Let the cakes rest in their pans for about 10 minutes before turning them out onto a wire rack to cool completely. Patience is key here—never frost a warm cake!
Step 7: Prepare the Buttercream and Ganache
Beat the butter for the frosting until it’s incredibly smooth. Gradually add the confectioners’ sugar and heavy cream, mixing until it’s light and airy. Set aside a cup of white frosting, then fold the crushed Oreos into the rest. For the ganache, gently melt the chocolate chips and cream together over low heat until smooth and glossy. Let it cool slightly so it reaches the perfect consistency for dripping.
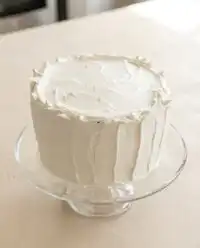
Step 8: Assemble Your Masterpiece
Place your first cake layer on a stand and spread a generous layer of Oreo buttercream, followed by a light swirl of ganache. Repeat with the second layer. Place the final layer on top and cover the entire cake in a thin coat of buttercream. Pour the ganache over the top, letting it wander down the sides in beautiful, rustic drips. Use the reserved white buttercream to pipe dollops on top and finish with a few more cookies.
Farmhouse Wisdom for the Perfect Crumb

One of the most important things I’ve learned in my kitchen is that temperature is everything. Make sure your butter, eggs, and milk are all at room temperature before you begin. This allows the ingredients to emulsify properly, creating a smooth batter that won’t break. If you are interested in more deep-chocolate techniques, you might find our chocolate fudge cake helpful for mastering rich textures. For those who want to see a different take on the stacking process, the guide over at Preppy Kitchen offers some wonderful visual aids for getting those layers perfectly straight. Also, remember not to over-chop your cookies for the batter; larger pieces stay crunchier during the bake, giving you that delightful texture we all love.
Seasonal Swaps and Creative Twists
While the classic Oreo is hard to beat, I often find myself inspired by what’s in the pantry. For a fun seasonal twist, you could use the golden variety of sandwich cookies in the spring for a lighter, more buttery flavor profile. If you’re looking for something that feels a bit more like a candy bar, try swapping the cookies for chopped peanut butter cups, which creates a flavor very similar to our popular snickers cake. You can also add a layer of fresh raspberry jam between the cake layers in the summer to add a bright, tart contrast to the rich chocolate and cream.
At the Table with Friends and Family

When it comes to serving this cake, I like to keep things simple and rustic. Place the cake on a sturdy ceramic platter or a wooden cake stand to highlight its natural beauty. It’s a wonderful centerpiece for a birthday or a casual Sunday gathering. I always suggest serving it with a large pitcher of cold milk or a pot of freshly brewed coffee. If you’re hosting a larger event and want a variety of flavors, this cake sits beautifully next to our ferrero rocher cake, offering guests a choice between two different but equally delicious chocolate experiences. A small sprig of fresh mint on the side of the plate can also add a nice touch of color.
The Simple Truth About Homemade Cake
At the end of the day, baking is about more than just the final product; it’s about the warmth and love we put into the process. This Oreo Cake is a reminder that you don’t need fancy ingredients to create something truly memorable. It’s a celebration of simple flavors done well, and I hope it brings as much joy to your table as it does to mine. If you find yourself craving more classic chocolate flavors, I highly recommend trying our old fashioned chocolate cake. I’d love to see your farmhouse creations, so please share your photos with me on Instagram, Pinterest, and Facebook. Happy baking!

