Walking through the local farmers market on a crisp Saturday morning always reminds me of the simple joy found in small bakes like the traditional Fairy Cake. There is something truly special about a treat that fits perfectly in the palm of your hand, smelling of sweet cream and pure vanilla. These little gems take me back to my grandmother’s kitchen, where the oven was always warm and a pot of tea was never far away.

A authentic Fairy Cake is lighter and daintier than its more modern cupcake cousin, making it the perfect companion for a quiet afternoon. This recipe uses honest, simple ingredients to create a delicate crumb that feels like a bit of farmhouse magic on your plate.
Rustic Beauty
You will fall in love with these treats because they represent the very heart of farmhouse baking—uncomplicated, sweet, and reliable. Unlike heavy, frosted cupcakes, the Fairy Cake is prized for its light-as-air texture and just a whisper of sweet icing. They are the perfect size for children and adults alike, offering a small bite of happiness without being overly indulgent.
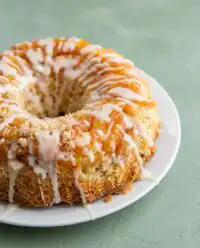
The beauty of this bake lies in its humble nature. The tops are meant to be slightly rounded and golden, creating a soft landing for a drizzle of simple icing. Whether you are hosting a garden party or just want to brighten a rainy Tuesday, these cakes bring a sense of nostalgia and warmth to the table that is hard to match with more complex desserts.
Every bite carries the flavor of real butter and fresh eggs. When we stick to the basics, the quality of our ingredients truly shines through. You will find that these cakes disappear quickly, often while they are still just a little bit warm from the oven cooling rack.
Print
Fairy Cake
- Total Time: 35 mins
- Yield: 12 cakes
- Diet: Vegetarian
Description
Experience the gentle charm of traditional British baking with these light-as-air fairy cakes, featuring a delicate vanilla crumb and a simple, glossy icing. Perfect for tea time, these petite treats are a nostalgic farmhouse staple that come together with just a few pantry essentials.
Ingredients
- 110g unsalted butter, softened
- 110g caster sugar
- 2 large eggs, room temperature
- 1 tsp vanilla extract
- 110g self-raising flour, sifted
- 200g icing sugar, sifted
- 1–2 tbsp whole milk
- Optional: natural food coloring, sprinkles, or dried edible petals
Instructions
- Preheat your oven to 180°C (160°C fan) and line a 12-hole cupcake tin with paper cases.
- In a large mixing bowl, beat the softened butter and caster sugar together until the mixture is pale and visibly fluffy.
- Add the eggs one at a time, beating well after each addition, then stir in the vanilla extract.
- Sift the self-raising flour over the mixture and gently fold it in with a metal spoon until just smooth.
- Divide the batter evenly among the paper cases and bake for approximately 20 minutes until golden and springy to the touch.
- Transfer the cakes to a wire rack to cool completely while you whisk the icing sugar and milk together into a thick, smooth consistency.
- Spoon the icing onto the center of each cooled cake and top with sprinkles or petals before the icing sets.
Notes
To ensure the lightest possible crumb, always sift your flour from a height to incorporate extra air and make sure all ingredients are at room temperature before starting. If your icing is too runny, simply add a bit more sifted sugar; if it is too stiff, add milk a few drops at a time until it reaches the desired flow.
- Prep Time: 15 mins
- Cook Time: 20 mins
- Category: Dessert
- Method: Baking
- Cuisine: British
The Farmhouse Pantry

Gathering your ingredients is the first step in this peaceful baking journey. I always recommend using the freshest dairy you can find, as the flavor of the butter and eggs is the star of the show here. When the ingredients are this simple, their quality becomes the most important part of the process.
- Unsalted Butter: Make sure your butter is properly softened at room temperature. It should be soft enough that a finger leaves a gentle indent but not so warm that it is greasy.
- Caster Sugar: This fine sugar dissolves easily into the butter, creating a pale and fluffy base that gives the cakes their signature lightness.
- Fresh Eggs: Use large, room-temperature eggs. If they are too cold, they can cause the butter mixture to curdle during the mixing process.
- Vanilla Extract: A splash of pure vanilla adds a comforting scent and a depth of flavor that makes these cakes feel like a real treat.
- Self-Raising Flour: This provides the lift needed for a perfect rise. Sifting it is a small but vital step to avoid any lumps in your delicate batter.
- Icing Sugar: Also known as powdered sugar, this creates the smooth, glossy finish for the tops.
- Whole Milk: Just a tablespoon or two helps loosen the icing to the perfect drizzling consistency.
Simple Steps
Step 1: Prep Your Farmhouse Kitchen
Heat your oven to 180C (350F) or 160C if you are using a fan-assisted oven. Take a 12-hole cupcake tin and line it with paper cases; I love using simple white or brown parchment cases for that rustic look. Having everything ready before you start mixing helps the process feel calm and organized.
Step 2: Cream the Butter and Sugar
In a large mixing bowl, combine your softened butter and caster sugar. Beat them together vigorously until the mixture is pale, soft, and visibly fluffy. This step incorporates the air that will help your cakes rise, so take your time here and watch for that beautiful light color to appear.
Step 3: Incorporate the Eggs and Vanilla
Add your eggs one at a time, beating well after each addition to keep the batter smooth. Stir in the vanilla extract, enjoying the sweet aroma that fills the air. If the mixture looks like it might separate, just add a spoonful of your flour to help it bind back together.
Step 4: Fold in the Flour
Sift the self-raising flour over the bowl to remove any clumps. Use a large metal spoon or a spatula to gently fold the flour into the wet ingredients until the batter is just smooth. Be careful not to overwork it, as we want to keep all that lovely air inside for a light crumb.
Step 5: Bake Until Golden
Divide the batter evenly between the paper cases, filling them about two-thirds of the way up. Slide the tin into the center of the oven and bake for about 20 minutes. You will know they are ready when they are golden brown and a wooden skewer comes out clean from the center.
Step 6: Create the Simple Icing
While the cakes are cooling on a wire rack, sift your icing sugar into a clean bowl. Gradually stir in the milk, one teaspoon at a time, until the icing is thick enough to coat a spoon but thin enough to flow slightly. This is where you can add a drop of natural food coloring if you want a bit of seasonal cheer.
Step 7: Decorate and Finish
Once the cakes are completely cool to the touch, spoon a little icing onto the center of each one. Let it settle and find its own path toward the edges for that beautiful rustic charm. Add your sprinkles or dried flower petals immediately before the icing sets.
Farmhouse Wisdom

One of my favorite secrets for a successful bake is to make sure all your ingredients are at the same room temperature before you begin. This helps the emulsion stay stable and results in a much finer crumb. If you find your icing is too thin, simply add a bit more sifted sugar; if it is too thick, a tiny drop of milk will fix it right up. For those looking to master the basics, following foundational baking recipes can help you build the skills needed for more complex projects. I also suggest checking out this guide from Olive Magazine for more technical insights on the perfect small-scale bake. Always sift your flour from a bit of a height to incorporate even more air into the mix.
Farm-Fresh Options
You can easily adapt these cakes to match the changing seasons of the farm. In the summer, try adding a bit of fresh lemon zest to the batter for a bright, citrusy lift. During the autumn harvest, a pinch of cinnamon or nutmeg in the flour adds a wonderful warmth that pairs perfectly with a hot cup of cider. If you are interested in older styles of baking, you might enjoy looking into vintage cake designs for more decoration ideas. A very popular variation is the “Butterfly Cake,” where you cut a small circle out of the top of the cooled cake, slice it in half, and place the “wings” back into a dollop of jam and whipped cream.
At the Table

I love serving these cakes on a wooden board or a vintage ceramic platter in the center of the table. They are wonderful for an outdoor picnic or a simple afternoon tea with friends. For a more modern presentation, you can look at contemporary small-format treats to see how others are styling their miniature bakes. Pair them with a pot of Earl Grey tea or a cold glass of milk for the children. If you are feeling extra festive, a few edible wildflowers scattered around the plate add a lovely touch of natural beauty to your presentation.
The Simple Truth
There is a deep satisfaction in making something so simple and seeing the joy it brings to those around you. These little cakes remind us that we do not need fancy equipment or expensive ingredients to create something beautiful and delicious. I hope this recipe finds a permanent place in your farmhouse kitchen and brings a little bit of magic to your next gathering. For more creative ways to celebrate with cake, visit our celebration design ideas page. Please share your bakes with me on Instagram, Pinterest, or Facebook. Happy baking!


