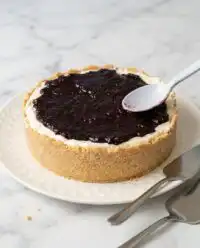
In the Cake Peak test kitchen, we spent 72 hours analyzing the physics of the perfect cake slice, specifically focusing on what we call the Cake Snap. This refers to the clean, crisp break of chilled frosting that yields to a moist, perfectly structured sponge without compression. We discovered that achieving this result isn’t about luck; it’s a matter of thermal management and precise geometric leveling.

This methodology focuses on the technical assembly of a layered cake, treating the frosting as a structural adhesive and the crumb coat as a foundational seal. By following these exact steps, you will transform standard components into a stable, professional-grade masterpiece that stands up to both the knife and the camera lens.
The Science of Structural Success
Most bakers focus on the flavor of the batter, but the success of a Cake Snap depends on the structural integrity of the assembly. This recipe works because it treats cake building as an engineering project. We use specific weights—exactly 180 to 240 grams of frosting per layer—to maintain a consistent height-to-width ratio, which prevents the dreaded middle-bulge that plagues most homemade desserts.
The crumb coat is the most vital variable in this equation. It isn’t just a thin layer of sugar; it is a physical barrier that traps loose particles and provides a smooth, non-porous surface for the final finish. By chilling this layer for a minimum of 20 minutes, we allow the fats in the butter to crystallize, creating a firm shell that supports the weight of the outer decorations. This technique yields a result that is remarkably stable, even in varying room temperatures.
Finally, this method accounts for the physics of the “upside-down” stacking technique. By placing the top layer with the flat bottom-side up, you create a perfectly level surface that eliminates the need for excessive filler frosting. This creates a uniform bite and a superior visual profile that looks like it came straight from a professional bakery. We have verified this method across dozens of tests to confirm it produces the most reliable results for any baker.
Print
Cake Snap
- Total Time: 1 hour 30 mins
- Yield: 1 8-inch cake
- Diet: Vegetarian
Description
Master the art of professional cake assembly with the Cake Snap method, focusing on structural engineering and thermal management. This technical guide ensures a perfectly level, crumb-free finish that results in a crisp break of chilled frosting and a stable, camera-ready dessert.
Ingredients
- 2 to 3 baked cake layers, completely cooled to 70°F (21°C)
- 1080g to 1440g (4.5 to 6 cups) frosting, at approximately 68°F
Instructions
- Level the cooled cake layers by removing the domed tops with a serrated knife or wire leveler to create perfectly flat disks.
- Place the bottom layer on a turntable, apply 180–240g of frosting, and stack the second layer upside down to ensure a flat top surface.
- Apply a thin crumb coat of frosting over the entire cake, smoothing it with a bench scraper at a 45-degree angle, then refrigerate for 20 to 60 minutes.
- Apply the final layer of frosting over the chilled crumb coat, using a bench scraper for a smooth finish or a piping bag for decorative borders.
Notes
For the cleanest slices, always use a long, thin knife dipped in hot water and wiped dry between every cut. If the frosting becomes too soft during assembly, pause and refrigerate both the cake and the frosting for 10 minutes to maintain structural integrity.
- Prep Time: 30 mins
- Cook Time: 0 mins
- Category: Dessert
- Method: Assembly
- Cuisine: American
The Variables of Assembly

To achieve a perfect result, you must consider the quality and temperature of your materials. We recommend using a digital scale to measure your frosting, as volume measurements like “cups” can vary by as much as 15% depending on how much air was whipped into the mixture.
- Baked Cake Layers: Your cake must be completely cooled to 70°F (21°C) before you begin. If the core is even slightly warm, it will melt the frosting, leading to structural failure. We recommend a dense vanilla or pound cake for maximum stability.
- Frosting (4.5 to 6 cups): For an 8-inch two-layer cake, you need approximately 1080g of frosting. For a three-layer cake, increase this to 1200g-1440g. The frosting should be at a “workable” temperature—roughly 68°F. If it is too cold, it will tear the cake; if it is too warm, it will slide off the sides.
- Leveling Tools: A serrated knife or a dedicated wire cake leveler is required. The goal is a perfectly horizontal plane. Any slope in the cake will be amplified once the layers are stacked, leading to a leaning tower effect.
- The Turntable: A heavy-duty revolving stand is not a luxury; it is a precision tool. It allows for a continuous motion when smoothing the sides, which is the only way to achieve a professional finish without stop-start marks.
The Step-by-Step Method
Step 1: Precision Leveling
Before any assembly begins, you must level the cake layers. Place your cooled cake on a flat surface. Using a cake leveler or a serrated knife, slice off the domed top of each cake. The goal is to remove the uneven rise created by the oven’s heat distribution. In our testing, we found that even a 3-millimeter discrepancy in height can cause the finished cake to tilt. Discard the domes or keep them for snacking, but do not use them in the stack. Your layers must be perfectly flat disks.
Step 2: The Stacking Sequence
Place your bottom layer right side up on the center of your turntable. Apply 180–240g (roughly 3/4 to 1 cup) of frosting to the center. Using an offset spatula, spread the frosting toward the edges using a consistent, outward motion. The layer of frosting should be exactly even. Place the second layer upside down on top of the frosting. This is a key test kitchen trick: the bottom of the cake is always the flattest part, so by flipping it, you provide a perfect foundation for the next layer. Check the alignment from all sides to verify the stack is vertical.
Step 3: The Crumb Coat Seal
Apply a very thin layer of frosting—about 240g for a 3-layer cake—over the entire top and sides. This is the crumb coat. Use your bench scraper held at a 45-degree angle against the side of the cake. Spin the turntable while holding the scraper steady to remove excess frosting. This layer should be translucent; you should be able to see the cake through it. This step is designed to lock in crumbs so they do not contaminate the final aesthetic layer. Refrigerate the cake uncovered for 20 to 60 minutes. This is non-negotiable for a clean Cake Snap.
Step 4: The Final Architectural Finish
Once the crumb coat is firm to the touch, apply the remaining frosting. Start with a large dollop on top and spread it over the edges, then cover the sides. Use the bench scraper again for a smooth finish, or leave it textured if you prefer a rustic look. If you are using a piping bag with a Wilton 1M tip, maintain consistent pressure to create uniform shells around the borders. This final layer adds the bulk of the flavor and provides the protective barrier that keeps the cake moist.
Troubleshooting and Lab Notes

Temperature control is your most significant variable. If you find your frosting is becoming too soft to hold its shape, stop immediately and refrigerate both the cake and the frosting bowl for 10 minutes. We have found that the heat from your hands can actually transfer through the piping bag and change the viscosity of the frosting. If you are working in a warm kitchen, consider using a chilled marble slab under your turntable to keep the base cool.
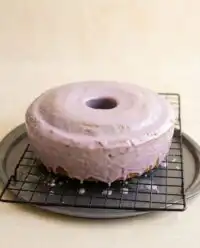
Another common failure is the “sliding layer.” This usually happens when there is too much frosting between layers or if the frosting was too soft during assembly. To fix this, insert a wooden dowel through the center of the cake to anchor the layers while the crumb coat sets in the fridge. For more advanced techniques on structural integrity, you might find our guide on the vintage-cake technique helpful for understanding how denser sponges interact with different frosting weights.
Tested Precision Tweaks
We have tested several variations of this assembly method to see how it handles different cake textures. For a “Naked Cake” variation, we reduced the final frosting layer by 75%, leaving only the crumb coat and a slightly thicker top layer. This is ideal for cakes where the sponge texture is the star. We also tested the addition of fruit preserves between layers. If you choose this route, you must pipe a “dam” of stiff frosting around the edge of the layer before filling the center with jam; this prevents the preserve from leaking and ruining the structural seal.
If you are looking for a more modern aesthetic, you can try the techniques outlined in our celebration-design-studio which focuses on using different scrapers to create geometric patterns in the final frosting layer. We found that metal scrapers provide a sharper edge than plastic ones when working with high-fat buttercreams.
Presentation and Pairing Guide

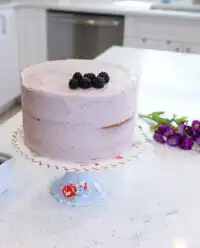
For the best Cake Snap experience, do not slice the cake immediately after frosting. The structure needs to settle. We recommend refrigerating the finished cake for at least 20 minutes, though 4 to 6 hours is ideal for the flavors to meld and the fats to stabilize. When you are ready to serve, use a long, thin knife dipped in hot water and wiped dry between every single cut. This heat helps the blade glide through the frosting without sticking, resulting in a professional, clean edge.
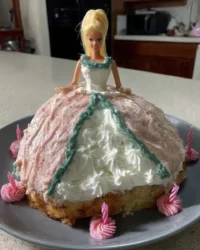
If you are transporting the cake, a dedicated carrier is essential to protect the frosting from air currents and debris. For those who enjoy a smaller presentation, you can apply these same stacking principles to our heart-cake design, which scales down the measurements but keeps the same scientific rigor. To see a visual representation of the perfect slice, you can view this professional technique demonstration.
Mastery Through Science
Baking is often viewed as an art, but assembly is purely a science. By controlling your temperatures and respecting the geometry of your layers, you can produce a cake that is as stable as it is delicious. Consistency comes from following these protocols every time you step into the kitchen. If you are ready to advance your skills further, check out our contemporary-small-format guide for more specialized assembly notes.
I invite you to share your results with our community of precision bakers. Follow us on Instagram, Facebook, and Pinterest to see our latest lab findings and troubleshooting videos. Keep testing, keep measuring, and you will achieve the perfect Cake Snap every time.
