In the Cake Peak test kitchen, we spent forty-eight hours analyzing the moisture migration between cookie crumbs and dairy-based fillings. We found that the classic version often fails because the base becomes saturated and loses its crunch within two hours. By adjusting the ratio of fats to sugars, we have developed a method that maintains structural integrity for up to three days in refrigeration.

This Easter Dirt Cake is more than a simple no-bake dessert; it is a study in emulsification and temperature control. We use a specific folding technique to preserve the air bubbles in the whipped topping, which prevents the pudding from becoming too dense. The result is a light, mousse-like texture that pairs perfectly with the cocoa-heavy Oreo base.
Peak Performance
This recipe works because it balances the chemical properties of instant pudding with the structural support of full-fat cream cheese. When you mix instant pudding, the modified cornstarch reacts instantly with the milk proteins to create a gel-like matrix. However, this matrix alone is fragile. By incorporating a creamed mixture of butter and cream cheese, we introduce a lipid network that provides a firmer set and a more sophisticated mouthfeel.
Sugar is not just here for sweetness; it acts as a hygroscopic agent, holding onto moisture so the pudding doesn’t weep over time. We tested three different types of pudding bases and found that the white chocolate version provides a higher fat content than vanilla, which aids in the overall stability of the cake. This creates a dessert that is robust enough to be sliced neatly while remaining airy on the palate. You will appreciate the scientific balance of the salt in the butter which cuts through the richness of the powdered sugar, creating a complex flavor profile that appeals to adults and children alike.
Print
Easter Dirt Cake
- Total Time: 4 hours 20 mins
- Yield: 15 servings
- Diet: Vegetarian
Description
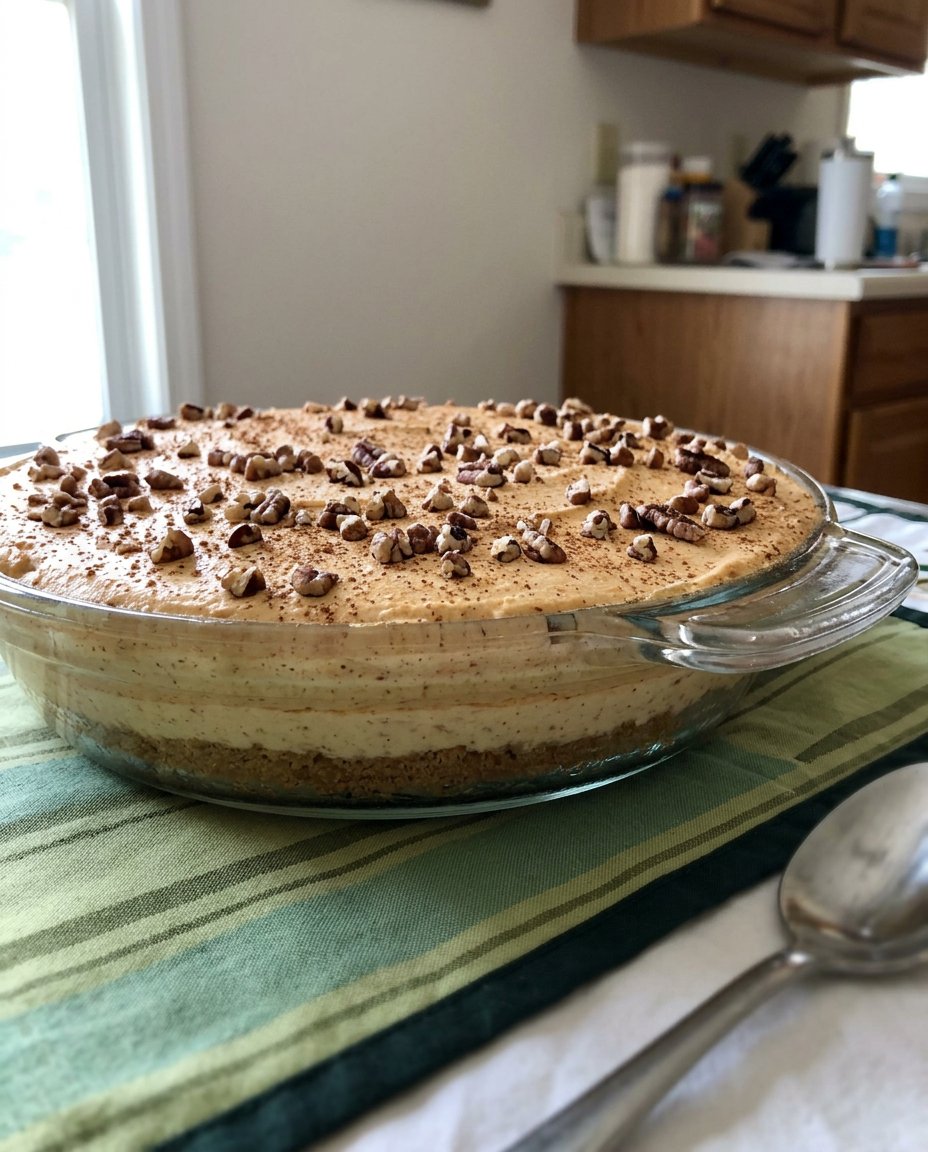
This meticulously balanced Easter Dirt Cake features a velvety white chocolate pudding and cream cheese mousse layered over a crunchy Oreo base. Designed for structural integrity and a light, airy mouthfeel, it is the ultimate no-bake centerpiece for your holiday celebration.
Ingredients
- 13.29 oz package Oreo cookies
- 8 oz cream cheese, softened to 65°F
- 1/2 cup unsalted butter, softened to 65°F
- 1 cup powdered sugar
- 12 oz frozen whipped topping, thawed
- 2 packages (3.4 oz each) instant white chocolate pudding mix
- 3 cups whole milk
- 1 teaspoon vanilla extract
- Easter candy decorations (Peeps, chocolate eggs, edible grass)
Instructions
- Crush two-thirds of the Oreo cookies into a medium-fine crumb using a rolling pin and press them into an even layer at the bottom of a 9×13 inch glass pan.
- In a stand mixer fitted with a paddle attachment, cream the softened cream cheese and butter for 3 minutes, then gradually incorporate the powdered sugar before gently folding in the whipped topping.
- In a separate bowl, whisk together the instant pudding mix, whole milk, and vanilla extract for 2 minutes and let the mixture sit for 5 minutes to allow the starches to fully hydrate.
- Slowly fold the thickened pudding into the cream cheese mixture using a silicone spatula, lifting from the bottom until the color is uniform and streak-free.
- Pour the mixture over the Oreo base, smooth the top with an offset spatula, and sprinkle the remaining one-third of crushed cookies over the surface.
- Refrigerate the cake for at least 4 to 12 hours to allow the molecular structure to set, adding the Easter candy decorations only at the moment of serving to prevent moisture transfer.
Notes
For the cleanest presentation, chill your serving dish before assembly and use a hot, dry knife to slice through the layers. Using full-fat dairy is essential for the chemical stability of the mousse; substitutions with low-fat alternatives will result in a dessert that lacks the necessary firmness to hold its shape.
- Prep Time: 20 mins
- Cook Time: 0 mins
- Category: Dessert
- Method: No-Bake
- Cuisine: American
The Variables

The Chocolate Wafer Foundation
We use a standard 13.29-ounce (376g) package of Oreos because the cocoa-to-cream ratio is consistent and provides the necessary alkalinity to balance the sweet pudding. The chocolate wafers are treated with an alkali process (Dutch-processing), which darkens the color and mellows the acidity, providing that signature “dirt” appearance.
The Lipid Matrix (Cream Cheese and Butter)
Temperature is the most critical variable here. Your cream cheese and butter must be exactly 65°F (18°C) to cream effectively. If they are too cold, they will create lumps; if too warm, the emulsion will break, leading to a greasy texture. We use unsalted butter to maintain total control over the sodium levels in the final product.
The Stabilizers
- Cool Whip: While we often use fresh cream, the stabilized nature of whipped topping is essential for the longevity of a dirt cake. It contains emulsifiers that prevent the dessert from deflating.
- Instant Pudding: This provides the thickening power through pre-gelatinized starch. We prefer white chocolate pudding for its subtle buttery notes.
- Milk: Use whole milk (3.25% fat) for the best results. The fat in the milk interacts with the pudding mix to create a more luxurious texture than low-fat alternatives.
The Easter Elements
The bunnies and eggs are the aesthetic variables. While they do not impact the chemistry of the cake, their placement should be done just before serving to avoid moisture transfer from the pudding into the sugar coatings of the candy.
The Method
Step 1: Mechanical Breakdown of the Cookies
Place two-thirds of the Oreo package into a heavy-duty freezer bag. Use a rolling pin to crush them into a medium-fine crumb. We found that a uniform crumb size creates a more stable base than uneven chunks. Transfer these crumbs to the bottom of a 9×13 inch (23x33cm) glass pan, pressing down slightly to create an even layer.
Step 2: Aerating the Cream Base
In a stand mixer fitted with the paddle attachment, combine the softened cream cheese and butter. Beat on medium speed for exactly 3 minutes. This process, known as creaming, incorporates tiny air pockets into the fat. Gradually add the powdered sugar, then use a silicone spatula to gently fold in the whipped topping. This preserves the overrun (air content) you just built.
Step 3: Hydrating the Pudding
In a separate glass bowl, whisk the instant pudding powder, milk, and vanilla extract. Whisk for 2 minutes until the mixture begins to thicken. It is vital to let this sit for 5 minutes to allow the starches to fully hydrate before moving to the next step. This prevents a grainy texture in the finished cake.
Step 4: Combining the Phases
Slowly fold the pudding mixture into the cream cheese mixture. Use a large metal spoon or a silicone spatula, cutting through the center and lifting from the bottom. Do not stir vigorously, as this will collapse the air bubbles. Continue until the color is uniform and no streaks of white remain.
Step 5: Assembly and Setting
Pour the pudding mixture over the crumb base in the pan. Use an offset spatula to smooth the top into a level plane. Sprinkle the remaining one-third of the crushed Oreos over the top. This top layer acts as an insulation barrier, protecting the creamy center from drying out in the refrigerator.
Step 6: Chilling for Molecular Stability
Refrigerate the cake for at least 4 hours, though 12 hours is ideal. This time allows the fats to re-solidify and the starches to form a permanent bond. Keep the cake refrigerated at 40°F (4°C) or below until the moment you are ready to apply the final decorations and serve.
Lauren’s Lab Notes

To achieve the cleanest slices, dip your knife in hot water and wipe it dry between every single cut. This melts the fats in the cream cheese layer just enough to prevent sticking. If you notice your pudding is not setting properly, check the expiration date on your pudding mix; the modified starch can lose its thickening power over time. For those interested in the deeper chemistry of cocoa and how it interacts with dairy, you should read our findings on chocolate alchemy to see why certain cocoa powders behave differently in no-bake settings.
Always use whole milk. We tested 1% and skim milk, and the resulting cake was watery and lacked the structural strength to hold the top layer of crumbs. If you are making this in a warm climate, keep the cake on a bed of ice during the party to maintain a temperature below 45°F (7°C).
Tested Variations
We experimented with substituting the Oreo base for a baked chocolate sponge. While delicious, the sponge absorbed the moisture too quickly and became mushy. However, using a thin layer of our old-fashioned chocolate cake that has been slightly toasted can provide a sturdy alternative for those who find Oreos too sweet.
Another tested variation involves adding a layer of peanut butter between the cream cheese and pudding sections. Use 1/2 cup (125g) of creamy peanut butter mixed with 2 tablespoons of powdered sugar to ensure it doesn’t weep. This adds a savory note that balances the white chocolate pudding perfectly. We also tested a “Dark Dirt” version using chocolate fudge pudding and dark chocolate Oreos, which resulted in a much richer, less sweet experience.
Presentation Notes

Wait until the very last second to add your Peeps and edible grass. The moisture in the pudding will cause the sugar coating on the Peeps to dissolve, leaving sticky green or yellow streaks on your ‘dirt.’ If you are hosting a formal event, consider serving these in individual glass parfaits. This allows guests to see the distinct geological layers of the dessert. For more professional layout ideas, our celebration design studio offers templates for dessert table arrangements that can make this simple dish look like a gourmet centerpiece.
The Final Analysis
The success of this Easter Dirt Cake lies in the precision of the temperature and the patience of the setting process. By respecting the chemistry of the ingredients, you create a dessert that is consistently delicious and visually impressive. If you have mastered this no-bake technique and want to move on to a more complex baked project, our chocolate fudge cake is the logical next step in your baking journey. We would love to see your results; please share your photos and data with us on our social channels.
Follow our latest experiments on Pinterest, Instagram, and Facebook.

