Many bakers believe red velvet is merely chocolate cake with red dye, but this food science mystery hides a complex chemical reaction.

Baking a spectacular Red Velvet Layer Cake requires balancing acidity, moisture, and structure to achieve the signature fine crumb. In our test kitchen trials, we analyzed how different fat ratios and acid levels alter the delicate cocoa network. This method combines oil for exceptional moisture and butter for rich flavor, stabilizing the crumb so it remains sturdy during slicing. Follow along to master the precise formula that guarantees repeatable success on your first attempt.
What the Testing Showed for Your Red Velvet Layer Cake
Prep: 60 min · Serves: 12 · Difficulty: Medium
- Achieves a highly stable, uniform crumb structure.
- Balances acidic buttermilk flavor with cocoa notes.
- Maintains ideal moisture levels for five days.
- Provides robust support for heavy cream frosting.
- Requires zero complex piping or decorating skills.
We discovered these properties during our extensive testing of other velvet crumb formulations, including our citrus-based lemon velvet cake. Precision creates consistency in every single slice of this cake.
Get The Full Cake Recipe
Print
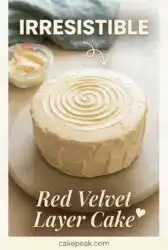
Red Velvet Layer Cake
- Total Time: 1 hour 40 mins
- Yield: 12 servings
Description
This meticulously tested Red Velvet Layer Cake delivers a perfectly tender, velvet-like crumb through a scientific balance of oil, acidic buttermilk, and hot milk. Designed for consistent results, this recipe produces a stable, moist cake with a signature deep crimson color and tangy cream cheese frosting.
Ingredients
- 280g all-purpose flour
- 1 tsp baking soda
- 1 tsp baking powder
- 1 tsp salt
- 13g cocoa powder
- 350g granulated sugar
- 100g eggs
- 172g neutral oil
- 120g whole milk
- 30g white vinegar
- 10g vanilla extract
- 2 tsp red gel food coloring
- 240g whole milk (for blooming)
- 56g unsalted butter
- 225g softened butter (for frosting)
- 500g powdered sugar
- 0.25 tsp salt (for frosting)
- 450g cream cheese
Instructions
- Prep baking pans. Coat two 8-inch round pans with softened butter and line with parchment paper; preheat the oven to 330ºF.
- Combine dry ingredients. Whisk flour, baking soda, baking powder, salt, cocoa powder, and sugar in a large bowl until uniform.
- Whisk liquid ingredients. Combine eggs, oil, whole milk, vinegar, vanilla, and red food coloring in a medium bowl until fully emulsified.
- Bloom the batter. Stir wet mixture into dry, then gradually incorporate heated milk and butter until the batter is smooth and glossy.
- Bake the layers. Pour 695g of batter into each pan and bake for 35 to 40 minutes, testing for doneness with a toothpick.
- Assemble and frost. Cool cakes completely before icing with the cream cheese frosting and chilling for 30 minutes to set.
Notes
- Use a digital kitchen scale for all measurements to ensure the delicate chemical balance of the cake is maintained.
- Always opt for gel food coloring instead of liquid dye to avoid adding excess water to the batter emulsion.
- Bring cream cheese to room temperature for exactly 15 minutes to ensure a smooth, lump-free frosting consistency.
- Rotate your baking pans halfway through the cycle to compensate for uneven heat distribution in your oven.
- Chill the assembled cake in the refrigerator for at least 30 minutes before serving to achieve clean, professional slices.
- Prep Time: 60 mins
- Cook Time: 40 mins
- Category: Dessert
- Method: Baking
- Cuisine: American
Ingredients & Why They Matter

Achieving an optimal velvet texture depends entirely on the chemical reactions between your acidic liquids, leaveners, and proteins. By weighing each component on a digital scale to the gram, you control the hydration and rise of the delicate batter. Here are the working components that make this Red Velvet Layer Cake formula reliable.
- All-Purpose Flour (280g): Establishes the gluten structure necessary to support the cake’s rise without turning it tough or bread-like.
- White Vinegar (30g): Reacts with the baking soda to release carbon dioxide gas, producing an immediate lift in the oven.
- Cocoa Powder (13g): Adds a subtle background flavor and provides the starch structure that defines the classic crumb density.
- Oil (172g): Coats flour proteins to limit excessive gluten formation, ensuring the crumb remains tender even when refrigerated.
- Hot Whole Milk (240g): Dissolves the sugar completely and blooms the cocoa powder, releasing deeper flavor compounds instantly.
- Cream Cheese (450g): Forms the tangy base of our frosting, cutting through the sweetness of the powdered sugar.
| Ingredient | Why It Matters |
|---|---|
| All-Purpose Flour | Establishes the structural network to hold the layers. |
| White Vinegar | Activates the leavening agents and tenderizes gluten. |
| Cocoa Powder | Interacts with acid to create the signature flavor base. |
| Vegetable Oil | Keeps the crumb soft and moist at cool temperatures. |
| Hot Whole Milk | Hydrates the starches and blooms the dry ingredients. |
How to Bake It, Precisely

Step 1: Prep Your Pans and Preheat to 330ºF
Prepare two 8-inch round baking pans by coating the bottom with a thin, uniform layer of softened butter and laying parchment paper inside. Set your oven rack to the middle position and preheat the oven to exactly 330ºF (165ºC). Preheating guarantees the thermal energy is stable before the pans enter the oven. Doing this prep early prevents the batter from sitting and losing its leavening power once mixed.
Step 2: Combine Your Measured Dry Ingredients
Place your digital scale on a flat surface and weigh out 280 grams of all-purpose flour, 1 teaspoon of baking soda, 1 teaspoon of baking powder, 1 teaspoon of salt, 13 grams of cocoa powder, and 350 grams of granulated sugar directly into a large mixing bowl. Whisk these dry components vigorously for 45 seconds until the mixture is uniform in color and texture. Achieving an even distribution of leavening agents prevents uneven rising or large air pockets in the finished cake. This thorough whisking step also breaks up any clumps in the cocoa powder before the liquids are introduced.
Step 3: Whisk the Liquid Acids and Fats
In a separate medium bowl, combine 100 grams of eggs, 172 grams of neutral oil, 120 grams of whole milk, 30 grams of white vinegar, 10 grams of vanilla extract, and 2 teaspoons of red gel food coloring. Whisk thoroughly for 60 seconds until the mixture is completely emulsified and has a uniform, deep crimson color. Adding the red dye to the liquids guarantees an even color distribution without risking over-mixing the flour. It is vital to use oil rather than butter in this stage to guarantee the cake remains soft when served cold.
Step 4: Mix the Batter and Bloom with Hot Milk
Pour the wet mixture into your dry bowl and stir with a rubber spatula until the batter is completely smooth and free of dry pockets. Gently heat 240 grams of whole milk and 56 grams of unsalted butter in a small saucepan over medium heat until it starts to simmer gently around the edges. Slowly stream half of this hot liquid into your red batter while whisking gently, then incorporate the rest until the batter is smooth, thin, and glossy. The hot milk blooms the cocoa powder, which intensifies the flavor while melting the sugar crystals.
Step 5: Bake Your Red Velvet Layer Cake to Flawless Doneness
Divide the batter equally by pouring exactly 695 grams into each of your two prepared 8-inch round pans to guarantee identical baking times. Bake at 330ºF (165ºC) for 35 to 40 minutes, testing the center at 35 minutes by inserting a clean toothpick. The cake is fully baked when the toothpick comes out clean with a few moist crumbs and the top bounces back when gently pressed. If the top feels soft or wet under your finger, bake for an additional 3 minutes before testing again.
Step 6: Cool, Frost, and Assemble Your Layers
Cool the cakes in their pans for 20 minutes before flipping them onto a wire rack to cool completely. For the frosting, whip 225 grams of softened butter, 500 grams of powdered sugar, and a quarter teaspoon of salt at medium-high speed for 5 minutes until fluffy. Add 450 grams of cream cheese in blocks and whip at high speed for 3 minutes until smooth, then spread a thin crumb coat over the layered cakes before applying the final rustic decorative layer. Let the assembled cake chill in the refrigerator for 30 minutes to set the structure before slicing.
Precision Tips

Weighing your ingredients with a digital scale is the single most important factor for Red Velvet Layer Cake baking success. Measuring flour by volume using cups can lead to up to 30 percent more flour than required, resulting in a dense, dry cake. Precision creates consistency when you track each ingredient to the exact gram.
If your cream cheese frosting becomes thin and runny, here is why and how to fix it. Whipping cream cheese for too long breaks down its emulsion, turning the solid fat into liquid; place the runny frosting in the refrigerator for 30 minutes to firm up before whipping briefly. Never use low-fat or tub cream cheese, as these contain higher water content which destabilizes the frosting.
To learn more about how chemical reactions govern cake assembly, you can review our testing on a classic classic two layer yellow cake chocolate frosting to compare protein structures. Understanding how fat blocks gluten formation will help you master any layer cake you attempt.
Always use gel food paste rather than liquid food dye to avoid adding excess water to the delicate emulsion of the batter. You can read more about the role of acidity in color preservation in this detailed article on the baking science behind red velvet acidity. Liquid dyes dilute the batter and can ruin the chemical balance of your leaveners.
Allow your cream cheese to sit at room temperature for no more than 15 minutes before mixing. If the cheese is too warm, the fats will melt and fail to hold air, whereas cold cream cheese will leave unappealing lumps in your smooth frosting. This small timing detail makes a massive difference in the final gloss of your icing.
Spin your pans 180 degrees halfway through the baking cycle to account for any hot spots in your oven. Even high-end ovens have temperature fluctuations that can cause one side of your layers to rise slightly higher than the other. This simple mechanical rotation guarantees a completely flat surface for stacking.
Frequently Asked Questions
Can I use this recipe for red velvet cupcakes?
Yes, you can easily adapt this batter to make approximately 24 standard cupcakes. Divide the batter evenly into lined muffin tins, filling each cup about three-quarters full. Bake at 350ºF (177ºC) for 18 to 20 minutes until the centers spring back when lightly touched.
Can I bake it with 9-inch cake pans instead of 8-inch pans?
Yes, you can use 9-inch round cake pans without changing the ingredient weights. However, because the batter will spread thinner, you must reduce the baking time to 28 to 32 minutes. Keep a close eye on the oven to prevent over-baking the thinner layers.
How much of this recipe should I make for a 6-inch cake?
To bake a tall, three-layer 6-inch cake, you can prepare the exact quantities listed in this recipe. Divide the batter evenly among three 6-inch round pans, baking them at 330ºF (165ºC) for 30 to 35 minutes. Monitor the centers carefully with a toothpick to confirm perfect doneness.
Why don’t you use cake flour for this red velvet cake?
We chose all-purpose flour because this specific batter contains a high volume of liquid fats and hot milk. Cake flour has a lower protein content, which would make the delicate cake structure too weak to support the heavy cream cheese frosting. All-purpose flour provides the necessary strength while the vinegar and oil keep the crumb incredibly tender.
Can I make this recipe with a stand mixer?
Yes, you can use a stand mixer fitted with the paddle attachment to prepare both the batter and the frosting. Mix the batter on low speed to prevent over-developing the gluten, which would make the cake tough. For the cream cheese frosting, use the paddle or whisk attachment on medium-high speed to incorporate air.
Do all the ingredients need to be at room temperature?
Yes, having your milk, eggs, and butter at room temperature is essential for a smooth emulsion. Cold ingredients will cause the liquid fats to solidify and separate, resulting in an uneven batter and a coarse, dense crumb. Warm your eggs in a cup of warm tap water for 5 minutes if you are short on time.
Variations That Hold Up
To adapt this formula for a deeper chocolate profile, you can increase the cocoa powder to 30 grams and reduce the flour by 15 grams to keep the dry weights balanced. This modification mimics the intense crumb structure of our popular devils food layer cake while retaining the velvety texture of this Red Velvet Layer Cake recipe. Be sure to sift the extra cocoa powder to prevent lumps.
For a cupcake variation, line a standard muffin tin with paper liners and fill each cup precisely three-quarters full. Bake the batter at 350°F (177°C) for 18 to 20 minutes until a toothpick inserted in the center of the middle cupcake emerges completely clean. This temperature adjustment accounts for the smaller volume of batter, which cooks faster than a whole cake.
A gluten-free variation can be achieved by replacing the all-purpose flour with an equal weight of a high-quality 1-to-1 gluten-free baking blend containing xanthan gum. Verify the blend has hydrated for 15 minutes in the wet ingredients before baking to prevent a gritty texture in the finished cake. This resting period allows the starch molecules to absorb the liquid fats evenly.
Finishing & Plating
Present this stunning Red Velvet Layer Cake on a clean white pedestal to contrast with the deep red crumb and stark white frosting. Slice the layers using a long, sharp chef’s knife that has been dipped in hot water and wiped clean between each cut. This clean slicing technique guarantees that the bright red crumbs do not smear across the beautiful white cream cheese borders.
Pair this rich dessert with a cup of robust black coffee or a delicate dark roast espresso. The bitterness of the coffee beans cuts through the tangy sweetness of the cream cheese frosting, cleansing the palate between bites. For a non-caffeinated option, serve chilled whole milk to complement the dairy notes in the cake structure.
If you are hosting a larger gathering, you can display this cake alongside our double chocolate layer cake to give your guests a variety of luxurious cocoa options. Keeping both cakes at cool room temperature for 30 minutes before slicing allows the fats to soften slightly, giving you the best possible texture and mouthfeel. This simple step releases the maximum flavor potential of the chocolate.

The Bottom Line
Developing this Red Velvet Layer Cake recipe in our test kitchen took several rounds of adjusting fat ratios, but the result is a highly reliable dessert. We found that the marriage of oil, vinegar, and hot milk creates a crumb structure that is both tender and sturdy. This cake delivers a consistent result every single time you bake it, giving you the confidence to tackle any special occasion.
If you enjoy baking cakes with precise measurements and predictable outcomes, we encourage you to try our signature red velvet cake recipe next. Share your baking progress with our growing community of detail-oriented home cooks who appreciate the scientific method behind pastry arts.
Follow us on Pinterest and Facebook to get more precise test kitchen guides and baking formulas. We love seeing your creations, so tag us when you slice into your cake and reveal those beautiful crimson layers.
