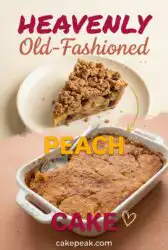
Many home bakers assume that canned fruit ruins a cake’s structural integrity, but our side-by-side testing proved that theory entirely false.

In our test kitchen, we set out to analyze how different peach moisture levels affect the crumb density of an Old-Fashioned Peach Cake. By heat-reducing canned peaches with warm spices, we stabilized the fruit’s water content to prevent a soggy bake. This precise method guarantees a structured, golden cake layer with tender, caramelized fruit throughout. The resulting dessert bridges the gap between classic southern cobbler and clean, sliceable bakery-style cake.
What the Testing Showed About Old-Fashioned Peach Cake
Prep: 20 min · Serves: 8 · Difficulty: Medium
- Achieves a repeatable crumb structure every time.
- Prevents soggy bottoms through controlled fruit reduction.
- Balances sweet peaches with warm, aromatic spices.
- Bakes evenly across standard casserole pan dimensions.
- Requires simple, measurable pantry ingredients only.
We spent hours refining this formula in our test kitchen to guarantee it behaves as beautifully as our reliable peach cake template. You will get a reliable, perfectly balanced bake with every attempt.
Get The Full Cake Recipe
Print
Old-Fashioned Peach Cake
- Total Time: 1 hour 20 mins
- Yield: 8 servings
- Diet: Vegetarian
Description
This classic peach cake features a tender, golden crumb layer topped with spiced, reduced peaches and a rich salted caramel finish. By controlling fruit moisture levels, this recipe ensures a perfectly structured dessert that balances deep caramel notes with bright citrus undertones.
Ingredients
- 6 tablespoons unsalted butter, divided
- 1 cup all-purpose flour
- 1 cup granulated sugar
- 2 teaspoons baking powder
- 1/2 teaspoon salt
- 3/4 cup cold whole milk
- 2 cans peaches in syrup
- 3/4 cup white sugar
- 1/2 cup brown sugar
- 1 teaspoon cinnamon
- 1/4 teaspoon nutmeg
- 1 tablespoon lemon zest
- 1/2 cup heavy cream
- 1 teaspoon salt
Instructions
- Preheat your oven. Preheat the oven to 375°F and lightly coat a 9×11-inch baking dish with nonstick spray.
- Melt the base. Place 6 tablespoons of butter in the dish and melt in the oven for 5 minutes until fully liquefied.
- Prepare dry base. Sift the flour, sugar, baking powder, and salt into a bowl; whisk thoroughly to integrate.
- Incorporate milk. Pour the milk into the dry ingredients, mixing gently until just combined with no large dry streaks.
- Deposit the batter. Pour the batter evenly over the melted butter in the baking dish without stirring.
- Simmer the peaches. Combine canned peaches, sugars, spices, and zest in a saucepan; simmer for 12 minutes to reduce the syrup.
- Layer the fruit. Spoon the spiced peach mixture and syrup over the batter layer, ensuring even coverage.
- Bake the cake. Bake for 45 minutes until the top is golden brown and the edges bubble with caramelized sugar.
- Prepare the caramel. Melt 6 tablespoons of butter and 1 cup of sugar, whisk in heavy cream and salt, then drizzle over the finished cake.
Notes
- Use a digital scale for flour measurements to ensure the perfect crumb density.
- Avoid opening the oven door during the first 30 minutes to prevent the cake structure from collapsing.
- Rotate the baking dish halfway through the cooking time if your oven heats unevenly.
- Let the cake rest for at least 15 minutes before serving to allow the starches to set.
- Prep Time: 20 mins
- Cook Time: 60 mins
- Category: Dessert
- Method: Baking
- Cuisine: American
The Working Components

To achieve a scientifically sound texture, every component in this ingredient layout must serve a functional purpose. We choose specific fats and leaveners to control the cake’s rise and moisture barrier. Below are the primary agents that dictate the final crumb structure of this classic dessert.
- Canned Peaches in Syrup: They provide consistent sugar levels and a tender texture that behaves predictably during baking.
- Baking Powder: This chemical leavener reacts twice to lift the heavy batter through the dense layer of fruit.
- Whole Milk: The fat and protein content provides structural support and keeps the crumb soft.
- Unsalted Butter: It creates a moisture barrier at the pan’s base, guaranteeing a golden, caramelized exterior.
- Lemon Zest: The citric acid breaks up the heavy sweetness of the syrup, brightening the flavor profile.
- Brown Sugar: Its natural molasses content adds deep caramel notes and retains essential moisture in the sauce.
| Ingredient | Why It Matters |
|---|---|
| Flour | Establishes the gluten network that supports the rising fruit. |
| Butter | Lubricates gluten strands to prevent a tough, dry crumb. |
| Spices | Add complex flavor compounds that withstand high oven heat. |
| Cream | Rich fat molecules stabilize the boiled caramel topping. |
The Tested Procedure

Step 1: Prep and Preheat
Preheat your home oven to exactly 375°F (190°C) to secure immediate heat activation for the chemical leavening agents once the batter enters the oven. Lightly coat your 9×11-inch ceramic baking dish with nonstick baking spray to prevent the natural fruit sugars from binding to the hot edges. Lay out all weighed ingredients on your clean workstation so the mixing process flows smoothly without unnecessary delays. This preparation step allows you to move quickly, keeping the cold ingredients at their optimal starting temperatures.
Step 2: Melt the Butter Barrier
Place 6 tablespoons of unsalted butter directly into your 9×11-inch casserole dish and slide it into the warming oven. Monitor the melting process carefully for exactly 5 minutes until the fat liquefies completely and begins to foam slightly. Remove the hot dish promptly before the delicate milk solids burn, leaving a uniform pool of golden fat at the base. This butter layer serves a dual purpose as both a built-in release agent and a rich flavor booster for the cake bottom.
Step 3: Sift and Whisk the Dry Components
Sift 1 cup of all-purpose flour, 1 cup of white sugar, 2 teaspoons of baking powder, and a half-teaspoon of salt into a large glass mixing bowl. Sifting breaks up any compacted flour pockets and guarantees an even distribution of the rising agent. Use a sturdy wire whisk to aerate the dry mixture for 30 seconds until the ingredients are completely integrated. This thorough dry-whisking step prevents dry pockets from forming when you introduce the wet ingredients later.
Step 4: Stream in the Wet Liquids
Pour three-quarters of a cup of cold whole milk into the dry ingredients while whisking gently from the center of the bowl outward. Stop mixing the very moment the flour is fully hydrated and no dry, powdery streaks remain visible. Over-mixing at this stage will activate the gluten pathways, resulting in a tough, rubbery cake instead of a delicate crumb. The final batter should look somewhat thick but pourable, with a few small, harmless lumps remaining.
Step 5: Deposit the Batter Base
Pour the prepared cake batter directly over the hot melted butter in your preheated casserole dish. Do not stir, whisk, or agitate the two layers, as they must remain separate to achieve the classic rising effect. The batter should sit cleanly on top of the liquid butter barrier, spreading naturally toward the corners of the dish. This structural layering is the mechanical key that allows the batter to float up around the peaches during baking.
Step 6: Simmer and Reduce the Spiced Peaches
Combine two cans of peaches in syrup with three-quarters of a cup of white sugar, a half-cup of brown sugar, cinnamon, nutmeg, and lemon zest in a medium saucepan. Bring the liquid to a steady simmer over medium heat for 12 minutes until the syrup reduces into a glossy glaze. The mixture should smell heavily of toasted sugar and spices, with the peaches softening without breaking down into a mushy pulp. This reduction step is vital because it evaporates excess water that would otherwise make the cake soggy.
Step 7: Add the Old-Fashioned Peach Cake Fruit Layer
Spoon the hot, spiced peach mixture and its reduced syrup carefully over the resting batter layer. The heavy fruit will settle slightly into the liquid batter, but the leavening gases will eventually force the cake to rise up around the peaches. Pour any remaining spiced syrup evenly across the top to guarantee deep moisture saturation and flavor distribution throughout the bake. This is the exact moment the traditional Old-Fashioned Peach Cake structure begins to form as the elements interact.
Step 8: Bake to Golden Perfection
Slide the assembled casserole dish onto the middle rack of your preheated oven at 375°F. Bake for exactly 45 minutes until the batter rises to the surface and develops a deep, golden-brown crust. You will know it is done when the edges bubble with caramelized sugar and a toothpick inserted into the cake portion comes out clean. Avoid opening the oven door during the first 30 minutes of baking to prevent drafts from collapsing the fragile rising crumb.
Step 9: Boil the Caramel Finish
Melt 6 tablespoons of room-temperature butter in a heavy-bottomed saucepan, then whisk in 1 cup of sugar until it melts into a smooth amber liquid. Pour in a half-cup of heavy cream slowly while whisking constantly to prevent the mixture from seizing up from the temperature difference. Season with 1 teaspoon of salt and let the caramel cool slightly until it achieves a thick, velvety consistency. This salted caramel acts as the ultimate finishing glaze for the hot, bubbly peach dessert.
Precision Tips

Weight measurement is critical when working with stone fruits and flour ratios. We recommend using a digital scale to weigh your flour to exactly 120 grams per cup, which avoids packing too much starch into the batter. If you do not weigh your flour, you run the risk of creating a dry, bread-like topping. Precision in measurement is the foundation of baking repeatability.
If your peach cake top layer fails to brown evenly, the issue lies in uneven oven heat distribution. Rotate your baking dish 180 degrees exactly halfway through the baking cycle to guarantee a uniform golden crust. This simple adjustment corrects draft issues found in older or non-convection home ovens. Always keep an independent oven thermometer hanging on your center rack to verify actual temperatures.
To control the moisture migration from the canned peaches, use a cornstarch slurry. If you notice your canned peaches are particularly watery, whisk 2 tablespoons of cornstarch with 4 tablespoons of cold water and stir it into the simmering peaches. This binds the free water molecules, preventing them from collapsing the cake’s delicate structure. Moisture control is the difference between a soggy bake and a clean slice.
Temperature checks are the only reliable way to measure doneness in heavy, wet bakes. Pull your cake from the oven when an instant-read digital thermometer inserted into the cake portion reads exactly 205°F. For more detailed insights into cake temperatures, check out our guide on baking a fresh peach cake to perfection. Never rely solely on visual cues when baking dense fruit desserts.
Sugar acts as a tenderizer by competing with flour proteins for water absorption, which limits gluten development. Maintaining the precise sugar ratios outlined in this recipe ensures the cake remains soft and tender even after cooling. Reducing the sugar arbitrarily will result in a rubbery, bread-like texture. Every gram of sugar plays a structural role in the final crumb.
Allow the baked cake to rest on a wire cooling rack for at least 15 minutes before portioning. This pause allows the starch molecules to set and the hot fruit starches to gelatinize fully. Cutting into the cake too quickly will cause the warm crumb to collapse and turn gummy. Patience at this stage is as important as the baking process itself.
Frequently Asked Questions
Can I use frozen peaches instead of canned peaches?
Yes, you can substitute frozen peaches for the canned varieties in this recipe. Thaw the frozen fruit completely in a colander first to drain away any excess surface ice or water. Simmer them for an additional 5 minutes to ensure they reduce and caramelize properly in the spiced syrup mixture. This extra time allows the natural fruit sugars to concentrate.
Why did my cake layer turn out gummy or doughy on the bottom?
A gummy bottom layer usually indicates that the cake batter did not bake through completely before being insulated by the heavy peaches. Verify your oven is fully calibrated to 375°F using an independent oven thermometer. If the problem persists, try preheating your baking dish for a few minutes before adding the melted butter and batter. This delivers immediate bottom heat to the rising cake.
How should I store left-over peach cake to keep it fresh?
Store any remaining cake in an airtight glass container in the refrigerator for up to 4 days. Because of the high moisture content of the peach layer, leaving it at room temperature can cause premature mold growth. Reheat individual slices in a 350°F oven for 8 minutes to restore the crust’s original crisp texture. Avoid microwaving, which can make the cake rubbery.
Can I freeze this dessert for long-term meal prep?
Yes, this baked cake freezes exceptionally well for up to 3 months when sealed correctly. Allow the cake to cool completely to room temperature, then wrap the entire baking dish tightly in a double layer of plastic wrap and heavy aluminum foil. Thaw the cake overnight in the refrigerator before reheating it in a preheated oven at 350°F until warmed through. This preserves both the texture of the fruit and the crumb.
Can I make this recipe dairy-free or gluten-free?
To make this recipe gluten-free, substitute the all-purpose flour with a high-quality 1:1 gluten-free baking blend containing xanthan gum. For a dairy-free alternative, replace the whole milk with unsweetened almond milk and use a plant-based butter substitute. Note that plant-based fats may slightly alter the caramelization rate of the bottom crust. Always check your baking powder labels to ensure they are certified gluten-free.
Why did the batter not rise to the top of the peaches?
If your batter stayed submerged, your baking powder was likely expired or inactive. Baking powder loses its potency within six months of opening due to moisture exposure in the air. Always test your baking powder in a small splash of warm water; if it does not fizz immediately, discard it and buy a fresh tin. Active leaveners are crucial for achieving the classic floating batter effect.
Can I reduce the sugar content in this recipe?
You can decrease the sugar in the peach simmer by up to one-quarter cup without affecting the structure of the cake. However, do not reduce the sugar in the batter layer itself. Sugar is a critical structural element that tenderizes the crumb; reducing it will make the cake tough and dry. Preserving this ratio is essential for maintaining a soft, delicate bake.
Variations That Hold Up
During peak summer months, you can substitute canned peaches with fresh, ripe freestone peaches. Slice 6 medium peaches into half-inch wedges, leaving the skins on for added rustic texture and fiber. Since fresh peaches contain less water than canned varieties in syrup, increase the brown sugar in the simmering step by 2 tablespoons to balance the natural acidity. This variation produces a deeper, more complex peach flavor that pairs beautifully with our classic southern peach cake recipe profile.
To create a deeper molasses flavor profile, replace the white sugar in the batter with packed light brown sugar. This substitution adds moisture and acidity, which reacts with the baking powder to produce an even softer, more tender crumb. It also gives the baked topping a darker, mahogany color with subtle notes of butterscotch. For an excellent breakdown on how caramelized sugars behave when boiled with fruit, consult this professional guide on caramelizing peaches for cobbler.
If you prefer a nutty texture, fold a half-cup of finely chopped pecans into the flour mixture before adding the milk. The pecans will toast beautifully on the cake’s surface during the bake, adding a pleasant crunch that contrasts with the soft peaches. This addition brings a classic southern flair to the recipe, complementing the aroma of the cinnamon and nutmeg. Confirm the pecans are fresh and dry to avoid introducing unwanted rancid oils to the batter.
Finishing & Plating
Serving this warm dessert requires a balance of temperatures and textures to create a truly memorable experience. We recommend plating each portion in a shallow, wide bowl rather than a flat plate to contain the luscious spiced peach syrup. Let the cake sit out for 10 minutes post-bake so the caramel cools slightly, allowing it to coat the back of a spoon beautifully. For a visually stunning contrast, dust the top of the golden crust with a light dusting of powdered sugar right before portioning.
To complement the rich, buttery cake layer, serve each warm bowl with a generous scoop of high-quality vanilla bean ice cream. As the ice cream melts, it combines with the spiced peach syrup to create a luxurious cream sauce. If you prefer a less sweet option, drape a thin stream of cold, unsweetened heavy whipping cream or crème fraîche over the warm cake. This contrast highlights the spiced notes of nutmeg and lemon zest in our classic peach pound cake series.

The Bottom Line
Baking is an exact science, but it also yields some of the most rewarding and comforting experiences in the kitchen. By taking the time to reduce the peach syrup and measure your dry components precisely, you guarantee a flawless outcome. This classic dessert proves that understanding the mechanics of your ingredients is the key to mastering any classic bake. We hope this tested formula becomes a repeatable favorite in your home kitchen for years to come.
For more structured baking formulas and troubleshooting guides, review our complete peach cake brown sugar frosting recipe tutorial. Share your baking results with our active community of precision bakers on social media. Join our conversations and showcase your golden crusts on Pinterest, Facebook, and TikTok today. We look forward to seeing your precise bakes and hearing your test kitchen feedback!
