A handmade cake should never look like it came from a factory, especially when it is piled high with sweet coconut.

There is a quiet joy in watching a towering cake take shape on a wooden cutting board in late August. This Three-Layer Coconut Cream Cake does not ask for polished piping or stiff sugar decorations. Instead, it relies on the honesty of rich coconut milk, deep orange egg yolks left behind for another day, and the casual beauty of shredded coconut pressed by hand into thick cream cheese frosting. It is a dessert born of patience, letting the sweet layers cool on a linen tea towel while the warm kitchen air carries the scent of toasted sugar.
Three-Layer Coconut Cream Cake: A Cake Worth the Season
Prep: 35 min · Serves: 12 · Difficulty: Medium
- Rich crumb with sweet coconut flavor
- Tender layers from soft cake flour
- Velvety cream cheese buttercream frosting
- Honest rustic look with shredded coconut
This is the honest, sweet dessert that always makes people linger at my farmhouse table.
When the late summer heat begins to soften into cool evening breezes, my mind turns to baking that feels both celebratory and grounded. This tall, rustic cake is exactly the kind of project that rewards a slow afternoon spent at the wooden counter. It does not demand fussy decorations, but instead invites you to appreciate the rich textures of wholesome baking ingredients. You can easily prepare this sweet dessert using a classic vanilla layer cake method as your foundation, but the addition of coconut milk takes it to a completely different level of comfort.
Every slice tells a story of careful measuring, patient cooling, and simple assembly that values flavor over rigid design. The cracked tops of the baked sponge disappear beneath a generous spread of homemade frosting, creating a finish that is beautifully imperfect. This cake represents the very best of farmhouse baking, where the ingredients are allowed to speak for themselves without being masked by heavy ornament.
Get The Full Cake Recipe
Print
Three-Layer Coconut Cream Cake
- Total Time: 2 hours
- Yield: 12 servings
Description
This tall, rustic cake features tender, airy layers infused with rich coconut milk and finished with a velvety cream cheese buttercream. It is the perfect centerpiece for a slow afternoon, celebrating honest ingredients and simple, classic baking techniques.
Ingredients
- 2 1/2 cups cake flour
- 1 1/2 tsp baking powder
- 1/2 tsp baking soda
- 1/2 tsp fine salt
- 1 cup unsalted butter, softened
- 1 1/2 cups granulated sugar
- 4 large egg whites, room temperature
- 1/2 cup full-fat sour cream
- 1 tsp vanilla extract
- 1 tsp coconut extract
- 1 cup unsweetened canned coconut milk
- 1 1/2 cups sweetened shredded coconut
- 8 oz full-fat brick cream cheese
- 4 cups confectioners’ sugar
Instructions
- Prep pans and oven. Heat oven to 350°F (177°C) and grease three 8-inch round cake pans, lining the bottoms with parchment paper.
- Whisk dry ingredients. Combine cake flour, baking powder, baking soda, and salt in a large bowl, whisking until thoroughly blended.
- Cream butter and sugar. Beat the softened butter and granulated sugar on medium-high speed for two minutes until light and fluffy, scraping the bowl as needed.
- Add wet ingredients. Mix in the room-temperature egg whites, sour cream, vanilla extract, and coconut extract until combined.
- Combine and bake. Alternate adding dry ingredients and coconut milk to the batter, then fold in shredded coconut; divide between pans and bake for 21 to 24 minutes.
- Cool the layers. Let the cakes rest in pans on a wire rack for one hour before inverting and peeling off the parchment paper to cool completely.
- Make the frosting. Beat softened butter and cream cheese until smooth, then gradually incorporate confectioners’ sugar, coconut milk, and extracts until fluffy.
- Assemble the cake. Level the cooled cakes, stack them with layers of frosting in between, and coat the exterior with the remaining frosting.
- Add coconut coating. Press shredded coconut over the surface of the frosted cake and chill for twenty minutes to set before slicing.
Notes
- Ensure all dairy and egg components are at room temperature to prevent the batter from curdling.
- Use a kitchen scale for measuring flour to avoid the excess density caused by packing flour into a measuring cup.
- Keep a pitcher of hot water nearby to dip and clean your knife between slices for cleaner presentations.
- If the buttercream becomes too soft, chill the mixing bowl for fifteen minutes before whipping it again to restore stability.
- Prep Time: 35 mins
- Cook Time: 25 mins
- Category: Dessert
- Method: Baking
- Cuisine: American
Honest Ingredients

Before we begin mixing, we must gather ingredients that are at their natural peak of quality. Choosing the right fats, flours, and dairy products makes certain that our crumb is tender and our frosting is thick enough to hold the weight of three rich layers.
- Cake Flour: This flour is milled very finely, which gives our sponge a delicate, soft crumb that holds its shape beautifully.
- Unsalted Butter: Using high-quality cultured butter that has softened slowly on the kitchen counter provides the rich fat base for our layers.
- Egg Whites: Fresh egg whites are essential for keeping the cake light and airy, avoiding the heaviness that whole eggs sometimes bring.
- Sour Cream: Adding thick, full-fat sour cream introduces a gentle tang and remarkable moisture that keeps the baked sponge from drying out.
- Unsweetened Canned Coconut Milk: This cooking ingredient is rich and thick, quite different from the thin beverages found in cartons.
- Sweetened Shredded Coconut: We fold these moist flakes directly into the batter and use them to coat the outside of the frosted layers for a beautiful rustic finish.
- Full-Fat Brick Cream Cheese: The brick variety is necessary for a sturdy, tangy frosting that will not slip or become runny between the layers.
| Ingredient | Why It Matters |
|---|---|
| Cake Flour | Creates a tender, delicate crumb structure |
| Egg Whites | Ensures a light, airy, and soft cake texture |
| Sour Cream | Adds deep moisture and a subtle, balancing tang |
| Canned Coconut Milk | Provides a rich, authentic tropical flavor profile |
| Brick Cream Cheese | Gives the rustic buttercream stability and tang |
When sourcing these components, I always suggest looking for unsweetened canned coconut milk, which contains the natural fats necessary for a rich batter. This ingredient is typically found near import goods rather than the dairy aisle, as it is a thick cooking liquid rather than a beverage. Avoid using the refrigerated cartons of coconut milk, as they are mostly water and will make your cake batter far too thin.
The eggs should be separated while they are still cold from the larder, as the yolks part from the whites far more cleanly at lower temperatures. Once separated, let the whites sit on the counter until they reach room temperature before you begin mixing. Warm egg whites whip to a much greater volume, which is the secret to achieving that coveted, cloud-like lift in the oven.
For the outer coating, choosing sweetened shredded coconut is a deliberate choice for texture. These shreds are softer and hold more natural moisture than their unsweetened, desiccated counterparts, which can sometimes feel dusty or dry. If you prefer a finer finish, you can give the flakes a brief pulse in a wooden bowl or food processor before pressing them into the soft frosting.
A Slow, Steady Bake

Step 1: Prep Your Pans and Oven
Begin by heating your oven to 350°F (177°C) so that it reaches a steady, even warmth before the pans are placed inside. Lightly grease three eight-inch round cake pans, then line the bottom of each with a round of kitchen parchment paper. Apply another thin layer of grease over the paper to make certain that the baked layers release cleanly without tearing. This preparation is the best way to prevent your beautiful sponge from sticking to the metal.
Step 2: Whisk the Flour and Dry Ingredients
In a large enamel mixing bowl, combine your measured cake flour, baking powder, baking soda, and fine salt. Use a sturdy metal whisk to blend these dry components thoroughly, making sure that the leavening agents are evenly distributed. This process also aerates the flour, helping to create a lighter, more uniform crumb once the wet ingredients are introduced. Set this dry mixture aside on your wooden workspace while you prepare the butter base.
Step 3: Cream the Butter and Sugar
Fit your electric mixer with the paddle attachment and place the softened unsalted butter and granulated sugar into the bowl. Beat these together on medium-high speed for about two minutes until the mixture looks pale, fluffy, and completely smooth. Be sure to scrape down the sides of the bowl with a flexible rubber spatula to make sure no pockets of sugar remain unblended. This step builds the air pockets that will expand in the heat of the oven.
Step 4: Incorporate the Wet Ingredients
Slowly add the room-temperature egg whites to the creamed butter mixture, beating continuously until they are fully incorporated. Next, blend in the rich sour cream, vanilla extract, and coconut extract until the mixture is uniform. Do not be alarmed if the batter looks slightly curdled at this point, as this is a natural reaction when ingredients of different densities combine. Keep the mixer on low speed as you prepare for the next additions.
Step 5: Bake Your Three-Layer Coconut Cream Cake Layers
With the mixer running on its lowest setting, add the dry ingredients in three parts, alternating with the thick canned coconut milk. Mix only until the flour disappears, then fold in the sweet shredded coconut by hand using a large wooden spoon. Divide the thick batter evenly among your three prepared pans, using a kitchen scale if you want exact accuracy. Bake for twenty-one to twenty-four minutes, or until a clean toothpick inserted into the center of the sponge comes out clean.
Step 6: Cool the Cake Layers Completely
Once the pans are out of the oven, place them on a wire cooling rack to rest for about an hour. Carefully run a thin knife around the edges of each pan, then invert the layers onto the rack and peel away the parchment paper. Allow the baked cakes to cool completely to room temperature before you attempt to apply any frosting. A warm cake will melt the butter in your frosting, causing the layers to slide and tilt.
Step 7: Prepare the Coconut Cream Cheese Buttercream
In a clean mixing bowl, beat the softened butter and brick cream cheese together on medium speed until the mixture is completely smooth. Gradually add the confectioners’ sugar, a cup at a time, along with the two tablespoons of canned coconut milk and both flavor extracts. Increase the speed to high and beat the frosting for three minutes until it is light, fluffy, and holds its shape beautifully. Taste the frosting and add a tiny pinch of salt if you find it too sweet.
Step 8: Assemble and Frost the Cake Layers
Use a long serrated knife to shave a thin layer off the top of each cooled sponge to create flat, level surfaces. Place your first layer onto a plain white plate or a sturdy cake stand, then spread a generous cup of frosting evenly across the top. Stack the second layer on top, cover it with another cup of frosting, and then position the final layer. Use an offset spatula to spread the remaining frosting over the top and sides of the entire cake.
Step 9: Coat with Shredded Coconut and Chill
While the frosting is still soft, gently press the remaining shredded coconut all over the top and sides of the cake. This step can be beautifully messy, so do not worry if some flakes scatter across your workspace. Place the completed cake in the refrigerator for at least twenty minutes before you attempt to slice it. This brief chill helps the cream cheese frosting set, making sure you get neat, clean slices when you serve.
What I’ve Learned at the Counter

Baking a tall, layered dessert requires us to pay close attention to the small details that happen before the pans ever touch the oven. One of the most common issues bakers face is using ingredients that are at different temperatures, which prevents the batter from emulsifying correctly. If your batter looks separated or cold, let the bowl sit in a warm spot for ten minutes before you continue mixing. Taking this extra moment will give your finished sponge a much more uniform, tender crumb that melts in the mouth.
If your cream cheese buttercream becomes soupy and warm while you are mixing, do not panic or add more sugar immediately. This usually happens if your kitchen is warm or if the butter was too soft before you began. Simply place the entire bowl of frosting into the refrigerator for fifteen minutes to let the fats firm up again. Once chilled, give it a quick whip with your mixer, and you will find it returns to a beautiful, spreadable consistency that holds up your layers.
When it comes to cutting clean slices of a tall cake, the temperature of your blade makes a significant difference. I keep a tall pitcher of hot water on the counter and dip my long serrated knife into it before making each cut. Wipe the blade clean with a linen tea towel between slices to prevent crumbs from smearing the clean white frosting. This slow, unhurried practice makes sure that every guest receives a beautiful, honest slice that shows off the three distinct layers.
For those who want to practice their skills on other bakes, you can apply these same structural techniques to a three layer earl grey cake with great success. The secret is always in the patient cooling of the baked sponge, which prevents the frosting from melting. If you rush this step, the heat from the center of the cake will ruin the texture of your buttercream.
Finally, I highly recommend using a kitchen scale to measure your flour rather than relying on a measuring cup. Scooping flour directly from the bag packs it down, which can add up to twenty percent more flour to your batter and result in a heavy, dry cake. Spooning the flour into your cup and leveling it off with a flat edge is a much more reliable method. For more guidance on achieving the ideal bake, you can consult this recipe for classic coconut cake which offers wonderful insights into ingredient ratios.
Frequently Asked Questions
Can I use all-purpose flour instead of cake flour?
While all-purpose flour can be used in a pinch, it will yield a heavier and more compact cake layer. Cake flour has a lower protein content, which is essential for creating the delicate, soft crumb that makes this dessert so light. If you must use all-purpose flour, I recommend replacing two tablespoons of flour from each cup with cornstarch to mimic the texture of cake flour.
What is the difference between cream of coconut and coconut milk?
Cream of coconut is a highly sweetened, thick syrup used primarily for cocktails, while canned coconut milk is unsweetened and has a consistency closer to heavy cream. It is very important not to confuse the two, as using cream of coconut in the batter will make your cake far too sweet and sticky. Always check the label carefully to ensure you are purchasing unsweetened canned coconut milk.
Can I use vegetable oil instead of butter?
You can use vegetable oil, but you will lose the rich, classic butter flavor that defines this traditional farmhouse recipe. Butter also provides structural support when creamed with sugar, which helps the cake rise evenly. If you choose to use oil, your cake may be slightly moister, but the crumb will be noticeably different and less sturdy.
What is the best frosting for coconut cake?
A rich cream cheese frosting is the traditional choice because its slight tang balances the sweetness of the coconut. However, if you prefer a lighter finish, a classic Swiss meringue buttercream or a simple vanilla buttercream works wonderfully. Whichever frosting you choose, make sure it is sturdy enough to support the weight of the three stacked layers.
How do I make the coconut flavor stronger?
The best way to enhance the tropical flavor is to use high-quality coconut extract in both the cake batter and the buttercream frosting. You can also toast the coconut flakes used on the outside of the cake, which releases their natural oils and intensifies their aroma. Avoid adding extra coconut milk to the batter, as this will alter the moisture balance and make the cake heavy.
Should I use sweetened or unsweetened coconut for the outside?
I recommend using sweetened shredded coconut because it contains more moisture and has a softer texture that clings well to the frosting. Unsweetened desiccated coconut can be quite dry and may feel powdery or tough when chewed. If you prefer a less sweet option, you can mix equal parts of sweetened and unsweetened flakes for a balanced finish.
How do I get perfectly flat layers?
To make sure your layers bake evenly without a large dome in the center, you can use fabric cake strips soaked in cold water around the outside of your pans. Alternatively, you can use a long serrated knife to carefully slice off the rounded tops of the cooled cakes before you begin frosting. Slicing the tops also allows the rich frosting to soak slightly into the sponge, making it even more delicious.
How far in advance can I make a coconut cream cake?
You can bake the cake layers and prepare the frosting up to two days before you plan to assemble the dessert. Keep the cooled layers wrapped tightly in plastic wrap at room temperature, and store the frosting in an airtight container in the refrigerator. When you are ready to assemble, let the frosting warm slightly on the counter and give it a quick stir to restore its creamy texture.
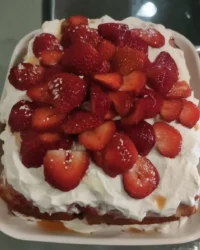
Ways to Adapt It
While the classic coconut profile is a beautiful thing on its own, the seasons offer many opportunities to introduce new flavors to this rustic bake. In the heat of late August, I love to slide a thin layer of fresh, sliced stone fruit or a quick-cooked berry compote between the frosted sponge layers. The bright acidity of summer berries cuts through the rich cream cheese frosting beautifully, offering a lovely balance of flavors. If you enjoy experimenting with tropical fruits, you might also find inspiration in a mango birthday layer cake which pairs wonderfully with similar creamy frostings.
Another wonderful option is to toast the shredded coconut before applying it to the outside of the cake. To do this, spread the flakes in a single layer on a baking sheet and bake at 325°F (163°C) for about five to eight minutes, stirring occasionally. Watch the oven closely, as the natural oils in the coconut can cause it to turn from golden to burnt in a matter of seconds. Toasting the coconut adds a deep, nutty complexity and a pleasant crunch that contrasts beautifully with the soft, cloud-like sponge.
If you prefer a simpler project that does not require stacking multiple layers, you can easily bake this batter in a single sheet pan. Grease a nine-by-thirteen-inch baking pan and spread the batter evenly inside, then bake for about forty minutes. Once cooled, cover the top with a thick layer of the cream cheese frosting and a generous handful of coconut flakes. This rustic sheet cake is perfect for carrying to a backyard gathering or a neighborhood potluck where easy slicing is key.
Bringing It to the Table
This tall, rustic cake is best served on a plain white plate where its simple beauty can take center stage. I love to carry it to the table at the end of a long, unhurried summer dinner when the twilight is beginning to fade. Because the cake is rich and sweet, it pairs beautifully with a pot of strong, unsweetened black tea or a French press of dark roast coffee. The bitter notes of the coffee cut through the sweetness of the coconut and cream cheese, cleansing the palate between each bite.
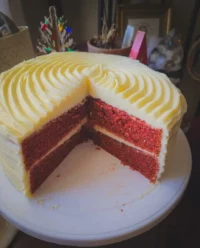
For a truly special occasion, you can serve this dessert alongside a bowl of fresh, unsweetened berries like blackberries or raspberries. The bright red and purple fruits look beautiful against the snowy white coconut flakes and add a refreshing acidity to the dessert plate. If you are hosting a larger gathering and want to offer a variety of options, this cake sits wonderfully next to a red velvet layer cake for a striking contrast of colors and flavors on your sideboard.
Always allow the cake to sit at room temperature for about fifteen minutes before serving if it has been stored in the refrigerator. This brief rest allows the butter in the cake and the cream cheese in the frosting to soften slightly, restoring the tender crumb and velvety mouthfeel. Use a sharp, warm knife to cut clean slices, and do not worry if a few coconut flakes tumble onto the table—that is all part of the rustic charm.

The Quiet Goodbye
There is a deep satisfaction in sharing a handmade dessert that relies on simple, honest ingredients rather than complicated techniques. This three-layer cake is a reminder that the best bakes are often the ones that look a little imperfect, with coconut flakes falling where they may. It is a cake designed for lingering over, for second helpings, and for quiet conversations around the farmhouse table as the evening winds down. If you find yourself enjoying the process of building layered bakes, you might also want to try your hand at a classic three layer italian cream cake for your next weekend project.
I hope this recipe brings a sense of warmth and slow, steady comfort to your kitchen this season. Take your time with the steps, let the butter soften naturally on your counter, and enjoy the simple craft of baking from scratch. When your cake is complete, I would love for you to share your rustic creation with me and our community of home bakers.
You can find more seasonal inspiration and connect with other bakers by visiting our pages on Pinterest and Facebook. We often share stories from the kitchen garden, tips for sourcing the best market produce, and photos of our favorite imperfect bakes. Let us keep the spirit of farmhouse baking alive, one slow and honest cake at a time.


