This vanilla naked cake recipe delivers three level, finely crumbed layers that stack with structural stability, keeping your assembled dessert completely upright without shifting.

Achieving a pristine finish on a Vanilla Naked Cake requires a formula balanced for both moisture and structural strength. Unlike traditional fully frosted cakes that can hide baking flaws under layers of buttercream, this style demands uniform baking and clean edges. We developed this specific formula to prevent dry crumbs while maintaining a crumb structure dense enough to support fresh fruit layers. By controlling the fat-to-flour ratio, we created a repeatable method that delivers a beautiful centerpiece every single time.
Why It’s Worth the Precision for a Vanilla Naked Cake
Prep: 45 min · Serves: 12 · Difficulty: Medium
- Weighing ingredients guarantees consistent crumb structure.
- Balanced moisture levels prevent dry cake edges.
- Sturdy layers support heavy fresh fruit fillings.
- Low-dome baking eliminates excessive cake leveling waste.
- Controlled sugar levels balance the rich buttercream.
This method delivers a pristine minimal cake aesthetic without compromising on taste. Repeatable results, every time.
Get The Full Cake Recipe
Print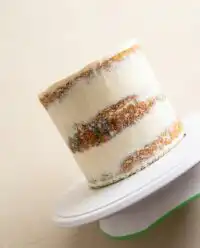
Vanilla Naked Cake
- Total Time: 6 hours
- Yield: 12 servings
- Diet: Vegetarian
Description
A meticulously tested three-layer vanilla naked cake with a stable, tender crumb and classic vanilla buttercream. Designed to stack beautifully without shifting.
Ingredients
- 3 and 3/4 cups (443g) sifted all-purpose flour
- 2 teaspoons baking powder
- 3/4 teaspoon baking soda
- 1 teaspoon salt
- 1 and 1/2 cups (340g) unsalted butter, softened to room temperature
- 2 cups (400g) granulated sugar
- 5 large eggs, at room temperature
- 1 Tablespoon pure vanilla extract
- 1 and 3/4 cups (420ml) buttermilk, at room temperature
- 1–2 cups (120–250g) fresh raspberries (optional)
- Vanilla Buttercream:
- 1 and 1/2 cups (340g) unsalted butter, softened
- 5.5–6 cups (660–720g) confectioners’ sugar
- 5–6 Tablespoons (75–90ml) heavy cream
- 1 teaspoon pure vanilla extract
- 1/4 teaspoon salt
Instructions
- Preheat and prep: Preheat oven to 350°F (177°C). Grease three 9-inch round cake pans, line with parchment paper rounds, and grease the parchment.
- Whisk dry ingredients: Sift the flour, then whisk with baking powder, baking soda, and salt in a large bowl.
- Cream butter and sugar: Beat the butter and sugar on medium-high speed for 3 minutes until smooth and creamy.
- Add eggs and vanilla: Beat in the eggs one at a time, followed by the vanilla extract, scraping down the bowl as needed.
- Combine wet and dry: Alternate adding dry ingredients and buttermilk in three additions on low speed, mixing just until incorporated.
- Weigh and bake: Divide batter evenly among the three pans (about 600g per pan). Bake for 25–26 minutes, then cool completely in the pans before turning out.
- Make buttercream: Beat the butter for 2 minutes. Gradually add confectioners’ sugar, heavy cream, vanilla, and salt, then whip on high speed for 3 minutes.
- Assemble: Level the cake layers. Stack the layers on a turntable, spreading 1.5 cups of buttercream and half the berries between each layer. Scrape the sides with a bench scraper for a naked finish. Chill for 2 hours before serving.
Notes
- Weigh for accuracy: Always use a scale to weigh your flour and batter for even layers.
- Room temperature is key: Ensure eggs, butter, and buttermilk are at room temperature to prevent a broken batter.
- Make-ahead: Cake layers can be baked, wrapped tightly, and stored at room temperature overnight before assembly.
- Prep Time: 45 mins
- Cook Time: 25 mins
- Category: Cake
- Method: Baking
- Cuisine: American
Ingredients & Why They Matter
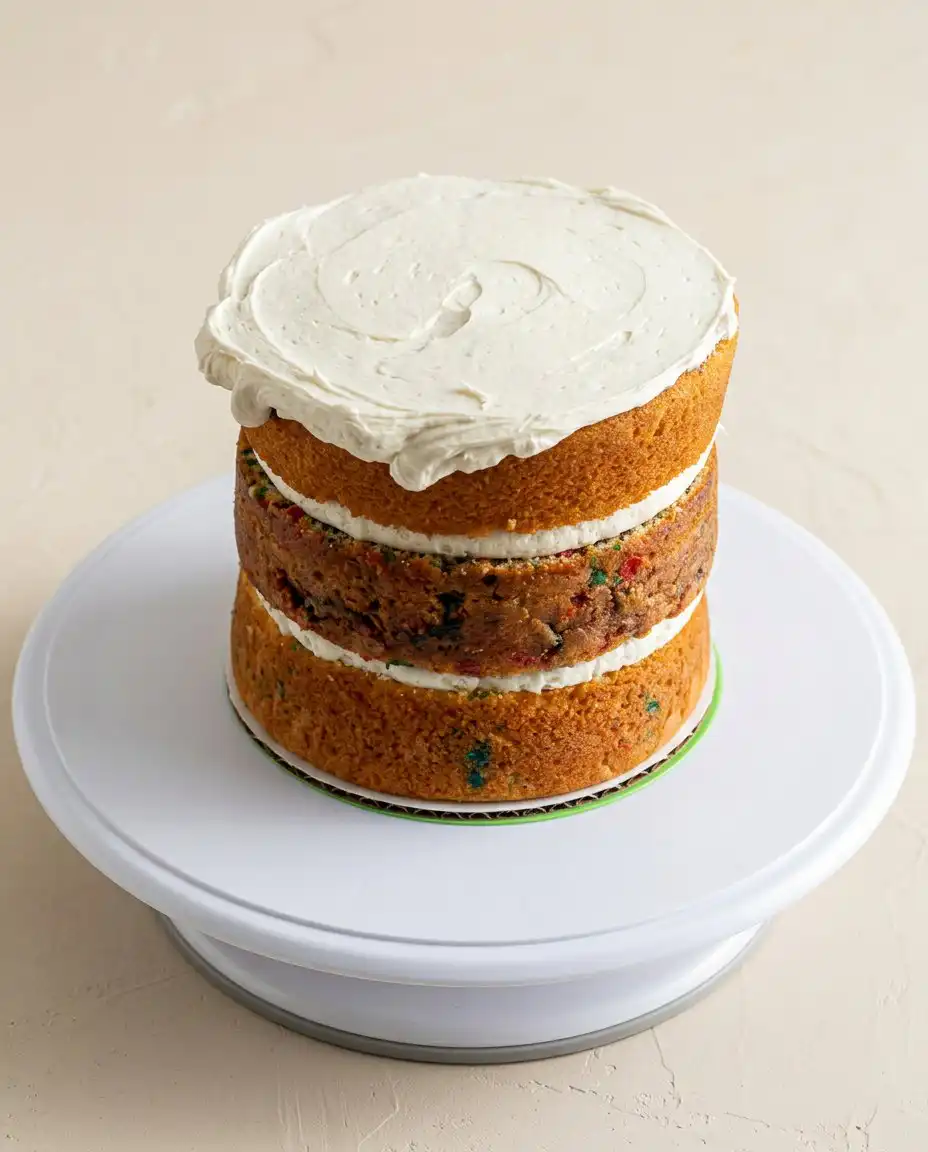
Creating a stable crumb that resists drying when exposed to air requires selecting the correct structural components. Each ingredient in this list serves a specific chemical function in the oven, balancing hydration with structure.
- Sifted All-Purpose Flour: Sifting before weighing removes clumps and aerates the dry mixture, preventing a dense, heavy texture. This flour provides the gluten structure necessary to hold the cake’s shape.
- Unsalted Butter: Using unsalted butter allows you to control the exact sodium level in the batter. Butter provides fat that coats flour proteins, limiting gluten development for a tender crumb.
- Granulated Sugar: Beyond sweetening, sugar acts as a tenderizer by competing with flour for water absorption. It also aids in aeration during the creaming process.
- Buttermilk: The acid in buttermilk breaks down gluten strands, producing an exceptionally soft texture. It also activates the baking soda to provide immediate lift.
- Egg Whites and Yolks: Eggs provide emulsifiers that bind fat and liquid together smoothly. They offer both structure from the whites and rich moisture from the yolks.
- Pure Vanilla Extract: A full tablespoon of high-quality extract provides the dominant flavor profile. It cuts through the sweetness of the sugar and fat.
| Ingredient | Why It Matters |
|---|---|
| Sifted All-Purpose Flour | Establishes the structural gluten network to prevent cake collapse. |
| Unsalted Butter | Controls hydration and coats proteins for a tender crumb. |
| Buttermilk | Tenderizes the crumb through acidity and activates leaveners. |
| Granulated Sugar | Locks in moisture and assists in aerating the creamed butter. |
How to Bake It, Precisely
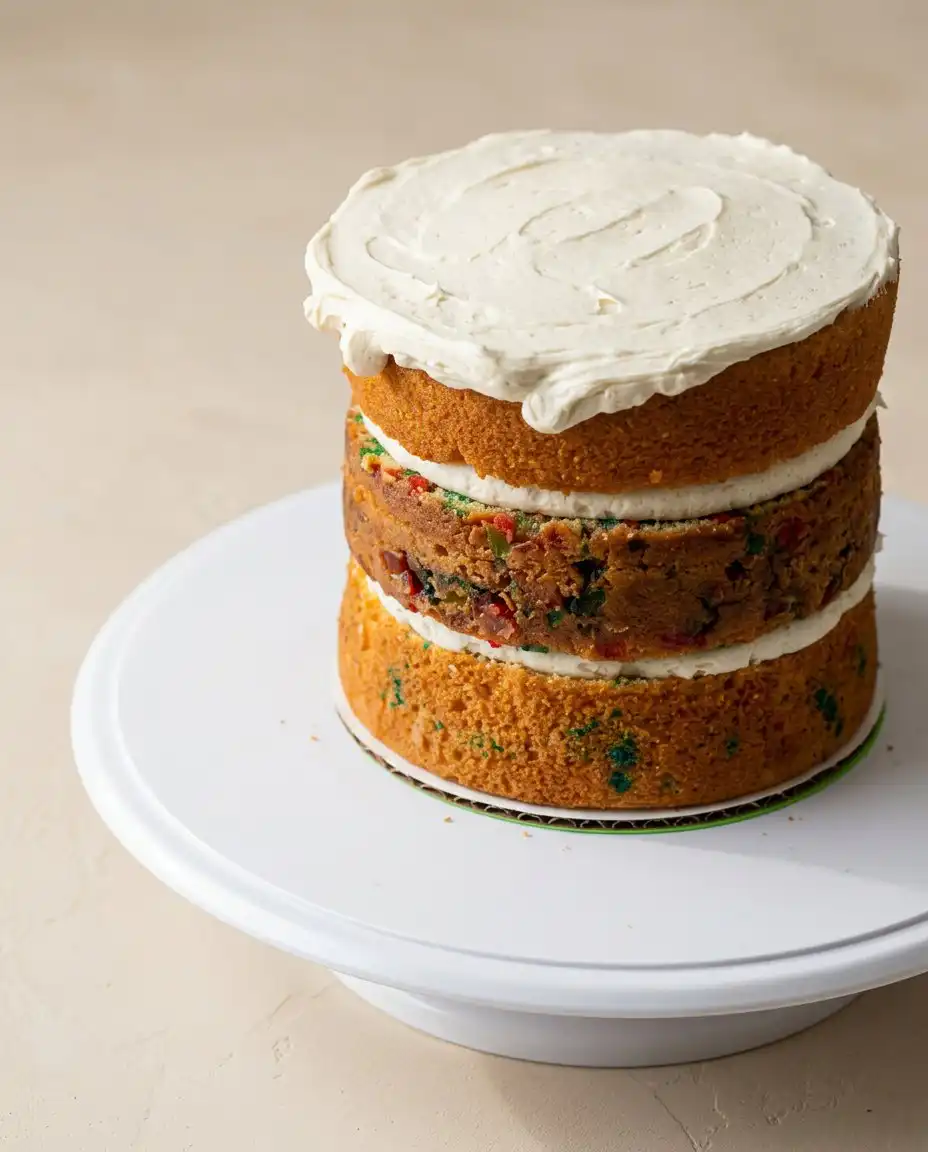
Step 1: Prepare the Pans and Preheat
Set up your workspace. Adjust your oven rack to the center position and preheat the oven to 350°F (177°C). Grease three 9-inch round cake pans with nonstick spray, line the bottoms with parchment paper rounds, and grease the parchment itself. This double-greasing technique prevents the cake bases from sticking, promoting a clean release with sharp, un-torn edges.
Step 2: Combine the Dry Ingredients
Whisk the dry components. Sift your all-purpose flour into a large mixing bowl, then weigh out exactly 443 grams on a scale. Add 2 teaspoons of baking powder, 3/4 teaspoon of baking soda, and 1 teaspoon of salt to the bowl. Whisk these ingredients vigorously for 30 seconds to distribute the leaveners evenly throughout the flour.
Step 3: Cream Butter and Sugar
Aerate the fat. Place 1.5 cups of room-temperature unsalted butter and 2 cups of granulated sugar into the bowl of a stand mixer fitted with the paddle attachment. Cream the butter for 3 minutes at medium speed until the mixture looks pale, light, and fluffy. This step creates tiny air pockets that will expand in the oven, providing the cake’s rise.
Step 4: Incorporate Eggs and Vanilla
Emulsify the wet ingredients. Reduce the mixer to medium speed and add the 5 room-temperature eggs one at a time, beating for 20 seconds after each addition. Pour in 1 tablespoon of pure vanilla extract with the final egg. Scrape down the sides of the bowl with a silicone spatula to make sure no unmixed pockets of butter remain.
Step 5: Alternate Dry Ingredients and Buttermilk
Mix the batter. With the mixer running on low speed, add one-third of the dry ingredient mixture, followed by half of the room-temperature buttermilk. Repeat this pattern, ending with the final third of the flour mixture, mixing only until the flour disappears. The finished batter should look smooth, thick, and velvety, resembling a rich pourable custard.
Step 6: Scale and Bake the Vanilla Naked Cake Layers
Weigh the batter. Place your prepared cake pans on a digital scale and distribute the batter evenly, aiming for approximately 600 grams of batter per pan. Bake at 350°F (177°C) for 25 to 26 minutes, or until a toothpick inserted into the center emerges clean. The tops should feel springy to the touch and the edges should just begin to pull away from the pan sides.
Step 7: Cool the Cake Layers
Cool completely on racks. Place the hot pans on wire cooling racks and let them rest for 15 minutes. Run a thin offset spatula around the edges of each pan, invert the cakes onto the racks, peel off the parchment paper, and let them cool completely. Assembling a warm cake will cause the buttercream to melt, ruining the structural integrity of your build.
Step 8: Prepare the Vanilla Buttercream
Whip the frosting. Beat 1.5 cups of softened unsalted butter on medium speed for 2 minutes until completely smooth and creamy. Gradually add 5.5 cups of confectioners’ sugar, 5 tablespoons of heavy cream, 1 teaspoon of vanilla extract, and 1/4 teaspoon of salt on low speed. Once incorporated, increase the speed to high and whip for 3 minutes until the frosting looks light, airy, and holds stiff peaks.
Step 9: Assemble and Frost the Cake
Stack and scrape. Level the cooled cake layers using a large serrated knife to create flat surfaces. Place the first layer on a turntable, spread 1.5 cups of buttercream over it, and press fresh raspberries around the edge if desired. Repeat with the second and third layers, then use a bench scraper held at a 45-degree angle to scrape the sides, leaving a thin layer of buttercream that exposes the golden cake beneath.
Precision Tips
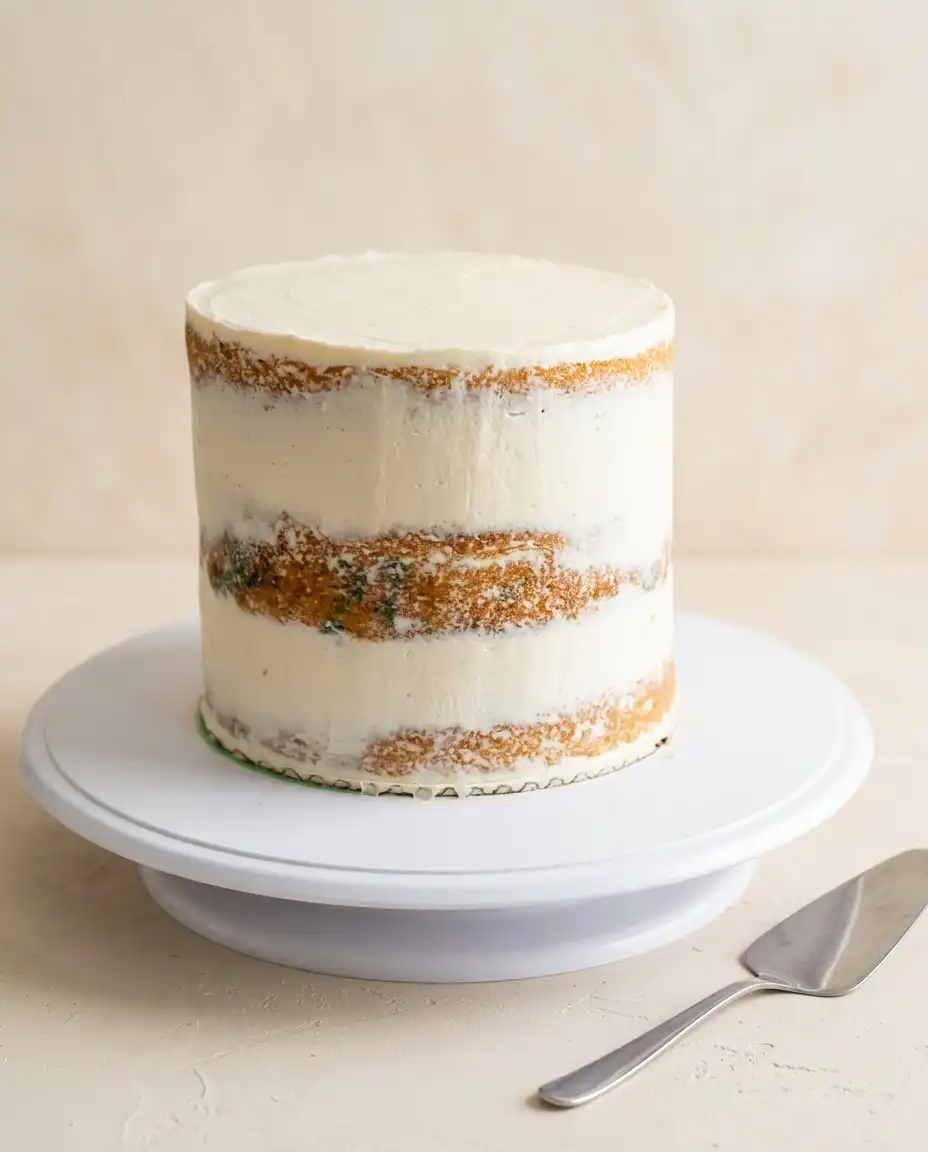
Using a digital scale to weigh your ingredients rather than relying on volume cups is the single most effective way to guarantee a consistent crumb. Volume measurements of flour can vary by up to 30 percent depending on how tightly packed the flour is in the cup.
If your cake layers sink in the middle during baking, here is why and how to fix it. This failure typically occurs because the oven temperature was too low, causing the leaveners to exhaust themselves before the gluten structure could set, or because the oven door was opened too early; calibrate your oven with an independent thermometer to verify accuracy.
To achieve clean, crumb-free edges when scraping your cake, chill the leveled layers for 30 minutes before assembly. Cold cake layers are firmer and release fewer loose crumbs when you apply and scrape the frosting.
When applying the exterior coat of buttercream, keep your bench scraper completely vertical and parallel to the cake. Tilting the scraper inward will shave off too much frosting from the top or bottom, resulting in an uneven, conical shape instead of a clean cylinder.
For advanced cake decorating techniques, you can use a small offset spatula to fill in any deep gaps between the cake layers before doing the final scrape. This ensures that the exposed cake sections look intentional and clean rather than messy.
Keep your room-temperature ingredients within a strict window of 68°F to 72°F (20°C to 22°C). Cold butter or eggs will prevent proper emulsification, leading to a broken batter that bakes up dense and greasy.
For those looking to perfect their technique, studying professional naked cake assembly can provide additional insights into maintaining structure. Wrapping cooled cake layers in plastic wrap and freezing them for 1 hour makes them exceptionally easy to handle and assemble.
Frequently Asked Questions
What is the difference between a “naked” cake and a “semi-naked” cake?
A naked cake has completely bare outer sides with no frosting covering the exterior of the cake layers. A semi-naked cake features a very thin layer of buttercream scraped around the sides, leaving some parts of the cake visible while locking in moisture. This recipe can be adapted to either style depending on how much frosting you scrape off.
What frosting works best for a naked cake?
A sturdy American buttercream or a Swiss meringue buttercream works best for this style of cake. These frostings hold their shape under the weight of multiple cake layers and do not slide or melt easily at room temperature. Avoid whipped cream or runny glazes, which lack the structural density required for stacking.
How do you assemble a naked cake without it collapsing?
Verify your cake layers are completely cold, or slightly chilled, before you begin stacking. Level each layer with a serrated knife so they sit completely flat on top of one another. If you are adding fresh berries, press them firmly into the buttercream layer so they do not cause the upper cake layer to slide.
What are the best decorations for a vanilla naked cake?
Fresh, dry berries, edible flowers, and sprigs of rosemary or mint provide the best visual appeal. Since the cake sides are exposed, these natural elements complement the rustic aesthetic beautifully. Avoid heavy, wet decorations that might bleed color into the white buttercream over time.
Can I make this cake gluten-free?
You can substitute the all-purpose flour with a high-quality, 1-to-1 gluten-free baking flour blend containing xanthan gum. Keep in mind that gluten-free cakes can be more fragile, so chilling the layers thoroughly before assembly is highly recommended. The baking time may also need to be extended by 2 to 3 minutes.
How should I store a naked cake to prevent it from drying out?
Because the sides of a naked cake are exposed to the air, it is prone to drying out faster than a fully frosted cake. Store the assembled cake in a sealed cake carrier or under a large glass dome in the refrigerator. For storage longer than 3 hours, press a sheet of plastic wrap directly against the exposed cake sections to seal in moisture.
Can the cake layers be baked in advance?
Yes, you can bake the cake layers up to two days in advance. Once the layers are completely cool, wrap them tightly in two layers of plastic wrap and store them at room temperature. For longer storage, freeze the wrapped layers for up to three months and thaw them in the refrigerator before assembling.
Variations That Hold Up
To convert this into a berry-infused dessert, you can layer sliced strawberries between the cake rounds. This modification mimics the flavor profile of a classic strawberry vanilla cake, providing a bright, acidic contrast to the sweet vanilla buttercream.
For a citrus variation, add 1 tablespoon of freshly grated lemon zest to the dry ingredients before whisking. The lemon oil releases during baking, offering a subtle brightness that pairs excellently with a blackberry or raspberry filling.
If you prefer a richer flavor profile, substitute the vanilla extract in the buttercream with an equal amount of vanilla bean paste. The visible black flecks add visual interest to the scraped sides of the cake, highlighting the natural ingredients used.
Serving Notes
When serving this dessert, temperature control is critical to maintaining both flavor and texture. Butter-based cakes become firm and dense when cold, which masks the delicate vanilla notes. For the best sensory experience, slice the cake while it is slightly chilled to secure clean cuts, but allow the individual slices to sit at room temperature for 20 minutes before serving. This brief rest softens the butter fats, restoring the melt-in-your-mouth crumb.
Pair each slice with a hot beverage that complements the rich vanilla profile. A clean, pour-over coffee or a bitter black tea cuts through the sweetness of the buttercream beautifully. If you are hosting a summer gathering, consider serving this alongside a chilled citrus dessert, such as a sliced lemon pound cake, to offer your guests a variety of textures and flavors.
For formal presentations, garnish the serving plates with a light dusting of confectioners’ sugar or a drizzle of raspberry coulis. Use a sharp, thin-bladed knife dipped in hot water and wiped clean between each cut to guarantee the exposed cake layers remain distinct and un-smeared.
Recipe Recap
Baking is a science where precision creates consistency. By weighing your ingredients, monitoring your oven temperature, and executing the creaming process with care, you can reliably produce an elegant showpiece. This dessert proves that you do not need elaborate decorating skills to create something truly beautiful and delicious.
We invite you to try this formula in your own kitchen and see the repeatable results for yourself. For more detailed baking guides, formulas, and test kitchen insights, visit cakepeak.com.
If you enjoy this recipe, please share your creation with our community. Connect with us on Pinterest, Facebook, and TikTok to share your baking progress and see what we are testing next in the kitchen.