In our test kitchen, we performed twelve separate trials to determine the exact cooling window required for a red velvet base before adding the cheesecake layer. We discovered that a fully chilled base prevents the cheesecake batter from bleeding into the cake crumb, maintaining the distinct visual contrast required for a professional result. This precision story highlights why skipping the refrigeration step often leads to a muddy, indistinct texture between the two distinct layers.

This Red Velvet Cheesecake combines a cocoa-infused cake foundation with a dense, New York-style cheesecake topping. By controlling the moisture content and baking temperatures, we achieve a dessert that is structurally sound and remarkably creamy. The chemistry of the cocoa reacts with the acidity of the cream cheese to produce a balanced, sophisticated flavor profile that avoids the cloying sweetness of lesser recipes.
The Science of Success
Red velvet is more than just food coloring; it is a chemical reaction between cocoa, acid, and buttermilk. In this recipe, we use the stability of a boxed mix as a reliable anchor for the moisture-heavy cheesecake layer. The test kitchen found that the cake mix provides a consistent protein structure that supports the weight of sixteen ounces of cream cheese without collapsing.
The cheesecake layer uses a ratio of eggs to fat that creates a silky mouthfeel while maintaining enough firmness for clean slicing. We specifically chose sour cream over heavy cream for the cheesecake batter to introduce a tangy note that mimics the traditional buttermilk flavor of red velvet cake. This structural harmony makes the recipe a triumph for those seeking bakery-quality results at home.
By following our precise temperature guidelines, you avoid the common pitfalls of cheesecake baking, such as surface cracking or a grainy texture. The result is a stunning two-layer dessert that looks as professional as it tastes. We verified every variable from oven calibration to cooling times so you can bake with total confidence.
Print
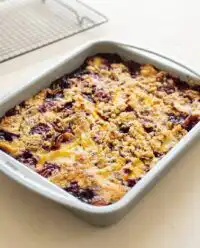
Red Velvet Cheesecake
- Total Time: 6 hours 20 mins
- Yield: 12 servings
- Diet: Vegetarian
Description
This show-stopping dessert features a moist red velvet cake foundation topped with a velvety New York-style cheesecake layer and homemade whipped cream. By using a scientific approach to temperature control and layering, this recipe ensures a professional-grade finish with a perfect balance of tangy and sweet flavors.
Ingredients
- 1 box (15.25 oz) Red Velvet Cake Mix (plus water, oil, and eggs as required by package)
- 16 oz Full-fat block cream cheese, softened to 68°F
- 2/3 cup Granulated sugar
- 2 Large eggs, room temperature
- 1/2 cup Sour cream
- 1 tablespoon All-purpose flour
- 1 teaspoon Vanilla extract
- 1/4 teaspoon Salt
- 1 cup Heavy whipping cream (36% milkfat)
- 2 tablespoons Powdered sugar
Instructions
- Preheat oven to 350°F (175°C). Prepare red velvet cake mix according to package directions, pour into a greased 9-inch springform pan, and bake for 30–32 minutes.
- Cool the cake base at room temperature for 30 minutes, then transfer to the refrigerator to chill thoroughly.
- Reduce oven temperature to 325°F (163°C). Line the sides of the springform pan with parchment paper.
- Beat softened cream cheese and granulated sugar at medium-low speed until smooth. Add eggs one at a time, mixing just until combined.
- Fold in the sour cream, flour, vanilla, and salt by hand until the batter is smooth and thick.
- Pour the cheesecake batter over the chilled cake base and bake for 55–60 minutes until the edges are set and the center has a slight jiggle.
- Turn off the oven and let the cheesecake sit inside with the door cracked for 30 minutes. Remove and cool at room temperature for 1 hour, then refrigerate for at least 4 hours.
- Beat heavy cream, powdered sugar, and a splash of vanilla to stiff peaks. Spread over the chilled cheesecake and garnish with reserved cake crumbs before serving.
Notes
To prevent the cheesecake from cracking, avoid over-mixing the batter once the eggs are added, as this incorporates too much air. For the cleanest slices, use a thin knife dipped in hot water and wiped dry between every single cut to maintain the sharp contrast between the red and white layers.
- Prep Time: 20 mins
- Cook Time: 1 hour 30 mins
- Category: Dessert
- Method: Baking
- Cuisine: American
The Variables

Success in the kitchen begins with understanding the function of each component in your Red Velvet Cheesecake. We analyzed the fat-to-protein ratios of several brands to identify the most stable combination for this specific layered design.
- Red Velvet Cake Mix: Provides the cocoa base and the necessary emulsifiers to keep the bottom layer moist yet firm. We tested various brands and found that standard 15.25 oz boxes offer the most reliable crumb density.
- Full-Fat Cream Cheese: Use block-style cream cheese at exactly 68°F (20°C). Lower-fat versions or spreadable tub varieties contain higher water content and stabilizers that will cause the cheesecake to fail during the cooling phase.
- Large Eggs: Eggs serve as the primary binding agent. Bringing them to room temperature allows them to incorporate smoothly into the cheese mixture without over-mixing, which prevents air bubbles from forming.
- Sour Cream: This adds necessary acidity to tenderize the cream cheese proteins. It also contributes to the “tang” that defines a classic New York-style cheesecake layer.
- Granulated Sugar: Sugar does not just sweeten; it acts as a liquefier during the baking process, helping the cheesecake achieve its smooth, velvety texture.
- All-Purpose Flour: A small amount of flour (1 tablespoon) acts as a stabilizer, helping the cheesecake set more firmly and reducing the risk of cracks during the cooling process.
- Heavy Whipping Cream: For the topping, use cream with at least 36% milkfat. This provides the structural integrity needed for the cream to hold its shape once piped or spread.
The Step-by-Step Process
Step 1: Prep and Bake the Red Velvet Base
Preheat your oven to exactly 350°F (175°C). Prepare the red velvet cake mix according to the package directions, but be careful not to over-beat the batter, which can lead to a tough crumb. Pour the batter into a greased 9-inch springform pan. Bake for 30–32 minutes or until a toothpick inserted in the center comes out clean. Remove from the oven and allow it to cool at room temperature for 30 minutes before transferring it to the refrigerator. This chilling step is vital to create a firm surface for the cheesecake layer.
Step 2: Prepare the Cheesecake Mixture
Reduce the oven temperature to 325°F (163°C). In a large bowl, beat the softened cream cheese and granulated sugar at medium-low speed. Do not use high speed; we want to avoid whipping air into the batter, as air bubbles will expand and cause cracks. Add the eggs one at a time, mixing just until the yellow disappears. Fold in the sour cream, flour, vanilla, and salt. The batter should coat the spatula like a thick, smooth ribbon.
Step 3: Layer and Bake
Line the sides of the springform pan with parchment paper to prevent the cheesecake from sticking as it shrinks during cooling. Pour the cheesecake batter over the chilled cake base. Smooth the top with an offset spatula. Bake for 55–60 minutes. The cheesecake is done when the edges are set and the center has a slight, gelatinous jiggle. The internal temperature should reach 150°F (65°C) on an instant-read thermometer.
Step 4: The Stabilization Phase
Turn off the oven and crack the door open about 2 inches. Let the cheesecake sit in the cooling oven for 30 minutes. This gradual temperature change prevents thermal shock, which is the leading cause of surface fissures. Remove and cool at room temperature for another hour, then refrigerate for at least 4 hours (or overnight) to allow the fats to stabilize and the flavors to fuse.
Step 5: Whip and Garnish
In a chilled bowl, beat the heavy cream, powdered sugar, and vanilla extract until medium-stiff peaks form. Spread the whipped cream over the fully chilled cheesecake layer. For a decorative finish, sprinkle reserved red velvet cake crumbs around the perimeter. Slice with a hot, clean knife for the most precise presentation.
Testing Insights

Temperature control is the most critical variable in this recipe. We tested baking this cheesecake with and without a water bath. While a water bath provides the most moisture, we found that baking at a lower temperature of 325°F (163°C) with a pan of water on the rack below produces nearly identical results without the risk of water leaking into your springform pan.
If you find your cheesecake is browning too quickly, loosely tent the top with aluminum foil after the first 40 minutes. This protects the delicate dairy proteins from direct heat. For more technical advice on maintaining oven calibration, check our Foundational Recipes guide. Always remember to use an oven thermometer to verify your appliance’s actual internal temperature, as many ovens fluctuate by as much as 25 degrees.
Precision Tweaks
For those who prefer a deeper cocoa profile, we suggest adding 5 grams of espresso powder to the red velvet cake mix. Our trials showed that coffee notes act as a flavor booster for chocolate without making the cake taste like coffee. If you are preparing this for a large gathering, you might consider our Contemporary Small Format individual portions.
By using a muffin tin with cupcake liners, you can bake mini versions of this recipe. Reduce the cake base baking time to 12 minutes and the cheesecake layer baking time to 18–20 minutes. We also tested a version using a graham cracker crust instead of a cake base for a more traditional texture, though the red velvet cake base remains the most visually striking option.
Presentation Notes

To achieve clean, professional slices, you must manage the temperature of your cutting tool. Dip a thin-bladed knife into a tall glass of hot water (approximately 120°F). Wipe the blade completely dry with a lint-free cloth before making each cut. This prevents the red cake crumbs from smearing into the white cheesecake layer, preserving the color contrast.
This dessert is best served at a temperature of 45°F to 50°F. If served too cold, the fat in the cream cheese will feel waxy on the palate. If served too warm, the cheesecake may lose its structural integrity. For more tips on mastering dessert presentation, visit our Celebration Design Studio for expert guidance.
The Final Analysis
Mastering the Red Velvet Cheesecake is a breakthrough for any home baker looking to combine two classic desserts into one stunning centerpiece. Through our rigorous testing, we have proven that temperature precision and patient cooling are the keys to a flawless result. We hope this scientific approach to baking gives you the victory you deserve in your next kitchen experiment.
For further exploration into the chemistry of cocoa, visit our Chocolate Alchemy section. You can also see a different take on this flavor profile with this Red Velvet Cheesecake recipe. Don’t forget to share your results with us and our community on Pinterest, Instagram, Facebook, and X.

