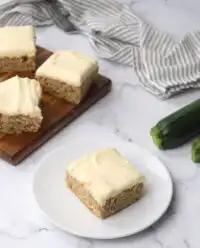
This structured recipe guarantees a reliable, repeatable outcome, producing a Chocolate Rosette Cake with a highly stable mousse frosting and an exceptionally tender crumb structure every single time.

Achieving a pristine Chocolate Rosette Cake requires more than standard culinary intuition; it demands an understanding of moisture retention and fat-to-liquid ratios. Our rigorous testing protocol analyzed how varying levels of cocoa acidity and liquid temperature affect gluten development. By introducing boiling liquid, we fully bloom the starch in the cocoa powder, which yields a crumb that is soft yet structurally sound. This guide translates those test kitchen results into a repeatable process for the meticulous home baker.
Why It’s Worth the Precision
Prep: 45 min · Serves: 14 · Difficulty: Advanced
- Exact flour weight guarantees a delicate crumb structure.
- Blooming cocoa powder yields deep chocolate flavor expression.
- Gelatin stabilization prevents the mousse from weeping over time.
- Explicit piping angles secure stable, uniform chocolate roses.
- Comprehensive testing delivers consistent, predictable results every time.
Developing a cake decorating routine with this scientific method ensures your presentation matches your technical baking standards.
Get The Full Cake Recipe
Print
Chocolate Rosette Cake
- Total Time: 1 hour 25 mins
- Yield: 14 servings
Description
Master the art of high-stability pastry with this professional-grade Chocolate Rosette Cake. This recipe features a tender, cocoa-bloomed crumb paired with a precision-stabilized chocolate mousse for perfect, lasting piping results.
Ingredients
- 220g All-Purpose Flour
- 90g Unsweetened Cocoa Powder
- 12g Baking Soda
- 240g Buttermilk
- 240ml Hot Coffee
- 460g Semisweet Chocolate
- 10g Gelatin Powder
Instructions
- Calibrate and prep. Preheat your oven to 350°F (180°C) and prepare two 9-inch round cake pans with butter, flour, and parchment paper rounds.
Notes
- Use a digital scale for dry ingredients to ensure the delicate crumb structure remains consistent.
- Ensure the chocolate mousse base is between 65°F and 68°F before folding to prevent melting or premature setting.
- Sprinkle gelatin evenly over cold liquid to allow for proper hydration and prevent lumps.
- Chill both the cake and the piping bag if the rosettes lose definition during assembly.
- Slice the finished cake using a warm, clean knife to maintain sharp, professional lines in the layers.
- Prep Time: 45 mins
- Cook Time: 40 mins
- Category: Dessert
- Method: Baking
- Cuisine: Modern American
The Working Components

Every ingredient in this formula serves a distinct chemical function to balance structure, moisture, and aeration. Substituting any element alters the hydration level and threatens the stability of the baked cake or the piping consistency of the chocolate mousse frosting.
- All-Purpose Flour (220g): Provides the baseline gluten framework to support the high liquid volume without becoming dense or tough.
- Unsweetened Cocoa Powder (90g): Introduces intense chocolate flavor while modifying the acidity of the batter for proper leavening activation.
- Baking Soda (12g): Reacts instantly with the acidic buttermilk to release carbon dioxide, creating uniform pockets of air.
- Hot Coffee (240ml): Dissolves and blooms the cocoa powder, releasing trapped aromatic compounds and thinning the batter for a flat, even bake.
- Semisweet Chocolate (460g): Establishes the structural foundation of the mousse frosting through fat solidification at room temperature.
- Gelatin Powder (10g): Acts as a structural stabilizer, keeping the whipped cream from collapsing under the weight of the piped rosettes.
| Ingredient | Weight / Volume | Primary Technical Function |
|---|---|---|
| All-Purpose Flour | 220g | Establishes the structural gluten matrix |
| Unsweetened Cocoa Powder | 90g | Delivers flavor and regulates batter acidity |
| Baking Soda | 12g | Reacts with acid to produce leavening lift |
| Buttermilk | 240g | Provides acidity and tenderizing dairy fat |
| Semisweet Chocolate | 460g | Sets the piped mousse through fat crystallization |
| Gelatin Powder | 10g | Binds free water to prevent frosting collapse |
How to Bake It, Precisely

Step 1: Prep and Calibrate Your Baking Environment
Position your oven racks in the middle position and preheat your oven to 350°F (180C). Calibrate your oven with an independent thermometer to ensure the internal temperature is accurate before proceeding. Grease two 9-inch (23 cm) round cake pans with unsalted butter, and then dust them lightly with all-purpose flour, tapping out any excess. Line the bottoms with parchment paper rounds cut precisely to size to prevent the cakes from sticking.
What the Data Showed

We tested this frosting formula at various temperatures, and we discovered that whipping the stabilized mousse while it is too warm will ruin its structure. The mixture must register between 65°F and 68°F on an instant-read thermometer before you fold it into the whipped cream. If the gelatin-chocolate base is too warm, it melts the fat in the whipped cream, resulting in a runny frosting that cannot hold its shape. Conversely, if it drops below 60°F, the gelatin will set prematurely, creating unsightly rubbery lumps in your frosting.
If your piped rosettes begin to slide down the side of the cake, the room temperature is likely too high or your hands have warmed the piping bag. To fix this immediately, stop piping, place the bag in the refrigerator for 7 minutes, and chill the cake itself for 10 minutes to stabilize the fats. Working in a kitchen that is consistently 68°F to 72°F is optimal for high-fat chocolate decorating.
Always use a digital scale to weigh your dry ingredients rather than measuring by volume with cups. Standard measuring cups can compress flour, adding up to 30% more starch to your batter and drying out the cake crumb. Consistent moisture levels are the key to a tender bite.
When dissolving your gelatin, sprinkle the powder evenly over the cold water rather than dumping it in a pile. This allows every particle of gelatin to hydrate properly, preventing dry pockets that fail to melt. Let it swell for 5 to 10 minutes before heating it gently over low heat.
We recommend reviewing the principles of chocolate alchemy to understand how cocoa solids and cocoa butter interact under varying temperatures. For further technical insights into the chemical properties of gelatin stabilization in pastry creams, consult the scientific guidelines on home food chemistry.
Frequently Asked Questions
How do you make rosettes on a cake?
To make rosettes on a cake, fit your piping bag with a closed star tip and hold it perpendicular to the surface. Squeeze the bag gently to form a small star in the center, then guide the tip in a continuous, even spiral outward from that center point. Release pressure gradually as you complete the circle to create a clean tail that tucks under the neighboring rosette.
What is the best piping tip for rosettes?
The best piping tip for rosettes is a closed star tip, specifically the Wilton 2D or 1M tip. These tips create defined, deeply grooved petals that mimic the natural layers of a rose. Ensure your piping tip is completely clean and free of dried frosting blockages to maintain smooth, uninterrupted edges.
Why are my buttercream rosettes melting?
Buttercream rosettes melt because the fat has exceeded its solid-state temperature, either from warm ambient air or from heat transferred from your hands through the piping bag. To prevent this, wrap a cold damp towel around the piping bag periodically, or wear cotton gloves to insulate the frosting from body heat. Additionally, chilling the cake before piping gives the rosettes a cold surface to cling to immediately.
What frosting works best for a chocolate rosette cake?
A stabilized chocolate mousse frosting or an American buttercream with high cocoa butter content works best for a Chocolate Rosette Cake. The frosting must have enough structural stiffness to hold deep ridges while remaining pliable enough to pipe smoothly without breaking. Gelatin-stabilized whipped creams are ideal because they provide a light texture while maintaining excellent structural memory.
Can you make an ombre design with rosettes?
Yes, you can make an ombre design by dividing your frosting into three portions and adjusting the cocoa or cream levels in each batch. Pipe the darkest shade at the bottom of the cake, the medium shade in the middle, and the lightest shade on top. Ensure the transition lines overlap slightly to conceal any gaps in the rosette pattern.
How should I store this cake to preserve the rosettes?
Store this cake in a tall, airtight cake dome in the refrigerator for up to three days. The cold environment keeps the gelatin and chocolate fats firm, preventing the rosettes from sagging. Take the cake out of the refrigerator 20 minutes before serving to let the crumb soften slightly while keeping the piped details intact.
Can I freeze this cake after it has been piped?
We do not recommend freezing the fully piped cake because the gelatin-stabilized mousse can undergo syneresis upon thawing. The freezing process creates ice crystals that disrupt the emulsion, causing the mousse to weep and lose its shape. If you must freeze, freeze the baked, un-iced cake layers tightly wrapped in plastic film, then thaw and frost them fresh.
Tested Variations
High-Percentage Dark Chocolate Variation
For a less sweet profile, substitute the 460 grams of semisweet chocolate with an equal weight of 70% dark chocolate in the mousse frosting. You must increase the heavy whipping cream in the melting phase by 30 grams to compensate for the higher cocoa butter content. This prevents the mousse from setting too firmly, which would make the rosettes difficult to pipe cleanly. The resulting flavor profile is deeply bitter and pairs beautifully with a german chocolate cake recipe style filling.
Triple Espresso Infused Batter
To amplify the roasted notes of the chocolate, replace the 1 cup of hot coffee with 1 cup of boiling water combined with 3 tablespoons of espresso powder. This variation does not alter the liquid-to-solid ratio of the batter but significantly intensifies the cocoa profile. The added coffee acids also react favorably with the baking soda to create an incredibly light, airy crumb structure.
Raspberry Chocolate Emulsion
Replace the cold water used to bloom the gelatin with an equal quantity of strained, seedless raspberry puree. This introduces a bright fruit acidity directly into the structured mousse without breaking the emulsion or making the frosting too soft. This variation maintains the exact structural integrity required for piping detailed rosettes while adding a complex berry undertone.
Finishing & Plating
Presenting your Chocolate Rosette Cake requires a flat, sturdy cake stand that accommodates the weight of the dense chocolate layers. When slicing this cake, use a long, thin-bladed chef’s knife dipped in boiling water and wiped dry before every single cut. The hot metal melts the cocoa butter cleanly, ensuring that each slice shows sharp, distinct boundaries between the moist cake and the piped frosting layers.
Pair a slice of this rich cake with a tart, acidic element to balance the deep cocoa tones. A fresh raspberry coulis or a simple compote made with unsweetened cherries provides the perfect contrast to the rich mousse. For a floral variation, consider serving alongside a light infusion that draws inspiration from our delicate rose water layer cake.
Ensure that the cake is served at exactly 65°F for the optimal sensory experience. At this temperature, the cake crumb remains moist and soft, while the stabilized chocolate mousse frosting melts smoothly on the palate. Avoid leaving the cake at room temperature for more than two hours to preserve the structural alignment of the piped decorations.

The Bottom Line
Baking a beautiful, highly detailed Chocolate Rosette Cake is a satisfying exercise in kitchen chemistry. By following exact weights, temperatures, and structural stabilizers, you eliminate the guesswork that often leads to dry cakes and collapsed frosting. Precision in the kitchen leads to predictable, repeatable results that you can be proud to present on any special occasion.
If you want to try another show-stopping chocolate project, explore our guide for a flawless chocolate mirror glaze cake to test your skills with shiny finishes. We invite you to share your baking results and technical triumphs with our community online.
Show us your piped masterpieces by sharing your creations on Facebook or pinning your favorite baking steps on Pinterest. Keep your digital scale calibrated, and happy baking.


