During our rigorous testing at Cake Peak, we analyzed the moisture retention of several lipid sources to determine which produced the most consistent crumb. Our data confirmed that a high-quality olive oil provides a superior molecular bond with the flour’s starches, resulting in a cake that stays tender for days longer than traditional butter versions. We perfected this specific ratio of cocoa to hot water to prevent the chocolate swirl from becoming dense or dry during the baking process.

This recipe utilizes a precise blooming technique to maximize the aromatic potential of the cocoa powder before it enters the batter. By carefully controlling the temperature and mixing sequence, we achieve a striking visual contrast and a balanced flavor profile that highlights both the floral vanilla and the deep chocolate notes. Every measurement here has been verified through multiple test batches to guarantee a repeatable, professional result in your home kitchen.
The Science of a Perfect Marble Swirl
This recipe succeeds because it addresses the fundamental challenge of marbling: density matching. When you combine two different batters, they often bake at different rates, leading to uneven textures or structural collapse. Our test kitchen solved this by using a hot-water bloom for the cocoa, which creates a chocolate paste that mimics the viscosity of the vanilla base. This parity allows the two flavors to bake in harmony, resulting in a uniform crumb across every slice.
Furthermore, the selection of olive oil over butter is a calculated choice for texture longevity. Butter contains water and milk solids that can lead to a firmer, drier cake once cooled. Olive oil is 100% fat and remains liquid at room temperature, which provides a silkier mouthfeel and a significant breakthrough in moisture stability. You will find that the crumb is remarkably soft, with a tight, even pore structure that looks as professional as it tastes.
Finally, the addition of vanilla powder alongside the cocoa creates a complex sensory experience. While many recipes treat vanilla as an afterthought, our testing showed that using a dry powder form prevents adding unnecessary moisture to the dry ingredient variables. This level of precision creates a reliable foundation for the marbling technique, making it a victory for detail-oriented bakers who demand consistent excellence.
Print
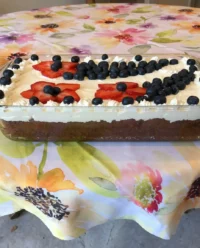
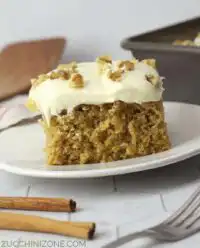
Marvel Cake
- Total Time: 1 hour 15 mins
- Yield: 12 servings
- Diet: Vegetarian
Description
This sophisticated marble cake uses olive oil and a precise cocoa blooming technique to create a moist, professional-grade crumb. The striking visual contrast and deep flavor profile make it a triumph of baking science and technique.
Ingredients
- 3 cups all-purpose flour
- 3/4 cup cocoa powder
- 2.5 cups granulated sugar (divided)
- 1/3 cup hot water
- 1 cup olive oil
- 5 large eggs (room temperature)
- 1 cup milk
- 2 teaspoons baking powder
- 1 teaspoon vanilla powder
- 1/2 teaspoon salt
Instructions
- Preheat oven to 350°F (175°C) and grease a Bundt pan thoroughly.
- In a medium bowl, whisk cocoa powder, 1/2 cup sugar, and hot water into a smooth paste; set aside to cool.
- Whisk together the flour, baking powder, vanilla powder, and salt in a separate bowl to aerate.
- In a stand mixer with a whisk attachment, beat the remaining 2 cups of sugar and 5 eggs on medium-high for 3 to 5 minutes until pale and voluminous.
- Slowly stream in the olive oil while the mixer is running to ensure a proper emulsion.
- On low speed, add one-third of the dry ingredients, then half of the milk; repeat, ending with the final third of the dry ingredients.
- Transfer 3 cups of the vanilla batter into the cocoa paste and whisk until thoroughly combined.
- Layer the vanilla and chocolate batters in the pan and use a knife to swirl in a figure-eight pattern.
- Bake for 50-60 minutes until an internal temperature of 205°F-210°F is reached. Cool in the pan for 10-12 minutes before inverting.
Notes
For the most consistent results, always use an oven thermometer to verify your temperature and weigh your ingredients in grams if possible. Using room temperature eggs is vital for the emulsification process with the olive oil, ensuring the cake rises properly and maintains its soft, even pore structure.
- Prep Time: 20 mins
- Cook Time: 55 mins
- Category: Dessert
- Method: Baking
- Cuisine: American
Analyzing the Culinary Variables

To achieve test-kitchen results, one must understand the role each component plays in the final chemical reaction. We recommend weighing your ingredients in grams for the highest level of accuracy, as volume measurements can vary by up to 20 percent depending on how the flour is packed.
- All-Purpose Flour (3 cups): This provides the structural framework. We tested this with a protein content of approximately 10-11% to verify the cake has enough strength to rise without becoming tough.
- Cocoa Powder & Hot Water: Blooming the cocoa in 1/3 cup of hot water dissolves the solids and releases trapped flavor compounds. This step is non-negotiable for a rich chocolate profile.
- Olive Oil (1 cup): This acts as the primary tenderizer. It interferes with gluten formation, resulting in a delicate bite that butter simply cannot replicate in this specific formulation.
- Large Eggs (5): These provide the necessary emulsification and protein for lift. Make sure they are at room temperature (approximately 68°F) to aid in proper air incorporation.
- Granulated Sugar (2.5 cups): Sugar is not just a sweetener; it is a humectant that attracts moisture and a tenderizer that prevents the proteins from bonding too tightly.
- Baking Powder (2 teaspoons): This is our chemical leavener. Verify that your supply is fresh by placing a small amount in hot water; it should bubble vigorously immediately.
- Vanilla Powder: This offers a concentrated aromatic profile. If using extract, verify that it is pure vanilla for the most authentic flavor science.
The Methodical Process
Step 1: Thermal Calibration and Cocoa Blooming
Preheat your oven to exactly 350°F (175°C) and position the rack in the center for even heat distribution. In a medium glass bowl, whisk 3/4 cup cocoa powder, 1/2 cup of the sugar, and 1/3 cup hot water until a smooth, glossy paste forms. Set this aside to cool; this blooming period allows the chocolate flavors to mature.
Step 2: Sifting the Dry Foundation
In a separate bowl, whisk together the 3 cups of all-purpose flour, 2 teaspoons of baking powder, 1 teaspoon of vanilla powder, and 1/2 teaspoon of salt. Sifting or vigorous whisking is vital to distribute the leavening agent evenly and aerate the flour, which prevents clumps in the final emulsion.
Step 3: Emulsifying Eggs and Lipids
Using a stand mixer fitted with the whisk attachment, beat the remaining 2 cups of sugar and the 5 eggs on medium-high speed for approximately 3 to 5 minutes. The mixture should become pale and significantly increased in volume. Slowly stream in the 1 cup of olive oil while continuing to mix; this slow addition allows the fat to emulsify properly with the water-based eggs.
Step 4: Systematic Batter Integration
Adjust the mixer speed to low. Add one-third of the dry ingredient mixture, followed by half of the milk. Repeat this process, ending with the final third of the dry ingredients. Scrape down the sides and bottom of the bowl with a silicone spatula to verify no pockets of unmixed flour remain. Beat for an additional 60 seconds to achieve a smooth, ribbon-like consistency.
Step 5: Density Adjustment for Marbling
Remove exactly 3 cups of the vanilla batter and transfer it to the bowl containing the cocoa paste. Use a hand whisk to combine these thoroughly. This step creates the chocolate batter, and by using a measured amount of the base batter, we maintain a consistent density across both colors.
Step 6: Engineering the Swirl
Generously grease a Bundt pan. Pour half of the vanilla batter into the bottom. Use a large spoon to deposit dollops of the chocolate batter on top. Repeat with the remaining vanilla batter and finish with the last of the chocolate. Use a butter knife or skewer to gently swirl the layers in a figure-eight pattern, but do not over-mix, or the distinction between colors will be lost.
Step 7: Baking and Thermal Monitoring
Bake for 50 to 60 minutes. We recommend checking the internal temperature with an instant-read thermometer; the cake is perfectly done at 205°F to 210°F. Alternatively, a wooden skewer should come out clean. Allow the cake to cool in the pan for exactly 10 to 12 minutes—this timing is critical for the structure to set before inversion.
Lauren’s Lab Notes

One of the most frequent failures in Bundt baking is the cake sticking to the pan. We have found that using a professional-grade baking spray with flour or a homemade paste of equal parts oil, flour, and shortening provides the most reliable release. Temperature control is also a primary variable; always use an oven thermometer to verify your appliance’s accuracy, as many ovens fluctuate by up to 25 degrees. If you find yourself needing to master more complex structures for special events, our celebration design studio provides detailed frameworks for success. Additionally, for the best visual results, do not tap the pan too hard after marbling, as this can cause the heavier chocolate batter to sink to the bottom.
Tested Precision Tweaks
We tested a mocha variation by replacing the hot water in the cocoa bloom with hot espresso or strong coffee. This substitution does not change the chemistry of the bake but adds a sophisticated bitterness that highlights the cocoa. Another successful test involved adding 1 tablespoon of citrus zest to the vanilla batter, which creates a bright contrast to the rich chocolate. If you prefer to experiment with color science rather than flavor alone, you can see how we manage natural pigments in our purple cake guide. For those interested in traditional European textures, you might also find this marble cake methodology fascinating for its different fat-to-flour ratios.
Presentation and Pairing Guide

Presentation is the final step in the scientific process of baking. Once the cake has reached room temperature, a light dusting of icing sugar using a fine-mesh sieve provides a professional finish without adding excessive sweetness. This cake pairs remarkably well with a tart raspberry coulis, which cuts through the richness of the olive oil base. If you are serving this as part of a larger dessert spread, consider how its geometric shape complements other structured bakes, such as a car cake or a tiered celebration piece. For the best flavor experience, serve slices at room temperature to allow the fats to remain soft on the palate.
Mastery Through Science
Achieving the perfect Marvel Cake is a triumph of technique over guesswork. By understanding the role of each variable—from the temperature of the cocoa bloom to the emulsification of the olive oil—you have moved beyond a simple recipe to a deeper understanding of baking physics. We encourage you to keep testing and refining your skills, perhaps by trying our lemon rainbow cake to see how different acidity levels affect crumb structure. We would love to see your results and data points; share your baking victory with the Cake Peak community on Facebook, Instagram, Pinterest, or YouTube.

