Every year, as the July sun warms the farmhouse porch, I find myself reaching for the mixing bowls to celebrate our heritage. There is something deeply grounding about gathering friends for a backyard picnic, where the simple joy of a homemade dessert becomes the centerpiece of the afternoon. This cake is my way of honoring those moments with a bit of festive color and honest, sweet flavor.

Creating a flag pattern inside a cake might seem like a feat of engineering, but it is truly just a labor of love and patience. Once you slice into this Red, White and Blue Layered Flag Cake, the beautiful stars and stripes reveal themselves, making every bit of effort worth the smile on your guests’ faces.
A Showstopping Centerpiece for Your Summer Table
There is a special kind of magic in a dessert that hides a secret. From the outside, this cake looks like a classic, tall white farmhouse cake, adorned with simple sprinkles and fluffy frosting. However, the first slice reveals a vibrant American flag pattern that never fails to draw gasps of delight from everyone at the table. It is a beautiful way to show your spirit during the summer harvest season.
I love this recipe because it relies on reliable staples while allowing for a bit of artistic flair. The crumb is soft and tender, thanks to the quality of the ingredients, and the whipped frosting provides a light, airy finish that isn’t too heavy for a warm afternoon. It celebrates the tradition of patriotic baking without being fussy or overly complicated. Whether it is for a town parade gathering or a quiet family dinner under the stars, this cake brings people together.
Furthermore, the process of assembling the layers is incredibly satisfying. It reminds me of quilting or piecing together a woodcraft project—each part has its place, and when they come together, they create something far greater than the sum of its parts. It is a testament to the beauty of simple ingredients handled with care and intention.
Print
Red, White and Blue Layered Flag Cake
- Total Time: 2 hours 30 mins
- Yield: 12 servings
- Diet: Vegetarian
Description
This spectacular patriotic dessert features a clever hidden flag pattern that is revealed only when you cut the first slice. Using high-quality pantry staples and a bit of creative assembly, it serves as a stunning and delicious centerpiece for any summer celebration.
Ingredients
- 2 boxes (16.25 oz each) white cake mix
- Water, vegetable oil, and eggs (quantities as specified on cake mix boxes)
- 2 teaspoons red paste food color
- 1 teaspoon blue paste food color
- 2 tablespoons star-shaped candy sprinkles
- 2 containers (12 oz each) whipped white frosting
- Assorted red, white, and blue sprinkles for decoration
Instructions
- Preheat your oven to 350°F (or 325°F for dark pans) and prepare two 8-inch round cake pans with cooking spray and parchment paper.
- Mix the first box of cake mix with water, oil, and whole eggs; stir in the red paste food color until vibrant, then bake for 28 to 33 minutes and cool completely.
- Clean the pans and prepare the second box of cake mix using egg whites; divide the batter in half, leaving one portion white and tinting the other with blue food color and star sprinkles.
- Bake the blue and white layers, then allow them to cool completely on a wire rack before trimming the rounded tops off all cakes.
- Slice the two red layers horizontally to create four thin disks, and slice the white layer horizontally to create two thin disks.
- Use a 4-inch biscuit cutter to cut holes in the center of the blue layer, one thin red disk, and one thin white disk.
- Stack one full red disk, a layer of frosting, a full white disk, more frosting, and another full red disk to form the base stripes.
- Place the blue cake ring on top, frost the inner circle, and insert the small red and white disks into the center hole with frosting between them.
- Frost the exterior of the entire cake with the remaining whipped frosting and decorate with festive sprinkles.
Notes
To achieve perfectly clean lines in your flag pattern, try chilling the cake layers in the freezer for 30 minutes before cutting and assembling. Using a long serrated knife with a gentle sawing motion will ensure your stripes remain even and prevent the cake from tearing during the layering process.
- Prep Time: 45 mins
- Cook Time: 35 mins
- Category: Dessert
- Method: Baking
- Cuisine: American
Gathering Your Farmhouse Pantry Essentials

To create this patriotic masterpiece, we start with high-quality basics that form a reliable foundation. Using a trusted white cake mix as our base allows us to focus our energy on the precision of the colors and the architecture of the layers.
- White Cake Mix: You will need two boxes to provide enough height for the flag design. This ensures a consistent, bright white crumb that makes the red and blue pop.
- Paste Food Coloring: I always recommend using red and blue paste or gel colors rather than liquid drops. Paste provides a deep, vibrant hue without thinning out the batter, keeping our “stripes” bold and true.
- Star Sprinkles: These are folded into the blue batter to represent the stars on the flag. It is a charming, rustic touch that adds a little crunch and whimsy to every bite.
- Whipped White Frosting: A light, fluffy frosting is key here. It acts as the “mortar” between our cake layers, and its snowy white color perfectly mimics the white stripes of the flag.
- Fresh Eggs and Oil: Using whole eggs in the red layers and egg whites in the blue and white layers helps manage the density and color purity of each section.
When choosing your ingredients, look for the freshest eggs you can find—ideally from a local farm where the yolks are rich and the whites are strong. The quality of your pantry staples really shines through in the final flavor of the cake.
Bringing the Stars and Stripes to Life
Step 1: Prepare Your Kitchen and Pans
Heat your oven to 350°F (or 325°F if you are using dark or nonstick pans). Take the time to spray the bottoms and sides of two 8-inch round cake pans with cooking spray and line them with parchment paper. This simple step is vital for a clean release, which is essential when you need perfectly flat layers for stacking.
Step 2: Bake the Red Layers
Prepare the first box of cake mix following the directions on the package, using water, oil, and whole eggs. Stir in two teaspoons of red paste food color until the batter is a deep, rich crimson. Divide this evenly between your prepared pans and bake for 28 to 33 minutes. Once a toothpick comes out clean, let them cool in the pans for 10 minutes before moving them to a wire rack to cool completely. This cooling time is non-negotiable for the structure of the cake.
Step 3: Bake the Blue and White Layers
Clean your pans and prep them again with spray and parchment. Prepare the second box of cake mix using water, oil, and egg whites to keep the batter as pale as possible. Pour half of this white batter into one pan. To the remaining batter, stir in the blue food color and those festive star-shaped sprinkles. Pour the blue batter into the second pan. Bake these just like the red layers and let them cool entirely on the rack.
Step 4: Trimming and Shaping the Flag Parts
Now for the craftwork. Flatten all cake layers by trimming off any rounded tops. Take your two red layers and cut them in half horizontally so you have four thin red disks. From one of these disks, use a 4-inch biscuit cutter to remove a center circle (set the outer ring aside). For the blue layer, use that same 4-inch cutter to cut a hole in the center. Finally, cut the white layer in half horizontally to make two thin white disks, and cut a 4-inch center out of one of those white disks as well.
Step 5: Assembling the Stripes
Place one full red cake layer on your serving platter and spread about 1/3 cup of frosting over it. Top this with a full white thin layer and another 1/3 cup of frosting. Add a second full red layer and frost it. This creates the bottom stripes of our flag. This foundation needs to be level and sturdy, so take your time to smooth the frosting evenly.
Step 6: Constructing the Blue Union
Place the blue cake ring (the one with the hole) on top of your striped stack. Lightly frost the inside of the hole. Now, take one of the small 4-inch red circles you cut earlier and place it inside the blue hole, followed by a thin layer of frosting, and then the small 4-inch white circle. This creates the smaller stripes that sit next to the blue “union” of the flag.
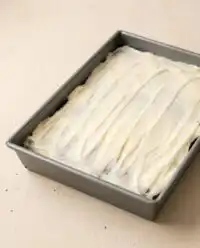
Step 7: Final Frosting and Decoration
Cover the entire cake—top and sides—with the remaining whipped frosting. I like to keep the frosting look somewhat rustic and thick, like a fresh snowfall. Finish by scattering more red, white, and blue sprinkles over the top. The beauty of this cake is that it hides its secret perfectly until that very first slice is removed.
Christine’s Secrets for a Perfect Patriotic Slice

To get those clean, sharp lines inside the cake, I recommend chilling your cake layers in the freezer for about 30 minutes before you start cutting and trimming. A cold cake is much easier to handle and produces fewer crumbs, which keeps the white frosting looking pristine. If you want to dive deeper into the basics, you might find my guide on mastering the art of cake decorating quite helpful for your journey.
Another tip is to use a long serrated knife for the horizontal cuts. Keep the knife level and use a gentle sawing motion to ensure your stripes are even. Also, don’t throw away those extra cake scraps! They are wonderful for making cake pops or simply snacking on with a cup of coffee while you finish your masterpiece. If you follow the original Betty Crocker method, you’ll see that patience is the most important ingredient in this build.
Seasonal Swaps and Festive Twists
While this flag design is a classic, you can easily adapt the flavors to suit your local harvest. In the autumn, you could use the same layering technique with orange and deep brown colors for a harvest theme. For a more natural approach, you might try using beet powder for the red layers and butterfly pea flower powder for the blue, which gives a lovely earthy tone to the cake. If you enjoy this color palette, you should also look at my recipe for a classic red white and blue cake which offers a different take on the patriotic theme.
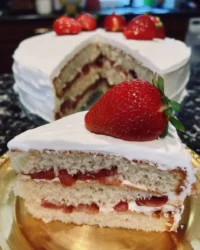
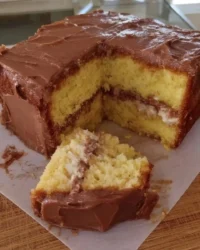
You can also change the frosting. While white frosting is traditional for the flag, a cream cheese frosting adds a bit of tang that pairs beautifully with the sweet cake. If you are feeling adventurous, add a layer of fresh strawberry jam between the red and white layers to emphasize the fruit of the season. The key is to keep the colors distinct so the flag pattern remains visible.
At the Table: Serving with Heart

I love to serve this cake on a large wooden pedestal or a simple ceramic platter to emphasize its rustic charm. It looks beautiful sitting in the center of a picnic table covered in a blue-checked linen cloth. Because this cake is quite tall and impressive, it truly deserves to be the star of the show. If you want more inspiration for your layout, check out our original flag cake presentation tips.
Pair each slice with a dollop of fresh whipped cream and a handful of seasonal berries, like raspberries and blueberries, to mirror the colors inside. A cold glass of lemonade or a crisp iced tea is the perfect accompaniment to the sweet vanilla notes of the cake. For an evening celebration, serving the cake under some twinkling string lights creates a warm, nostalgic atmosphere that your guests will remember long after the last crumb is gone.
The Simple Truth of Seasonal Baking
Baking for the people we love is one of the most honest ways to show our gratitude for the seasons and the community we share. This Red, White and Blue Layered Flag Cake is more than just a dessert; it is a conversation starter and a symbol of summer joy. I hope it brings as much light to your table as it does to mine. For more creative ideas on how to make your gatherings special, visit our celebration design studio for endless inspiration.
If you decide to bake this for your next gathering, I would love to see your results! Please share your photos with us on Instagram or Pinterest. You can also find more of my farmhouse baking tips on Facebook and YouTube. Happy baking, and may your summer be filled with sweetness.


