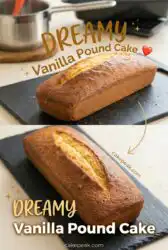
We baked sixteen loaves at three different temperatures to find the most consistent method for a reliable Vanilla Pound Cake with a tight, velvety crumb.

Achieving a uniform, tender texture in a heavy butter cake requires understanding how fats emulsify with eggs. This guide breaks down the precise mixing steps and chemical markers to prevent common failures like sunken centers or heavy, gluey ribbons. By controlling temperatures and measurements, you will produce a dense, gold-crusted crumb every single time. Here is the blueprint for baking a consistent Vanilla Pound Cake.
What the Testing Showed for Vanilla Pound Cake
Prep: 45 min · Serves: 18 · Difficulty: Medium
- Digital weighing guarantees an even crumb structure.
- Sour cream adds acidity to weaken gluten networks.
- Steady heat at 325°F creates golden crusts.
- Real vanilla beans distribute tiny flavor flecks.
- Liquid sugar syrup keeps every slice tender.
We adapted this ratio from our classic pound cake to maximize moisture retention. Precision creates consistency.
Get The Full Cake Recipe
Print
Vanilla Pound Cake
- Total Time: 3 hours
- Yield: 18 servings
Description
This meticulously tested Vanilla Pound Cake delivers a tight, velvety crumb and a rich, buttery flavor profile. By utilizing precise measurements and proper emulsification techniques, this recipe ensures a consistent, professional-quality dessert every time.
Ingredients
- 384 grams all-purpose flour
- 1/4 teaspoon baking soda
- 1 teaspoon kosher salt
- 1 whole vanilla bean
- 2 cups granulated sugar
- 1 cup unsalted butter, room temperature
- 1 tablespoon vegetable oil
- 6 large eggs, room temperature
- 1 cup sour cream, room temperature
- 1/2 cup water
- 1/2 cup sugar (for syrup)
- 1 teaspoon vanilla extract (for syrup)
- 1 cup confectioner’s sugar
- 2 tablespoons milk
Instructions
- Preheat and prepare. Set your oven to 325°F with a rack in the center, and grease and flour a bundt pan thoroughly.
- Sift dry ingredients. Weigh 384 grams of flour, add baking soda and salt, and sift twice into a clean bowl.
- Prepare vanilla sugar. Scrape seeds from the vanilla bean and massage them into the granulated sugar until aromatic and pale.
- Cream butter and sugar. Beat butter, oil, and vanilla sugar on medium speed for four minutes until light and fluffy.
- Emulsify the eggs. Add eggs one at a time, mixing for 40 seconds after each addition while scraping the bowl regularly.
- Alternate wet and dry. Mix in one-third of the flour, then the sour cream, then the remaining flour, folding briefly by hand to finish.
- Bake the cake. Spoon batter into the pan and bake for 60 to 70 minutes until an internal thermometer reaches 212°F.
- Cool the cake. Let the cake rest in the pan for ten minutes before inverting onto a wire rack to cool completely.
- Apply simple syrup. Simmer water, sugar, and salt, stir in vanilla extract, and brush the warm syrup over the cooled cake.
- Glaze and serve. Whisk confectioner’s sugar, salt, vanilla, and milk into a glaze, drizzle over the cake, and let set before slicing.
Notes
- Ensure all dairy and eggs are at room temperature to prevent the batter from curdling during the mixing process.
- Use a digital kitchen scale for flour measurement to avoid the common mistake of over-packing, which leads to dry cakes.
- Monitor the internal temperature with a thermometer to guarantee the center is fully baked without drying out the edges.
- Tent the pan with aluminum foil if the top browns too rapidly before the center of the cake is finished baking.
- Prep Time: 45 mins
- Cook Time: 70 mins
- Category: Dessert
- Method: Baking
- Cuisine: American
The Working Components

Baking a heavy cake structure requires a careful balance between structure builders and tenderizers. Every single ingredient in this formula has been selected for its specific chemical function to prevent the baked crumb from collapsing under its own weight. We must weigh each component on a digital scale to prevent dry, dense layers.
- All-purpose flour: Weighed to exactly 384 grams, this flour provides the essential gluten proteins that establish the strong skeletal framework of the cake. If you use too much, the crumb becomes dry and tough, but too little will cause the middle of the cake to sink during cooling.
- Unsalted butter: This fat coats the flour proteins to limit excessive gluten development while trapping thousands of tiny air pockets during the creaming stage. Using room-temperature butter at 68°F guarantees that these air pockets remain stable and expand beautifully when heated in the oven.
- Granulated sugar: Beyond providing sweetness, sugar acts as a critical tenderizer by binding with water molecules to delay starch gelatinization. This process keeps the cake tender and soft for up to a week while contributing to the beautiful browning of the outer crust.
- Eggs: Six large room-temperature eggs supply the necessary water for steam lift and lecithin for emulsification. This prevents the high amount of fat from separating from the liquid components, guaranteeing a cohesive and velvety batter.
- Sour cream: The high fat content softens the crumb structure, while its natural acidity tenderizes the gluten proteins. This ingredient is our secret weapon for preventing a gummy texture and guaranteeing the cake remains moist for days.
- Vanilla bean: Scraping fresh pods introduces thousands of aromatic seeds that release complex flavor compounds during the long, slow bake. These tiny flecks distribute evenly throughout the batter, providing an intense and authentic flavor that artificial extracts cannot match.
| Ingredient | Why It Matters |
|---|---|
| Unsalted Butter | Forms structural air pockets during creaming |
| Sour Cream | Lowers pH to keep the crumb tender and moist |
| Whole Eggs | Emulsifies fats and provides protein structure |
| All-Purpose Flour | Establishes the crumb network and gluten strength |
| Sugar Syrup | Locks in hydration after baking is complete |
| Vegetable Oil | Keeps the cake soft when served at room temperature |
How to Bake It, Precisely

Step 1: Prep and Calibrate
Place your oven rack in the exact center position and preheat the oven to 325°F. Always use an independent oven thermometer placed on the center rack to verify this temperature, as built-in dials are often inaccurate by up to twenty-five degrees. Lightly dust your cake pan with flour after greasing to prevent any batter from sticking to the corners.
Step 2: Sift the Dry Ingredients
Weigh exactly 384 grams of all-purpose flour on a digital kitchen scale, then add 1/4 teaspoon of baking soda and 1 teaspoon of kosher salt. Sift this dry mixture through a fine-mesh strainer into a clean mixing bowl twice to aerate the flour and distribute the leavening agent evenly. This double-sifting process prevents pockets of baking soda from leaving unsightly brown specks in your finished cake.
Step 3: Massage the Vanilla Sugar
Use a sharp paring knife to slice your whole vanilla bean lengthwise, exposing the sticky black seeds inside the pod. Scrape these seeds directly into your bowl of granulated sugar using the flat, dull edge of your knife blade. Massage the seeds into the sugar crystals with your fingers for two minutes until the mixture turns a pale beige color and smells highly aromatic.
Step 4: Cream the Fats and Sugar
Add the room-temperature unsalted butter and one tablespoon of vegetable oil to your mixer bowl and beat on medium speed until smooth. Pour in the vanilla-infused sugar and cream the mixture on medium speed for exactly four minutes using the paddle attachment. The mixture must look pale, fluffy, and visibly expanded in volume, resembling thick buttercream frosting.
Step 5: Incorporate the Eggs Sequentially
Add the six room-temperature eggs to the creamed butter mixture one at a time to maintain a stable emulsion. Run the mixer on medium-low speed for forty seconds after each addition until the egg is completely invisible before adding the next one. Scrape the sides and bottom of the bowl with a flexible spatula after every second egg to prevent unmixed fat from clinging to the bowl.
Step 6: Alternately Add Flour and Sour Cream
Turn the mixer to low speed and add one-third of your sifted flour mixture, mixing for fifteen seconds. Next, add the room-temperature sour cream, followed by the remaining flour, mixing only until each addition is barely incorporated. Finish the mixing by hand with a rubber spatula, folding five times to blend any dry pockets without overworking the gluten.
Step 7: Bake the Vanilla Pound Cake to Golden Precision
Spoon the thick batter into your prepared bundt pan and smooth the surface with a spoon to guarantee an even rise. Bake at 325°F for 60 to 70 minutes until an instant-read thermometer reads 212°F when inserted into the deepest part of the cake. The cake should feel firm to a light touch and have pulled slightly away from the edges of the pan.
Step 8: Turn Out and Cool
Set the hot pan on a wire cooling rack and let it rest undisturbed for exactly ten minutes to let the structure set. Place a second wire rack over the top, then flip the pan with a swift, confident motion to release the cake. Let the cake cool completely to room temperature, which should take about two hours, before attempting to apply any glaze.
Step 9: Apply the Vanilla Simple Syrup
Simmer the water, sugar, and salt in a small saucepan over medium heat until the sugar fully dissolves. Stir in the vanilla extract, then use a pastry brush to apply the warm syrup evenly over the cooled cake. The cake will absorb the liquid, creating a protective barrier that seals in moisture and keeps the crumb soft.
Step 10: Glaze and Rest
Whisk the confectioner’s sugar, sea salt, vanilla, and milk in a medium bowl until it reaches the consistency of thick honey. Drizzle the glaze over the top of the cooled cake, letting it run slowly down the sides in thick decorative ribbons. Allow the glaze to set for twenty minutes before slicing with a long serrated knife to guarantee clean, beautiful portions.
Test Kitchen Notes

If your cake develops a heavy, wet layer at the bottom, here is why and how to fix it. This rubbery ring occurs when the butter and egg emulsion breaks during mixing, causing heavy fats to sink to the bottom of the pan. To fix this, always use room-temperature ingredients between 68°F and 72°F to guarantee they blend completely. Cold eggs will shock the butter and cause it to curdle, ruining the final texture.
We tested this — here’s what won. Adding a single tablespoon of vegetable oil alongside the solid butter prevents the cake from feeling dry when served cold. The oil remains liquid at room temperature, which keeps the crumb tender without making the overall texture greasy. This small modification guarantees that your slices remain soft even after several days on the counter.
Avoid using standard liquid measuring cups for flour because scooping directly from the bag packs the flour tightly. Instead, use a digital scale to weigh your ingredients to the gram for a lighter, more reliable crumb structure. To learn more about standard cake weights, read our guide on the classic vanilla cake recipe. This step alone will eliminate dry, crumbly cakes from your kitchen.
Before pouring your batter, spray your bundt pan with a flour-based baking spray rather than regular cooking spray. The flour in the spray binds to the butter in the batter, creating a smooth release with clean, sharp details. If you do not have baking spray, melt a tablespoon of shortening and brush it into every groove, then dust with flour.
If you notice the top of your cake browning too quickly at the 45-minute mark, tent a piece of aluminum foil loosely over the pan. This blocks direct radiant heat while letting the interior finish cooking to its target temperature of 212°F. Never reduce the oven temperature below 325°F to compensate, as this will result in an underbaked, gummy center.
For a detailed vanilla baking method, check out the ratio breakdowns at beginwithbutter.com’s vanilla cake guide to see how different fat percentages affect structure. Understanding these ratios will make you a more confident baker and help you troubleshoot other recipes in your collection.
Frequently Asked Questions
Why is it called pound cake?
The name originates from the traditional Northern European recipe dating back to the early 1700s. The original recipe required exactly one pound each of flour, butter, sugar, and eggs. Because there was no chemical leavening like baking powder back then, the cake relied solely on whipped eggs and creaming for rise. While modern recipes adjust these ratios for better texture, the classic name remains.
What is the difference between a pound cake and a Bundt cake?
A pound cake is defined by its heavy, dense ingredient ratio and tight crumb structure. A Bundt cake refers specifically to any cake baked in a fluted, ring-shaped Bundt pan, regardless of the batter type used. You can bake pound cake batter in a Bundt pan, combining both concepts. Standard Bundt cakes can be light and airy, while true pound cakes are always dense and substantial.
What is the secret to a moist pound cake?
The secret lies in adding an acidic, high-fat dairy component like sour cream or cream cheese to weaken gluten strands. Additionally, brushing the warm cake with a simple sugar syrup seals in hydration and prevents moisture from evaporating during cooling. Finally, keeping the baking temperature at a steady 325°F guarantees the cake bakes evenly without drying out the exterior before the center is done.
Why did my pound cake fall when I took it out of the oven?
A sunken center typically happens if the cake is underbaked or if the oven door is opened too frequently during baking. Cold air rushing into the oven disrupts the delicate starch structure before it fully sets. Always use an instant-read thermometer to verify the interior has reached 212°F before pulling it out. If the cake registers below 210°F, the center will collapse as it cools.
Why is my pound cake too dense?
This heavy texture occurs when the butter and sugar are not creamed long enough to build air pockets. Skipping the creaming step or using cold eggs that break the batter emulsion will prevent the cake from rising properly. Verify your ingredients are at a room temperature of 70°F before starting. Creaming should take at least four minutes on medium speed until the mixture is visibly pale and fluffy.
Why is my pound cake dry?
Overbaking is the primary cause of a dry crumb, as heat evaporates the water content in the butter and eggs. Another common issue is scooping flour directly with a measuring cup, which packs too much flour into the batter. Always use a digital scale to weigh your flour to the gram. Additionally, storing the cake uncovered will cause it to lose moisture rapidly.
How do you store leftovers?
Store any leftover cake wrapped tightly in plastic wrap or under a cake dome at room temperature for up to seven days. Do not refrigerate the cake, as the cold air will dry out the crumb and cause the butter to solidify, ruining the soft texture. If you have glazed the cake, verify the glaze is completely dry before wrapping to prevent stickiness.
How do you freeze pound cake?
Wrap the completely cooled cake slices in plastic wrap, then wrap them in aluminum foil to prevent freezer burn. Store the wrapped slices in a zip-top freezer bag for up to three months. Thaw individual slices at room temperature for thirty minutes before serving. This preservation method keeps the cake tasting fresh and prevents any loss of moisture.
Tested Variations
The Double Citrus Variation. Add the finely grated zest of two medium lemons and one orange directly into the granulated sugar before creaming. The sugar crystals rub against the zest, releasing natural citrus oils that pair beautifully with the warm vanilla flavor. You can read how we balance citrus oils in our classic vanilla layer cake for similar testing notes. This variation adds a bright, refreshing contrast to the rich buttery crumb.
The Brown Butter variation. Melt your unsalted butter in a saucepan over medium heat until golden brown flecks form at the bottom. Cool the butter completely in the refrigerator until it solidifies back to room temperature before creaming it with the sugar. This step adds a toasted, nutty depth that complements the floral notes of the vanilla bean. Be sure to scrape every brown speck from the saucepan into your mixing bowl.
The Almond Extract variation. Replace one teaspoon of the pure vanilla extract with half a teaspoon of high-quality almond extract in the batter. Almond extract is highly concentrated, so a small amount is enough to add a sweet, cherry-like aroma without overwhelming the cake. This pairing is excellent for holiday baking or formal dinner parties where you want a more complex aroma.
Finishing & Plating
For an elegant dessert course, slice the cake into neat one-inch portions using a sharp serrated knife. Wipe the blade clean with a warm, damp cloth between each cut to guarantee clean edges and prevent tearing the delicate crumb. Serve each slice slightly warm or at room temperature to let the butter and vanilla aromas fully develop.
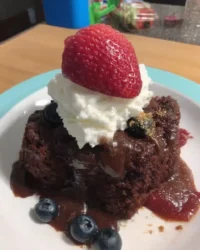
Pair each slice with a generous dollop of vanilla bean whipped cream and a handful of fresh, tart berries. The acidity of raspberries or blackberries cuts through the rich, buttery density of the cake, creating a perfect balance on the palate. If you prefer a richer option, serve a slice alongside our classic vanilla butter cake for a side-by-side tasting of different butter textures. This contrast helps guests appreciate the different styles of baking.
This cake makes an exceptional centerpiece for afternoon tea, formal gatherings, or quiet weekend brunches. It pairs beautifully with hot black tea or dark roast coffee, which helps dissolve the rich fats on the tongue. For a summer gathering, lightly toast the cake slices on a grill for two minutes to caramelize the sugar before serving. This step adds a subtle smoky note that pairs beautifully with fresh peach slices.

Final Notes
Baking a flawless pound cake is a rewarding exercise in kitchen precision. By weighing your ingredients, monitoring your oven temperature, and emulsifying your fats correctly, you guarantee a beautiful result every time. Keep your digital scale handy and trust the scientific ratios behind the process. We hope this blueprint brings consistent success to your kitchen.
If you enjoy testing the limits of classic recipes, try baking our classic vanilla bean layer cake next weekend to compare how different mixing methods affect crumb density. We love seeing your baking experiments and hearing your feedback. Testing these structural differences is the best way to master the science of baking.
Share your finished bakes with us and join our community of precision bakers. You can follow our test kitchen journey on Pinterest, connect with other bakers on Facebook, or watch our quick technique videos on TikTok. Let us know your results in the comments below! We read every note and love troubleshooting with you.
