The slight crack on a golden cake top tells a story of heat meeting flour, a quiet reminder that perfection lives in the taste, not the smooth finish.

This Classic Vanilla Bean Layer Cake is a staple in my farmhouse kitchen when the pantry is full and the afternoon is long. It relies on honest ingredients like real vanilla seeds and cultured butter to create a crumb that is both sturdy and tender. Baking a cake from scratch allows you to step away from the noise and focus on the rhythmic sound of the whisk against the bowl. The result is a dessert that feels rooted in tradition, making it suitable for a quiet Sunday or a crowded birthday table.
The Beauty of This Classic Vanilla Bean Layer Cake
Prep: 10 min · Serves: 16 · Difficulty: Intermediate
- Tiny vanilla bean specks offer deep flavor.
- Pastry cream center adds a velvety texture.
- Swiss meringue frosting remains light and silky.
- Reverse creaming method creates an extra-fine crumb.
- Wholesome ingredients provide an honest farmhouse taste.
This cake is the one I bake when the neighbors come over and the sun is setting behind the barn. If you enjoy this, you might also like my classic vanilla cake for a smaller gathering.
Get The Full Cake Recipe
Print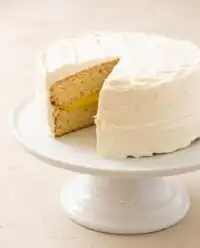
Classic Vanilla Bean Layer Cake
- Total Time: 3 hours 15 mins
- Yield: 16 servings
Description
This elegant layer cake features a tender, fine-crumb sponge infused with real vanilla bean seeds, finished with a velvety pastry cream filling and silky Swiss meringue frosting. It is a timeless, sophisticated dessert perfect for birthdays and special farmhouse celebrations.
Ingredients
- Cake flour
- Granulated sugar
- Baking powder
- Salt
- Unsalted butter, softened
- Egg whites
- Vanilla bean seeds
- Vanilla extract
- Almond extract
- Whole milk
- Cornstarch
- Egg yolks
- Cream of tartar
Instructions
- Prepare the equipment. Preheat your oven to 350°F and grease two 8-inch round cake pans, lining the bottoms with parchment paper for easy release.
- Mix dry ingredients. Combine cake flour, sugar, baking powder, and salt in a mixer, then incorporate the butter until the mixture resembles coarse cornmeal.
- Whisk liquid ingredients. In a separate bowl, whisk egg whites until frothy and combine with milk, vanilla bean seeds, vanilla extract, and almond extract.
- Combine the batter. Gradually add the liquid mixture to the dry base while the mixer runs on low, mixing until smooth, then bake for 25 to 30 minutes.
- Cool the layers. Let the cakes rest in pans for ten minutes before turning them onto wire cooling racks to cool completely to room temperature.
- Cook pastry cream. Whisk egg yolks, sugar, salt, milk, and cornstarch in a saucepan over medium-low heat until thickened, then finish with vanilla paste and butter.
- Chill the filling. Transfer the pastry cream to a bowl, cover with plastic wrap pressed directly against the surface, and refrigerate for at least two hours.
- Whip Swiss meringue. Whisk egg whites and sugar over simmering water until 160°F, then beat on high until stiff and glossy before slowly adding softened butter.
- Assemble the cake. Trim the cake tops, spread chilled pastry cream between the layers, and coat the exterior with the Swiss meringue frosting.
Notes
- Use a digital scale to weigh your flour for the most consistent and delicate cake crumb.
- Ensure your dairy and eggs are at room temperature to prevent the cake batter from curdling or becoming dense.
- If your Swiss meringue frosting appears soup-like during preparation, chill it briefly before continuing to whip.
- Pressing warm pastry cream through a fine-mesh sieve ensures a perfectly smooth and lump-free texture for your filling.
- Cover cooling cake layers with a clean kitchen towel to maintain moisture and prevent the edges from drying out.
- Prep Time: 45 mins
- Cook Time: 30 mins
- Category: Dessert
- Method: Baking
- Cuisine: American
Honest Ingredients
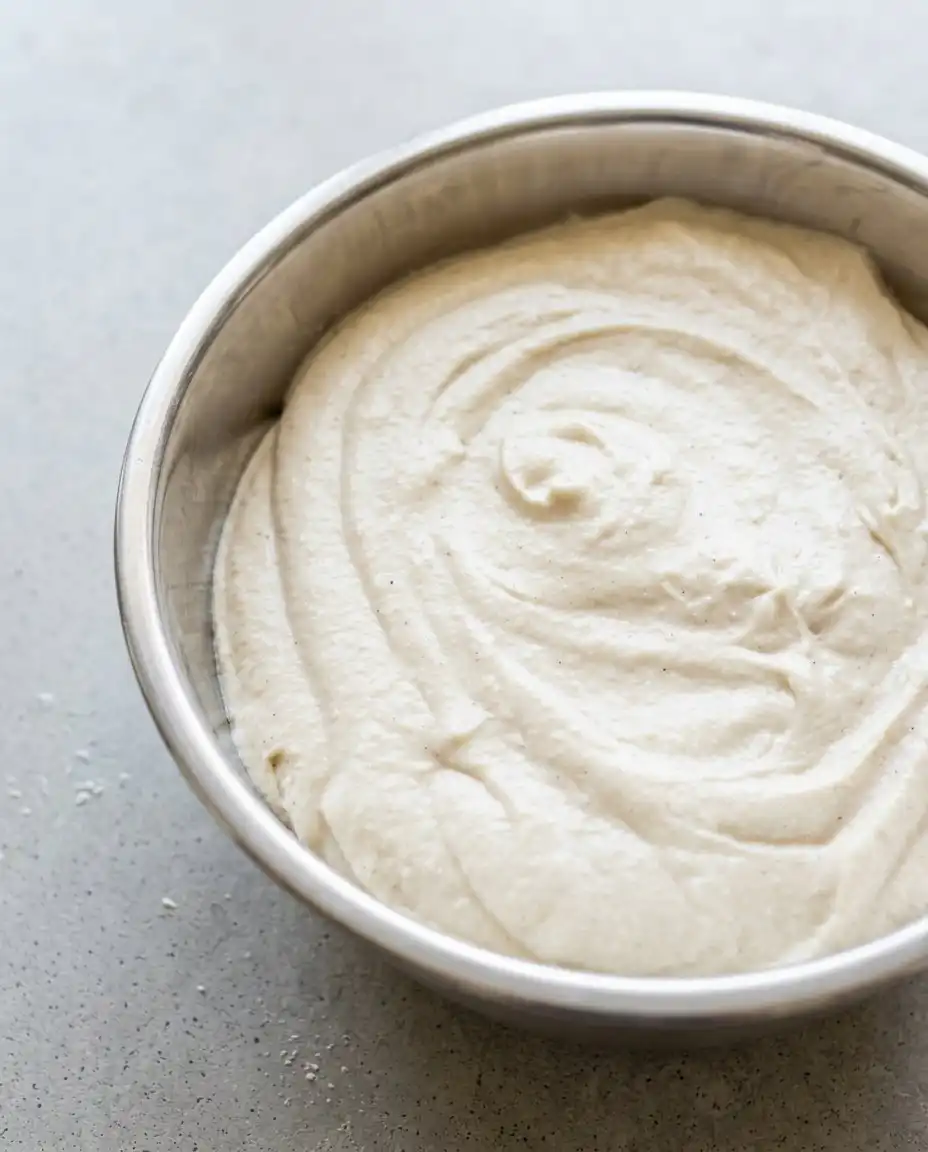
Building a cake from scratch requires a deep respect for the pantry staples that form its foundation. This Classic Vanilla Bean Layer Cake thrives when the eggs are fresh from the coop and the butter has softened naturally on the counter. Each element serves a specific purpose in creating the harmony of textures found in every slice.
- Cake Flour: This low-protein flour is essential for the soft, tight crumb that defines a professional-style bake.
- Vanilla Bean Seeds: Scraped directly from the pod, these provide the floral aroma and characteristic visual beauty.
- Egg Whites: By omitting the yolks in the cake batter, we achieve a snowy white color and a lighter feel.
- Whole Milk: Provides the necessary moisture and fat to ensure the cake remains tender for days.
- Cornstarch: Used in the pastry cream to create a thick, stable filling that mimics a rich pudding.
- Cream of Tartar: This acidic salt stabilizes the egg whites in the frosting, creating a glossy and stiff meringue.
| Ingredient | Why It Matters |
|---|---|
| Cake Flour | Creates a delicate, fine crumb structure. |
| Vanilla Bean Seeds | Provide visual beauty and deep aromatic flavor. |
| Egg Whites | Keep the cake light and purely white. |
| Butter | Adds richness and a tender mouthfeel. |
| Almond Extract | Enhances the floral notes of the vanilla. |
A Slow, Steady Bake
Step 1: Prepare the Pans and Oven
Preheat your oven to 350°F and prepare two 8-inch round cake pans. Lightly coat the pans with butter and place a circle of parchment paper at the bottom before applying another thin layer of butter. This double protection ensures your layers release without tearing or sticking to the metal.
Step 2: Mix the Dry Base and Butter
In the bowl of your electric mixer, combine the cake flour, sugar, baking powder, and salt. Turn the mixer to a low setting and add the room-temperature butter one tablespoon at a time. Continue mixing until the butter is fully incorporated and the texture resembles coarse cornmeal with no large lumps remaining.
Step 3: Combine the Liquid Ingredients
In a separate enamel or glass bowl, whisk the egg whites until they become frothy and lose their viscous texture. Add the vanilla bean seeds, vanilla extract, and almond extract to the milk, stirring gently. The milk should look cloudy and fragrant, with the dark seeds distributed throughout the liquid.
Step 4: Bake Your Classic Vanilla Bean Layer Cake
Gradually add half of the egg white mixture and half of the milk to the dry ingredients while the mixer runs on low speed. Repeat with the remaining liquids and mix for thirty seconds until the batter is smooth. Divide the batter between the pans and bake for 25 to 30 minutes until a skewer comes out clean.
Step 5: Cool the Layers Completely
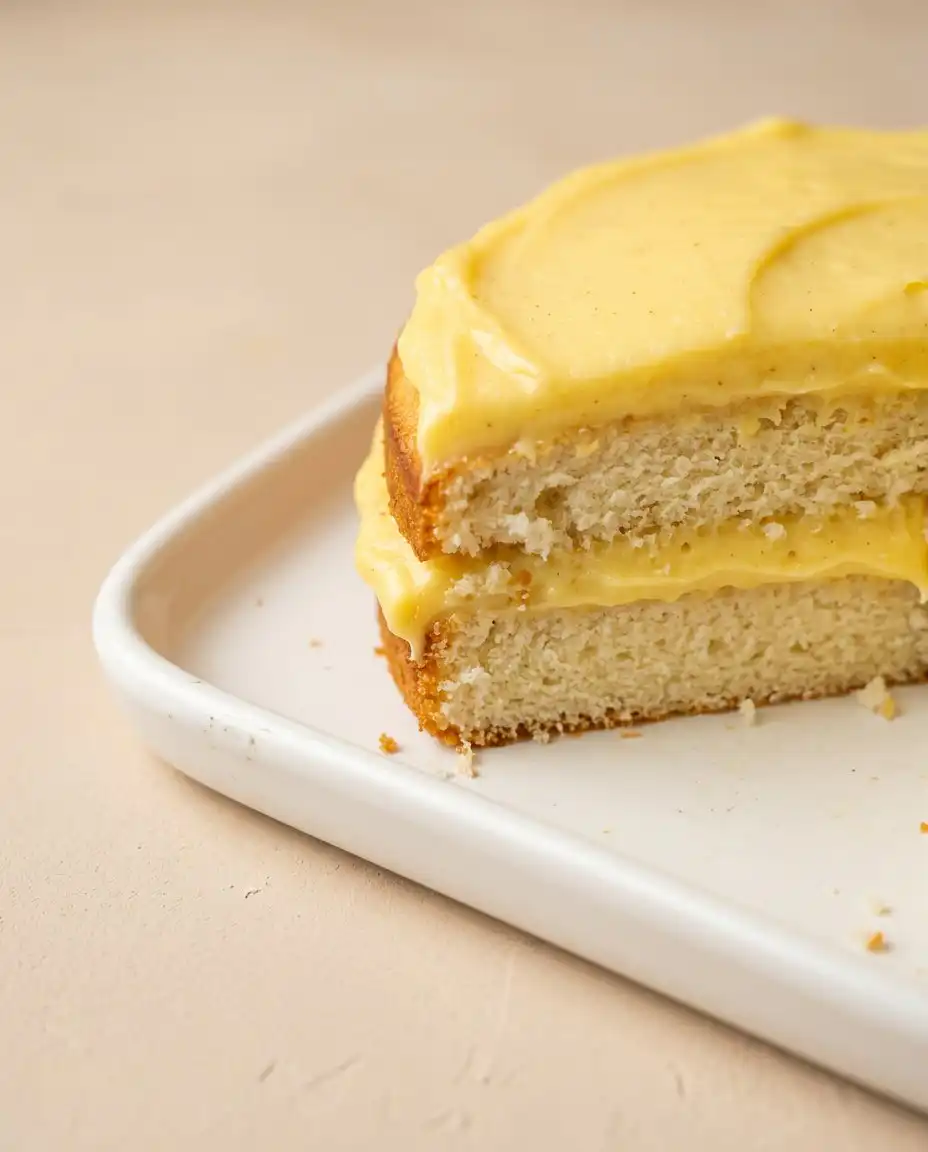
Allow the cakes to rest in their pans for ten minutes before turning them onto wire cooling racks. Peeling away the parchment paper should reveal a golden, even surface. Let the layers reach room temperature before you attempt to fill or frost them to prevent the butter from melting.
Step 6: Cook the Pastry Cream Filling
Combine egg yolks, sugar, salt, milk, and cornstarch in a heavy-bottomed saucepan over medium-low heat. Whisk continuously as the mixture warms, watching for it to thicken into a dense, pudding-like consistency. Once it bubbles, remove it from the heat and whisk in the vanilla paste and cold butter until the surface is shiny.
Step 7: Chill the Filling
Transfer the warm pastry cream to a bowl and press a piece of plastic wrap directly onto the surface. This prevents a skin from forming as the cream cools in the refrigerator. Let it chill for at least two hours so it becomes firm enough to support the weight of the top cake layer.
Step 8: Prepare the Swiss Meringue Frosting
Whisk egg whites and sugar over a pot of simmering water until the sugar grains disappear and the mixture reaches 160°F. Move the bowl to your stand mixer and whip on high speed until the meringue is stiff, glossy, and cool to the touch. Slowly add the softened butter, one piece at a time, until the frosting becomes thick and creamy.
Step 9: Assemble the Layers
Trim the tops of the cakes with a serrated knife to create a flat surface. Spread the chilled pastry cream over the first layer, leaving a small border at the edge. Place the second layer on top and apply a thin crumb coat of frosting before finishing the exterior with the remaining silky buttercream.
What I’ve Learned at the Counter
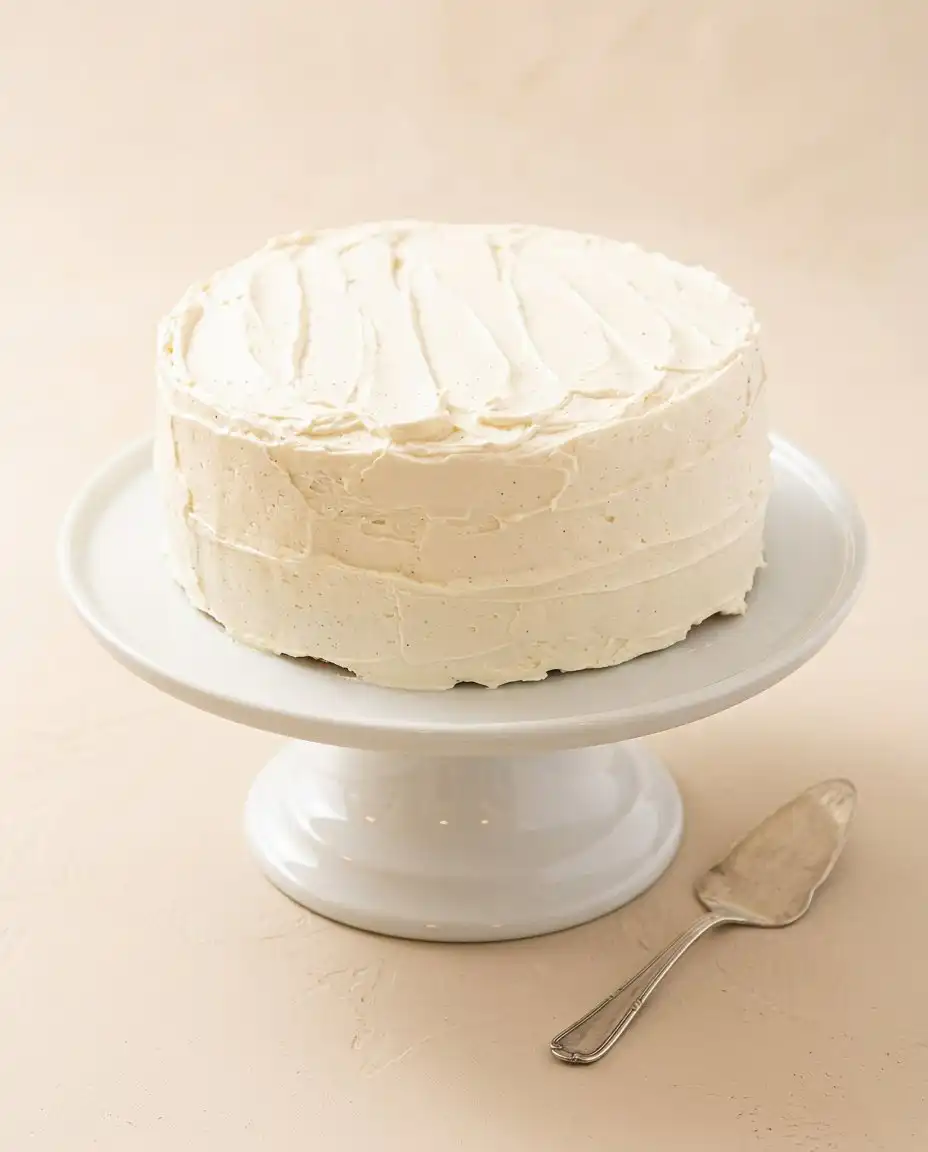
Temperature is the most critical factor when working with Swiss meringue frosting. If the meringue is still warm when you add the butter, the frosting will melt into a soup. If this happens, place the entire bowl in the refrigerator for fifteen minutes and try whipping it again to restore the structure.
When scraping a vanilla bean, use the back of a small knife to pull the seeds from the pod. This prevents you from cutting through the skin and ensures you collect every fragrant speck for your batter. For those who prefer a more traditional method, my guide on vanilla cake offers more insights.
Measuring flour by weight rather than volume will yield the most consistent results in a farmhouse kitchen. A cup of flour can vary significantly depending on how tightly it is packed into the scoop. Using a digital scale ensures the crumb remains light and airy every time you bake.
If your pastry cream looks lumpy after cooking, it usually means the heat was too high or the whisking was too slow. You can fix this by pressing the warm cream through a fine-mesh sieve into a clean bowl. This extra step removes any overcooked egg bits and restores the velvety texture.
Always use room temperature dairy and eggs for the cake batter to encourage proper emulsification. Cold milk can cause the butter to seize up, leading to a dense and uneven bake. I often follow the vanilla bean layer cake technique to ensure my ingredients are handled with the care they deserve.
Protect your cake layers while they cool on the rack by covering them with a clean linen tea towel. This prevents the edges from drying out in the air. If you are baking in a dry climate, this small habit makes a noticeable difference in the final mouthfeel of the dessert.
Frequently Asked Questions
How should I store this cake to keep it fresh?
Keep the cake in the refrigerator because the pastry cream and Swiss meringue frosting contain dairy and eggs. It stays fresh for up to three days when covered in an airtight container or a cake dome. Remove the cake from the fridge thirty minutes before serving to let the butter in the frosting soften.
Can I use all-purpose flour instead of cake flour?
You can substitute all-purpose flour, but the texture will be slightly heavier and more bread-like. If you must use it, remove two tablespoons of flour from every cup and replace them with two tablespoons of cornstarch. Sift the mixture three times to ensure the cornstarch is evenly distributed.
Why did my Swiss meringue frosting turn soupy?
The most common reason for soupy frosting is adding the butter while the meringue is still too warm. If the base of the bowl feels warm to the touch, the butter will melt upon contact. Chill the mixture for fifteen minutes in the refrigerator and continue whipping until it comes together into a creamy consistency.
What can I do with the leftover egg yolks from the cake?
The pastry cream in this recipe uses four yolks, which helps utilize the eggs. Any remaining yolks can be used to make a rich lemon curd or a batch of homemade vanilla pudding. You can also add them to your morning scrambled eggs for a richer breakfast.
Can I bake the cake layers in advance?
The cake layers can be baked up to one week in advance if they are wrapped tightly in plastic and stored in the freezer. Thaw them in the refrigerator overnight before assembling. This is a helpful strategy when preparing for a large gathering or a busy weekend.
Is vanilla bean paste the same as vanilla extract?
Vanilla bean paste contains the actual seeds and a thicker consistency, providing more intense flavor and visual appeal. You can use them interchangeably in a one-to-one ratio for this recipe. Use the paste in the frosting and filling to make the dark specks really stand out against the white cream.
Ways to Adapt It
When the first berries of spring appear at the market, I love to add a layer of sliced strawberries over the pastry cream. The tartness of the fruit cuts through the richness of the vanilla bean seeds beautifully. If you find yourself without cake flour, this yellow cake recipe is a wonderful alternative that uses standard pantry staples.
For an autumn twist, replace the almond extract with a hint of maple syrup in the frosting. This adds a grounded, earthy sweetness that pairs well with the floral vanilla notes. You can also turn this into a rustic sheet cake by baking the batter in a rectangular pan and spreading the pastry cream and frosting in thick, uneven swirls on top.
Honest ingredients, honest cake. The simplicity of this recipe allows you to experiment with different extracts, such as orange blossom or lavender, depending on what the season offers in your kitchen garden.
At the Table
Serve this cake on a plain white ceramic plate to let the golden layers and dark vanilla specks take center stage. A simple linen napkin and a silver fork are all you need to complete the setting. I find that a pot of Earl Grey tea or a cup of dark coffee balances the sweetness of the Swiss meringue perfectly.
You can even use a vanilla mousse cake filling instead of pastry cream for a lighter finish during the warmer months. If you are serving this for a celebration, consider placing the cake on a wooden pedestal to emphasize its rustic charm. The edges crack — that’s rustic charm, and it looks beautiful under the soft light of a kitchen window.
During the peak of summer, a bowl of macerated stone fruit on the side adds a bright acidity to the dish. Peaches or plums that have sat in their own juices for an hour provide a wonderful contrast to the velvety frosting. This cake is meant to be shared slowly, with good conversation and no rush to clear the table.
A Last Note
There is a certain peace that comes from the process of baking a Classic Vanilla Bean Layer Cake. From scraping the beans to watching the meringue turn glossy, every step is a reminder to slow down and appreciate the materials in front of you. I hope this classic vanilla butter cake becomes a favorite in your home and a regular guest at your most cherished gatherings.
Please share your bakes and your kitchen stories with our community. Seeing these recipes come to life in your own farmhouse kitchens is the greatest reward for any baker. You can find more inspiration and follow our seasonal baking journey on our social channels below.