Baking relies on starch gelatinization and fat coats gluten to yield the tender structure needed for a flawless cake ball.

When you craft Classic Vanilla Cake Pops, the structural integrity of your baked base determines the final texture. Traditional methods often rely on boxed mixes that contain stabilizers, resulting in a greasy, overly sweet crumb. This recipe employs a scratch-built vanilla cake paired with a measured buttercream to provide structural stability. By understanding the ratio of moisture to starch, you can create a bite-sized treat that holds its shape on the stick.
What the Testing Showed: The Physics of Classic Vanilla Cake Pops
Prep: 120 min · Serves: 40 · Difficulty: Medium
- Balanced ratios prevent greasy or soggy cake balls.
- Scratch-baked base provides superior crumb density.
- Controlled chilling keeps spheres securely on their sticks.
- Proper chocolate emulsion creates a smooth, glossy shell.
- Repeatable steps eliminate guesswork during the dipping process.
Through testing, we developed this reliable method for cake pops to prevent common failures like cracking or sliding. Precision creates consistency when assembling these delicate treats.
Get The Full Cake Recipe
Print
Classic Vanilla Cake Pops
- Total Time: 156 mins
- Yield: 40 pops
Description
These scratch-made vanilla cake pops feature a dense, tender crumb and a smooth chocolate shell. Using precise ingredient ratios and controlled temperature techniques, this recipe ensures a professional-grade treat that holds its shape perfectly on the stick.
Ingredients
- 209 grams all-purpose flour
- 1/2 teaspoon baking powder
- 1/4 teaspoon baking soda
- 1/2 teaspoon salt
- 99 grams softened butter (for cake)
- 150 grams granulated sugar
- 1 large egg
- 2 teaspoons pure vanilla extract
- 60 ml whole milk
- 99 grams softened butter (for frosting)
- 120 grams confectioners’ sugar
- 1 teaspoon heavy cream
- 24 ounces candy melts
Instructions
- Prep and preheat. Preheat your oven to 350°F (177°C) and grease a 9-inch springform pan. Whisk the flour, baking powder, baking soda, and salt together in a bowl until uniform.
- Cream butter and sugar. Beat the softened butter and granulated sugar in a stand mixer on medium speed for 3 minutes until light, fluffy, and pale.
- Integrate wet ingredients. Add the egg and 2 teaspoons of vanilla extract, beating on high speed for 1 minute until emulsified; scrape down the bowl as needed.
- Bake the cake. Add dry ingredients and milk to the mixer on low speed, then pour the batter into the pan and bake for 30 to 36 minutes until a toothpick comes out clean.
- Prepare the frosting. Once the cake is completely cooled, beat the remaining butter for 2 minutes, then incorporate the confectioners’ sugar, heavy cream, and vanilla, beating on high for 3 minutes.
- Combine cake and frosting. Crumble the cooled cake into the bowl of frosting and mix on low speed until a cohesive, pliable dough forms.
- Shape and chill. Scoop 20-gram portions, roll into smooth spheres, place on a parchment-lined sheet, and refrigerate for 2 hours until firm.
- Prepare for dipping. Melt the candy coating in 20-second microwave bursts; dip a lollipop stick into the coating and push it halfway into a chilled sphere to anchor it.
- Dip and set. Submerge the sphere in the coating, tap off the excess, add sprinkles if desired, and place in a foam block for 1 hour to set.
Notes
- Weighing ingredients with a digital scale is critical for maintaining the specific crumb density required for structural integrity.
- Ensure the cake is completely cool before adding frosting to prevent the mixture from becoming greasy or soft.
- Let chilled cake spheres sit at room temperature for 10 minutes before dipping to prevent the outer shell from cracking due to temperature shock.
- Use a deep, narrow vessel for melting the coating to ensure full coverage without needing excessive amounts of candy.
- Prep Time: 120 mins
- Cook Time: 36 mins
- Category: Dessert
- Method: Baking
- Cuisine: American
The Working Components

Successful baking depends on the chemical reactions between your structural, tenderizing, and liquid elements. Every ingredient in this formulation plays a precise role in achieving the ideal crumb density. Weighing these components guarantees your baked base is neither too dry to bind nor too wet to hold its shape.
- All-Purpose Flour: Provides the gluten structure required to hold the binder without turning gummy.
- Unsalted Butter: Softened to room temperature, butter coats the flour proteins to limit gluten development.
- Granulated Sugar: Acts as a tenderizer and holds moisture, preventing the baked base from drying out.
- Large Egg: Delivers emulsifiers through the yolk, binding the liquid and fat components together.
- Whole Milk: Hydrates the dry ingredients, activating the leavening agents for an even bake.
- Confectioners’ Sugar: Thickens the buttercream binder to provide structural security without graininess.
- Candy Melts: Formulated to melt smoothly and set firmly, creating a resilient exterior shell.
| Ingredient | Why It Matters |
|---|---|
| All-Purpose Flour | Establishes the foundation of the structural crumb. |
| Unsalted Butter | Controls gluten development and adds necessary fat. |
| Granulated Sugar | Tenderizes the cake structure and retains moisture. |
| Whole Milk | Activates the leavening agents and adds hydration. |
| Candy Melts | Creates a firm, glossy shell that seals moisture. |
The Tested Procedure

Step 1: Prep and Preheat
Preheat your oven to 350°F (177°C) and grease a 9-inch springform pan to prevent sticking. Whisk the 209 grams of all-purpose flour, 1/2 teaspoon of baking powder, 1/4 teaspoon of baking soda, and 1/2 teaspoon of salt together in a medium mixing bowl. The dry mixture should look uniform and free of visible clumps before you proceed.
Step 2: Cream the Butter and Sugar
Fit your stand mixer with the paddle attachment, then beat the softened butter and granulated sugar together in a large bowl. Run the mixer on medium speed for 3 minutes until the mixture appears light, fluffy, and significantly paler in color. This process introduces crucial air pockets that will help the cake rise during baking.
Step 3: Integrate the Wet Ingredients
Add the room-temperature egg and 2 teaspoons of pure vanilla extract to the creamed butter mixture. Beat on high speed until the egg is fully emulsified into the fats, which takes 1 minute. Stop the mixer to scrape down the sides and bottom of your bowl to guarantee an even distribution.
Step 4: Mix and Bake the Cake Base
Add the dry ingredients and whole milk to the bowl, mixing on low speed until the batter combines. Stir the thick batter briefly with a rubber spatula to make sure no dry pockets remain at the bottom. Pour the batter into the greased springform pan and bake at 350°F (177°C) for 30 to 36 minutes until a toothpick inserted in the center comes out completely clean.
Step 5: Cool and Prep the Frosting
Cool the baked cake completely on a wire rack to prevent steam from condensing inside your spheres later. While the base cools, beat 99 grams of softened butter on medium speed for 2 minutes until it becomes creamy and smooth. Add the confectioners’ sugar, heavy cream, and vanilla extract, mixing on low before beating on high speed for 3 minutes until the frosting is aerated.
Step 6: Crumble and Combine
Break the completely cooled cake into fine crumbs directly into the bowl with the prepared buttercream frosting. Run the mixer on low speed to combine the crumbs and frosting until a cohesive dough forms. The mixture should feel like pliable clay and hold its shape when squeezed.
Step 7: Portion and Shape the Spheres
Scoop 1 tablespoon of dough, weighing 20 grams, and roll it between your palms into a smooth sphere. Place the formed spheres onto a baking sheet lined with parchment paper and refrigerate them for 2 hours. The chilled spheres must feel firm and cold to the touch before you begin the dipping process.
Step 8: Coating Your Classic Vanilla Cake Pops
Melt 24 ounces of candy melts in a narrow, 2-cup glass measuring cup in the microwave using 20-second bursts, stirring between each interval. Remove only 2 or 3 chilled spheres from the refrigerator at a time so they do not warm up. Dip 1/2 inch of a lollipop stick into the melted coating, then push it halfway into a chilled sphere.
Step 9: Dip and Set the Shell
Submerge the sphere entirely into the melted coating in one smooth motion until the chocolate meets the stick. Gently tap the stick vertically against the edge of the glass cup to allow the excess coating to drip back down. Decorate the wet shell with sprinkles immediately, then place the stick upright in a styrofoam block for 1 hour to set.
Precision Tips

Weighing your flour with a digital scale prevents an overly dry cake base. If you scoop flour with a cup, you risk packing it, which results in a dense crumb that absorbs too much buttercream and turns gummy.
If your coating cracks after setting, it means the temperature difference between the cold cake spheres and the warm coating was too extreme. To fix this, let your chilled spheres sit at room temperature for 10 minutes before dipping to narrow the temperature gap.
To prevent your cake balls from slipping off their sticks, make certain you dip the tip of the stick into the melted coating first. The hardened chocolate acts as a structural anchor that stabilizes the sphere during dipping.
Always tap the stick vertically, not horizontally, when removing excess coating. Horizontal tapping can weaken the structural seal where the stick enters the cake sphere, causing the sphere to shear and drop into the cup.
Using a narrow, deep container like a silicone or glass measuring cup reduces the volume of coating required to fully submerge each piece. For more troubleshooting metrics on melting temperatures, check this detailed tutorial on cake pop mechanics from Sally’s Baking Addiction.
If your melted candy coating is too viscous, add 1/2 teaspoon of vegetable oil or paramount crystals to thin it. A thinner coating flows more easily, resulting in a lighter shell that does not weigh down the delicate cake core.
Frequently Asked Questions
Why are my cake pops cracking?
Cracking occurs when there is an extreme temperature discrepancy between the freezing cold cake sphere and the warm melted coating. As the cold cake expands slightly upon warming, it forces the rapidly hardening shell to split. To prevent this, allow your chilled spheres to rest on the counter for 10 minutes before dipping.
Why are my cake pops falling off the sticks?
Spheres fall off the stick when the cake mixture is too heavy, too warm, or lacks a secure chocolate anchor. Make certain you dip the tip of the stick into the melted coating before inserting it halfway into the sphere. Additionally, keep the spheres properly chilled so they maintain their structural integrity during dipping.
How long do they last, and how should I store them?
You can store these treats in an airtight container in the refrigerator for up to 1 week. If you plan to make them further in advance, freeze the undipped spheres on a tray for 1 hour, then transfer them to a freezer-safe bag for up to 6 weeks. Thaw the frozen spheres overnight in the refrigerator before dipping.
Can I use store-bought frosting?
While store-bought frosting is convenient, its high water content and oil stabilizers can make your cake mixture greasy or too soft to stay on the stick. The scratch-made buttercream in this recipe provides the precise ratio of fat and sugar needed to bind the crumbs securely. If you must use canned frosting, start with a minimal amount and add more only as needed.
Should I use real chocolate or candy melts?
Candy melts are highly recommended for beginners because they contain palm oil, which melts smoothly and sets into a durable shell without tempering. Real chocolate contains cocoa butter, which requires precise tempering to achieve a glossy finish and snappy texture. If you choose real chocolate, add a small amount of vegetable oil to help thin the melted consistency.
How do I prevent flat-bottomed cake pops?
To maintain a symmetrical sphere, you must dry the dipped pops upright rather than laying them flat on a tray. Inserting the sticks into a thick styrofoam block or a cardboard box with pre-punched holes keeps them elevated while the shell sets. Confirm the block is heavy enough so the weight of the pops does not cause it to tip over.
Can I make the cake base a day in advance?
Baking the vanilla cake base 1 day before assembly is highly efficient and actually improves the crumbling process. Wrap the cooled cake tightly in plastic wrap and store it at room temperature overnight. This rest period stabilizes the crumb structure, making it easier to break into uniform crumbs without creating gummy patches.
Tested Variations
Substitute the pure vanilla extract with an equal volume of vanilla bean paste in both the cake and frosting. This swap introduces visible vanilla specks and a deeper aromatic profile, mimicking the complexity of a classic vanilla bean layer cake.
Replace the candy melts with chopped high-quality white chocolate baking bars thinned with a touch of coconut oil. The real cocoa butter in white chocolate provides a richer flavor profile, though it requires more careful temperature control during melting to prevent seizing.
Add the finely grated zest of one medium lemon to the sugar before creaming the butter. This simple chemical addition cuts through the sweetness of the buttercream and coating without altering the structural moisture ratios of the batter.
Finishing & Plating
Arranging these treats on a dessert table requires consideration of both visual height and temperature control. Display them upright by anchoring the sticks into custom-designed wooden blocks, decorative jars filled with sugar crystals, or structured foam bases. Keep them in a cool room below 72°F (22°C) to prevent the delicate coating from softening before consumption.
For elegant gatherings, present these bite-sized treats alongside traditional baked goods to provide contrasting textures. They pair exceptionally well with delicate pastries or mini vanilla layer cakes on a tiered serving stand. This arrangement offers guests a variety of dessert formats while maintaining a consistent flavor profile across your sweet spread.
If you are preparing these for individual favors, wrap each finished sphere in a small cellophane bag and secure it with a ribbon just below the base. This protective barrier preserves freshness and prevents accidental scuffing during transport. Labeling each bag with the flavor profile adds a professional touch that guests appreciate.

Recipe Recap
Mastering the assembly of these sweet spheres relies on understanding the physical balance between cake crumb density and buttercream binder. When you measure your ingredients by weight and control the temperature of your components, you achieve a reliable structure every single time. This methodical approach transforms a notoriously difficult dessert into a predictable, repeatable baking project.
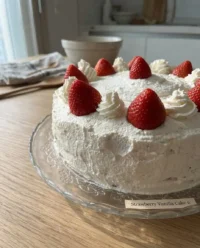
If you enjoy the foundational flavors of this recipe, you can apply these same structural principles to larger formats like a traditional classic vanilla cake. Both desserts rely on the same chemical reactions to produce a tender crumb that melts in your mouth. Taking the time to understand the role of each component boosts your confidence in the kitchen.
We invite you to share your results with our community of precision bakers. Let us know how your batch turned out by connecting with us on Pinterest, Facebook, and TikTok. Your feedback and notes help us refine our test kitchen experiments for future formulas.

