Growing up in the heart of Virginia, summer was defined by the scent of honeysuckle and the sound of laughter echoing across our back porch during family reunions. My grandmother always insisted that a gathering wasn’t truly a celebration without a dessert that looked as good as it tasted, something vibrant and proud to sit at the center of the picnic table. She taught me that the secret to a happy home often starts with a warm kitchen and a treat that brings folks together with every sweet, creamy bite.

These Patriotic Cheesecake Bars are my love letter to those sun-drenched Southern afternoons, offering a rich, velvety texture that balances perfectly against the crisp snap of a buttery graham cracker crust. By combining fresh, seasonal berries with a classic cheesecake base, we create a handheld delight that captures the spirit of community and the joy of shared traditions. Whether you are hosting a neighborhood cookout or a quiet Sunday dinner, these bars provide a reliable, beautiful finish to any meal.
A Perfect Treat for Any Occasion
There is something truly special about a dessert that manages to be both deeply comforting and visually stunning without requiring hours of fussy decoration. These bars win hearts because they offer that signature tender crumb and smooth mouthfeel that I strive for in every recipe at Cake Peak. The tangy zip of the sour cream cuts through the richness of the cream cheese, making every mouthful light enough for a warm summer day.
Folks love these bars because they are remarkably practical for large gatherings where slicing a full cake might feel like a chore. You get the same decadent experience of a gourmet cheesecake but in a portable format that is easy to share and even easier to enjoy while mingling. The combination of sweet strawberries and tart blueberries atop a creamy white canvas creates a natural beauty that honors our traditions with simple, honest ingredients.
Beyond the flavor, this recipe is a favorite because it is built on a foundation of professional technique made accessible for the home baker. We focus on achieving the perfect moisture levels and a dense, satisfying texture that doesn’t feel heavy on the palate. It is the kind of reliable recipe that becomes a family heirloom, passed down through generations just like the wisdom of a well-seasoned cast iron skillet or the secret to the perfect Sunday roast.
Print
Patriotic Cheesecake Bars
- Total Time: 3 hours 5 mins
- Yield: 24 bars
- Diet: Vegetarian
Description
Celebrate with these vibrant and creamy cheesecake bars featuring a buttery graham cracker crust and a smooth, tangy filling. Topped with fresh strawberries and blueberries arranged like a flag, they are the perfect handheld treat for any festive summer gathering.
Ingredients
- Graham cracker crumbs
- Unsalted butter, melted
- Granulated sugar
- Full-fat cream cheese, softened
- Sour cream
- Large eggs
- Vanilla extract
- Fresh strawberries, sliced
- Fresh blueberries
Instructions
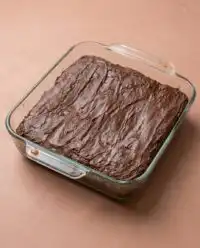
- Preheat your oven to 325°F (163°C) and line a 9×13-inch baking pan with parchment paper.
- In a medium bowl, stir together graham cracker crumbs, melted butter, and a touch of sugar until the texture resembles wet sand.
- Press the mixture firmly into the bottom of the prepared pan and bake for 10 minutes, then set aside to cool.
- In a large bowl, beat the softened cream cheese at medium speed until completely smooth.
- Gradually beat in the granulated sugar and vanilla extract until the mixture is well-combined and glossy.
- Add eggs one at a time, mixing just until combined, then gently fold in the sour cream with a spatula.
- Pour the batter over the cooled crust, smooth the top, and bake for 30 to 35 minutes until the edges are set but the center still jiggles slightly.
- Cool completely on a wire rack at room temperature, then refrigerate for at least 2 hours or overnight.
- Arrange the sliced strawberries and whole blueberries across the top of the chilled cheesecake to create a flag design.
- Lift the bars out using the parchment paper and slice into squares using a clean, sharp knife.
Notes
For the best results, use full-fat brick cream cheese rather than the spreadable kind found in tubs, as the consistency is vital for a firm bar. To prevent cracking, ensure all your refrigerated ingredients are at room temperature before you begin mixing to ensure a silky smooth batter.
- Prep Time: 20 mins
- Cook Time: 45 mins
- Category: Dessert
- Method: Baking
- Cuisine: Southern American
The Foundation of Flavor

Creating a masterpiece starts with understanding your pantry, and for these bars, we rely on high-quality Southern staples that provide deep flavor and structural integrity. I always tell my students that the quality of your butter and the temperature of your dairy will determine the success of your bake long before the oven is even turned on.
- Graham Cracker Crumbs: These provide the essential crunch and a subtle honey-sweetness that anchors the rich filling.
- Unsalted Butter: Melting high-quality butter ensures the crust stays together while adding a luxurious, savory note to the base.
- Cream Cheese: This is the heart of our bars; using full-fat, softened cream cheese is the only way to reach that professional, velvety smoothness.
- Granulated Sugar: We use just enough to sweeten the tang of the cheese without masking the natural brightness of the fresh fruit.
- Sour Cream: This is my secret weapon for moisture and a delicate tang that mimics the traditional flavors found in the best Southern bakeries.
- Large Eggs: These provide the structure and lift, binding the cream cheese into a custard-like consistency that melts in your mouth.
- Fresh Berries: Strawberries and blueberries aren’t just for show; they provide a burst of natural acidity and juice that complements the creamy filling perfectly.
The Process
Step 1: Prep Your Ingredients
Before you even think about mixing, make sure your cream cheese and eggs have sat out on the counter long enough to reach room temperature. This is a vital professional move that prevents lumps and ensures your batter is as smooth as silk. Preheat your oven to 325°F (163°C) and line a 9×13-inch baking pan with parchment paper, leaving a bit of overhang to help you lift the bars out later with ease.
Step 2: Mix the Crust
In a medium bowl, stir together your graham cracker crumbs, melted unsalted butter, and a touch of sugar. You are looking for a texture that resembles wet sand—it should hold its shape when you press a handful together. This buttery base is what provides the necessary contrast to the soft cheesecake layer above.
Step 3: Press and Pre-bake
Transfer the mixture to your prepared pan and press it firmly into an even layer across the bottom. I like to use the bottom of a flat measuring cup to get into the corners and ensure the crust is compact. Bake this for 10 minutes to set the structure and bring out a toasted aroma, then set it aside to cool while you focus on the star of the show.
Step 4: Cream the Cheese
In a large mixing bowl, beat your softened cream cheese until it is completely smooth and free of any small pieces. This step requires patience; rushing it now will lead to a grainy texture later. Use a medium speed to avoid whipping too much air into the mixture, which can cause the bars to puff up and then sink.
Step 5: Sweeten the Batter
Gradually pour in your granulated sugar and the vanilla extract, continuing to beat until the mixture looks glossy and well-combined. You will notice the aroma of the vanilla beginning to bloom as it mingles with the sugar and cheese, a hallmark of a classic Southern dessert in the making.
Step 6: Incorporate the Eggs and Sour Cream
Add your eggs one at a time, mixing just until the yellow disappears before adding the next one. Once the eggs are in, gently fold in the sour cream using a spatula or the lowest setting on your mixer. Folding keeps the batter dense and creamy, which is exactly what we want for a bar that holds its shape when sliced.
Step 7: Pour and Bake
Pour that beautiful, thick batter over your cooled crust and use a spatula to smooth it out toward the edges. Slide the pan into the center of the oven and bake for 30 to 35 minutes. You are looking for the edges to be set and slightly puffed, while the center should still have a gentle, rhythmic jiggle when you give the pan a soft nudge.
Step 8: Cool and Set
This is perhaps the hardest part: waiting. Let the pan cool completely at room temperature on a wire rack to prevent the crust from becoming soggy. Once it is cool to the touch, move it to the refrigerator for at least 2 hours, though overnight is even better for developing the deepest flavor and the best cutting consistency.
Step 9: Design Your Flag
Just before you are ready to serve, arrange your sliced strawberries and whole blueberries across the top. I like to place the blueberries in the top left corner to represent the stars and use the strawberry slices to create the iconic red and white stripes of our flag. This creative touch makes the dish a true centerpiece.
Step 10: Slice and Serve
Lift the chilled cheesecake out of the pan using the parchment paper handles. Use a long, sharp knife to cut the slab into even bars, wiping the blade clean between every single cut. This technique is how professional chefs get those crisp, clean edges that make the fruit pop against the white filling.
Pro Moves for Success

To achieve that signature professional finish, always make certain your cream cheese is truly soft before you begin mixing. If the cheese is even slightly cold, you will end up with tiny white lumps that no amount of whisking can fully remove once the liquid ingredients are added. Another secret for the most beautiful presentation is to pat your berries dry with a paper towel after washing them. This prevents the juice from bleeding into the white cheesecake, keeping your colors sharp and patriotic.
If you find yourself worrying about the texture, remember that low and slow is the way to go with cheesecake. Avoid the temptation to crank up the heat; a steady 325°F (163°C) prevents the eggs from overcooking and keeps the top from cracking. For those who want to master more fruit-topped delights, you might find my guide on strawberry cheesecake helpful for learning how to handle delicate summer produce. For even more inspiration on holiday baking, check out this great resource at My Savory Twist.
Classic Twists
While the red, white, and blue theme is a favorite for summer holidays, you can easily adapt this recipe to suit any Southern tradition. For a bright, citrusy flare that cuts through the richness, try adding the zest of two large lemons and a tablespoon of fresh juice to the batter. This creates a refreshing profile that pairs wonderfully with a tall glass of sweet tea on a hot afternoon.
If you are looking for a different aesthetic but want to keep the same festive spirit, you can swap the strawberry stripes for a raspberry jam swirl. Simply dollop small amounts of jam over the unbaked filling and use a toothpick to create elegant patterns before placing it in the oven. For those who prefer a more traditional cake structure for their celebrations, my red-white-and-blue-cake offers a wonderful alternative that still hits all those patriotic notes.
Celebration Time

When it comes time to bring these bars to the table, presentation is everything. I love to serve them on a large white platter or a rustic wooden board to let the colors of the fruit really shine. If you want to go the extra mile, add a small dollop of homemade whipped cream next to each bar just before serving; the airy sweetness of the cream provides a lovely contrast to the dense cheesecake.
These bars are a natural fit for a holiday dessert spread alongside other classics. For a truly impressive table that will have the whole neighborhood talking, try serving these alongside my flag cake to give your guests a variety of textures and styles. Whether you are at a church potluck or a backyard reunion, these treats are best enjoyed with good company and a spirit of gratitude.
The Final Slice
Baking is more than just following a set of instructions; it is a way to share love and create memories that last long after the final crumb has been enjoyed. These Patriotic Cheesecake Bars represent the very best of Southern hospitality—reliable, beautiful, and made with a whole lot of heart. I hope they bring as much joy to your family as they have to mine over the years, serving as a reminder that the best things in life are often the ones we share with the people we love most.
If you find yourself craving a different kind of citrusy brightness after this project, I highly recommend looking into my lemon cheesecake for your next kitchen adventure. I would love to see how your bars turned out, so please share your creations and join our community of home bakers. You can find more tips and Southern baking wisdom by following us on Pinterest, Instagram, Facebook, and YouTube. Keep baking with heart, and I will see you at the next celebration!
