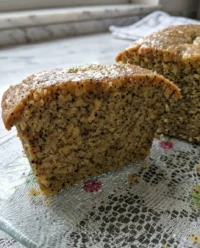
My grandmother’s church potluck tables were always crowded, but this golden cake stood right in the center, drawing every eye before the first prayer was even finished.

When you set a Classic Vanilla Layer Cake on the table, you are not offering a simple dessert; you are sharing a slice of pure Southern hospitality. Every single forkful carries the warmth of real vanilla bean paste and a delicate sweetness that feels both comforting and elegant. This recipe pairs a traditional white cake base with a rich, cooked custard filling and a velvety white chocolate buttercream that holds its shape beautifully. Getting this centerpiece to turn out right does not require luck, but rather a few reliable kitchen techniques that I am happy to walk you through today.
The Heart of This Classic Vanilla Layer Cake
Prep: 45 min · Serves: 12 · Difficulty: Medium
You will fall in love with this timeless Southern dessert.
- A crumb so tender it melts on your tongue.
- Elegant custard filling adds a rich homemade touch.
- White chocolate frosting whipped to glossy perfection.
- Beautiful golden layers that rise evenly every time.
- Traditional Southern flavors built on professional pastry techniques.
This is the classic vanilla bean layer cake that your family will request for every celebration.
Get The Full Cake Recipe
Print
Classic Vanilla Layer Cake
- Total Time: 3 hours
- Yield: 12 servings
Description
This timeless Southern layer cake features three tender vanilla bean sponge layers filled with a rich, velvety custard and encased in a glossy white chocolate buttercream. It is the perfect centerpiece for celebrations, offering an elegant balance of deep vanilla notes and melt-in-your-mouth texture.
Ingredients
- 3 cups all-purpose flour
- 2 tsp baking powder
- 1/2 tsp fine sea salt
- 1 cup unsalted butter, softened
- 2 cups granulated sugar
- 2 tbsp vanilla bean paste
- 1 tsp almond extract
- 6 large egg whites, room temperature
- 1 cup whole milk
- 1/4 cup vegetable oil
- 2 cups whole milk (for custard)
- 1/2 cup heavy cream
- 7 large egg yolks
- 1/2 cup granulated sugar (for custard)
- 3 tbsp cornstarch
- 4 oz white chocolate, chopped
Instructions
- Prep the oven. Preheat oven to 350°F (170°C) and grease three 9-inch cake pans, lining bottoms with parchment.
- Whisk dry ingredients. Combine flour, baking powder, and salt in a bowl, whisking until uniform.
- Cream butter and sugar. Beat butter and sugar in a stand mixer on medium-high for 4-5 minutes until pale and fluffy.
- Incorporate flavor and whites. Stir in vanilla paste and almond extract, then gradually add egg whites in four additions, scraping the bowl well.
- Combine liquids. Whisk milk and oil, then add to the butter mixture alternating with the dry ingredients.
- Mix until smooth. Combine on low speed just until the batter is smooth, being careful not to over-mix.
- Bake the layers. Divide batter into pans and bake for 30-34 minutes until a toothpick comes out clean.
- Cool the cakes. Rest in pans for 10 minutes before inverting onto wire racks to cool completely.
- Simmer milk mixture. Bring milk, cream, salt, and vanilla paste to a gentle simmer in a saucepan.
- Temper egg yolks. Whisk sugar and cornstarch into yolks, then slowly stir in the hot milk mixture.
- Cook the custard. Return to heat and whisk constantly until the custard thickens and bubbles.
- Stir in butter. Melt cold butter into the custard, strain through a sieve, and chill with plastic wrap pressed on the surface.
- Whip the buttercream. Beat room temperature butter, vanilla paste, and salt for 5-7 minutes until ivory and fluffy.
- Add condensed milk. Gradually stream in sweetened condensed milk while whipping on high speed.
- Fold in chocolate. Mix in the cooled, melted white chocolate until the frosting is thick and glossy.
- Assemble the cake. Level layers, pipe a buttercream border, fill with custard, and stack before applying a final crumb coat.
Notes
- Use a digital kitchen scale for dry ingredients to ensure the most consistent crumb structure.
- Ensure all cold ingredients like eggs and milk reach room temperature before starting to avoid curdled batter.
- If the custard develops lumps, use an immersion blender to quickly return it to a silky smooth texture.
- Always chill the cake for 30 minutes after the crumb coat to ensure the final layer of frosting applies smoothly.
- Store the finished cake in the refrigerator but bring it to room temperature for 20 minutes before serving to soften the butter-based frosting.
- Prep Time: 45 mins
- Cook Time: 45 mins
- Category: Dessert
- Method: Baking
- Cuisine: Southern
Gather These From the Pantry

Creating a spectacular dessert starts with selecting ingredients that work together to build flavor and structure. In my kitchen, we do not rely on shortcuts, but rather on simple pantry staples handled with a bit of care. Each element in this recipe plays a vital role in creating the moist texture and deep vanilla notes you expect from a heritage bake.
- Vanilla Bean Paste: This ingredient provides those beautiful dark specks and a deep, rounded flavor that standard extracts cannot match.
- Egg Whites: Whipping only the whites keeps our cake layers light, airy, and beautifully pale, allowing the vanilla flavor to shine through.
- Unsalted Butter: Using unsalted butter lets you control the salt levels precisely while providing that classic rich, melt-in-your-mouth crumb.
- Sweetened Condensed Milk: This pantry staple forms the base of our glossy buttercream, adding a smooth sweetness and luxurious body.
- Cornstarch: Essential for thickening our custard filling, cornstarch makes sure we get a stable layer that will not seep out when you slice.
- Whole Milk: High-fat whole milk adds necessary moisture and richness to both the batter and the cooked custard filling.
| Ingredient | Why It Matters |
|---|---|
| Vanilla Bean Paste | Delivers intense vanilla flavor and classic dark specks throughout the cake. |
| Egg Whites | Keeps the cake layers exceptionally light, fluffy, and pristine white. |
| Sweetened Condensed Milk | Creates an incredibly smooth, silky base for the whipped white chocolate buttercream. |
| Cornstarch | Thickens the custard filling to make sure the assembled cake slices cleanly. |
| Unsalted Butter | Provides the rich, buttery flavor and tender crumb structure of a true Southern classic. |
From Bowl to Cake Stand

Step 1: Prep Your Oven and Pans
Begin by preheating your oven to 350°F (170°C) with the oven rack positioned right in the center. Lightly grease three 9-inch cake pans with nonstick baking spray, then line the bottom of each pan with a parchment paper circle. Give the pans one more quick spray over the parchment to help the baked layers slip out cleanly without leaving any crumbs behind.
Step 2: Whisk the Dry Ingredients
In a large mixing bowl, combine your all-purpose flour, baking powder, and fine sea salt. Use a balloon whisk to aerate the mixture, stirring for about thirty seconds until everything is uniformly distributed. This simple step prevents any pockets of baking powder from causing uneven rising during the baking process.
Step 3: Cream the Butter and Sugar
Place your room temperature unsalted butter and granulated sugar into the bowl of your electric stand mixer fitted with the paddle attachment. Turn the mixer to medium-high speed and beat the mixture for a full four to five minutes until it looks pale yellow, fluffy, and light. This process beats microscopic air pockets into the butter, which is the foundation of a light, tender cake.
Step 4: Incorporate the Flavoring and Egg Whites
Lower the mixer speed and stir in the vanilla bean paste and almond extract until they are fully incorporated. Gradually add your room temperature egg whites in four separate additions, beating on medium speed after each addition to keep the emulsion stable. Take a moment to scrape down the sides and bottom of the bowl with a flexible spatula between additions.
Step 5: Mix the Milk and Oil
Whisk the whole milk and vegetable oil together in a large liquid measuring cup until the oil forms tiny droplets throughout the milk. Add about one-third of your dry ingredients to the creamed butter mixture, mixing on low speed until the flour disappears. Pour in half of the milk and oil mixture, letting the mixer run on low to combine, and scrape the bowl well to keep the batter uniform.
Step 6: Finish the Smooth Batter
Continue alternating the remaining wet and dry ingredients in two more additions, ending with the flour mixture. Mix on low speed for only a few seconds until the batter is completely smooth and free of large lumps. Over-mixing at this stage can develop too much gluten, which would ruin the delicate, melt-in-your-mouth crumb we want to achieve.
Step 7: Divide and Bake Your Classic Vanilla Layer Cake Layers
Divide the cake batter evenly among your three prepared cake pans, smoothing the tops with an offset spatula. Place the pans on the middle rack of your preheated oven and bake for 30 to 34 minutes. You will know they are done when the tops look lightly golden and a wooden toothpick inserted into the center comes out clean or with a few moist crumbs.
Step 8: Cool the Layers
Set the hot cake pans on a wire cooling rack and let them rest undisturbed for exactly ten minutes. Run a thin offset spatula around the inside edges of the pans to release any spots that might be sticking. Invert the pans carefully onto the racks, peel away the parchment circles, and let the layers cool completely before assembly.
Step 9: Start the Custard Filling
While your cake layers are cooling, pour your whole milk, heavy cream, fine sea salt, and vanilla bean paste into a medium-sized heavy saucepan. Stir the mixture gently with a wooden spoon and bring it to a gentle simmer over medium heat. Keep a close eye on the pot, as milk can quickly boil over once it reaches a certain temperature.
Step 10: Temper the Egg Yolks
In a medium heat-safe mixing bowl, whisk together your granulated sugar and cornstarch until no lumps remain. Add your seven large egg yolks and whisk vigorously until the mixture becomes smooth, pale, and thick. Slowly ladle about one-third of the hot milk mixture into the egg yolks, whisking constantly to warm the eggs without scrambling them.
Step 11: Cook the Filling
Pour the warmed egg yolk mixture back into your saucepan with the remaining hot milk, whisking constantly to combine. Cook the custard over medium heat, stirring non-stop as it begins to thicken at the bottom of the pan. Switch to a silicone spatula once it starts to clump, stirring rapidly until fat, lazy bubbles begin to burst on the surface.
Step 12: Melt the Butter and Strain
Pull the saucepan off the heat immediately and stir in the cold unsalted butter until it is completely melted and incorporated. Pour the hot custard through a fine-mesh sieve set over a clean, heat-safe bowl to remove any cooked egg bits. Press a sheet of plastic wrap directly onto the surface of the custard to prevent a tough skin from forming.
Step 13: Chill the Sweet Custard
Place the strained custard into the refrigerator to chill for at least two hours, or up to two full days if you are prepping ahead. For a faster cooling time, you can spread the hot custard into a shallow baking dish before covering it with plastic wrap. Make sure it is cold and firm before you attempt to use it as a filling between your cake layers.
Step 14: Whip the Frosting Base
To make your buttercream, place your room temperature butter, vanilla bean paste, and fine sea salt into the bowl of your electric stand mixer. Fit the mixer with the whip attachment and beat the mixture on high speed for five to seven minutes. The butter should become glossy, ivory-white, and have the fluffy consistency of spreadable frosting.
Step 15: Stream the Condensed Milk
Slowly pour your sweetened condensed milk into the whipped butter in five or six separate additions, keeping the mixer on high speed. Whip the frosting thoroughly after each addition, stopping the machine to scrape the sides and base of the bowl. This method creates a highly stable, decadent frosting with a smooth and silky mouthfeel.
Step 16: Fold in White Chocolate
Melt your finely chopped white chocolate and let it cool slightly so it is just warm to the touch. Pour the melted chocolate into your mixer bowl and beat on medium speed until it is fully combined and the frosting thickens. Transfer about one-third of this glossy buttercream into a pastry bag fitted with a half-inch round tip.
Step 17: Build Your Classic Vanilla Layer Cake
Level your cooled cake layers using a sharp serrated knife, then place your first layer onto a cardboard round on a rotating cake stand. Pipe a thick, sturdy border of buttercream around the outer edge of this layer to act as a retaining wall. Spoon half of your chilled custard into the center of the ring, spreading it evenly before placing the second layer on top.
Step 18: Crumb Coat and Final Decor
Repeat the filling process with the second layer, then top the cake with your final vanilla cake layer. Apply a very thin layer of buttercream over the top and sides of the entire cake to lock in any stray crumbs. Chill the cake for fifteen to thirty minutes to set this crumb coat, then apply the remaining frosting as smoothly or decoratively as you like.
Southern Baker’s Secrets

Always weigh your dry ingredients using a digital kitchen scale rather than relying on measuring cups. Measuring flour by volume can easily lead to packing too much into the cup, which will dry out your layers and leave you with a heavy crumb. For a truly light, bakery-style result, precise measurements are your best friend.
If your custard filling turns out lumpy while preparing your Classic Vanilla Layer Cake, do not panic or throw it out. Run the warm custard through a fine-mesh sieve a second time, or use an immersion blender for thirty seconds to whip it back into a silky smooth consistency. This usually happens when the heat is a bit too high or if you stopped whisking for even a moment.
Make sure your butter and egg whites are truly at room temperature before you begin mixing. Cold ingredients will cause the batter to curdle, resulting in an uneven rise and a dense texture rather than a perfectly structured vanilla crumb. Leave your ingredients on the counter for at least two hours before you plan to start baking.
When baking a traditional classic vanilla cake, keeping a close eye on the oven temperature is vital. Many home ovens run hot or cold, so keeping an inexpensive oven thermometer hanging on your center rack will help you adjust the temperature dial for an accurate bake.
If your buttercream splits or looks curdled while assembling your Classic Vanilla Layer Cake, the temperature of your butter was likely too cold. To fix this, wrap a warm kitchen towel around the bottom of the metal mixing bowl while whipping on high speed. The gentle warmth will help the fat emulsify, bringing the frosting back to a glossy, smooth finish.
Let your cake layers chill in the refrigerator for at least one hour before you attempt to level and slice them. Warm cake is incredibly fragile and prone to tearing, but chilling firms up the crumb structure, allowing your serrated knife to glide through cleanly without creating a mountain of crumbs.
Frequently Asked Questions
What is the secret to a super moist Classic Vanilla Layer Cake?
The key to achieving a moist, tender crumb lies in a combination of high-fat dairy, properly creamed butter, and a touch of vegetable oil. While butter provides that classic rich flavor, oil remains liquid at room temperature, which keeps the cake soft and moist for days. Additionally, incorporating a cooked custard filling adds a layer of moisture that infuses into the surrounding cake layers as it rests.
Is cake flour better than all-purpose flour for vanilla cake?
Cake flour contains less protein than all-purpose flour, which yields a softer, more delicate crumb structure. However, all-purpose flour is excellent for this specific recipe because it provides the structural strength needed to support the weight of the rich custard filling and dense buttercream layers. Using all-purpose flour makes sure your tall layers will not collapse under their own weight.
Why is my Classic Vanilla Layer Cake dry or dense?
A dry or dense texture usually happens due to over-mixing the batter or over-baking the layers. Over-mixing activates the gluten in the flour, which creates a tough, bread-like structure. To prevent this, always mix on low speed and stop as soon as the dry ingredients are combined, and start checking your cakes for doneness a few minutes before the recipe timer ends.
What is the difference between white cake and vanilla cake?
White cakes are made using only egg whites, which keeps the cake layers pale, light, and airy. Vanilla cakes often use whole eggs or egg yolks, which tints the batter a soft yellow and adds a richer, slightly custardy flavor. This recipe uses egg whites for the layers to create a clean aesthetic, but brings back that rich yolk flavor in the delicious cooked custard filling.
Should ingredients be at room temperature?
Yes, having your butter, milk, and egg whites at room temperature is critical for a successful cake batter. When ingredients are at the same warm temperature, they form a stable emulsion that traps air easily during the creaming stage. Cold ingredients will cause the batter to separate, leading to uneven baking and a dense final crumb.
How should I store leftover layer cake?
Because this cake features a cooked custard filling, any leftovers must be kept in the refrigerator. Store the cake in a cake keeper or cover any exposed sliced edges with plastic wrap to prevent them from drying out. For the best flavor and texture, let individual slices sit on the counter for about twenty minutes to warm up before serving.
Can I freeze the cake layers ahead of time?
You can easily freeze the baked cake layers to save time. Let the layers cool completely, wrap them tightly in two layers of plastic wrap, and then wrap them in a layer of aluminum foil before freezing for up to three months. Thaw the wrapped layers in the refrigerator overnight before assembling the cake with fresh custard and buttercream.
Family Twists & Variations
For a delightful twist that feels right at home at a summer reunion, you can turn this recipe into mini vanilla layer cakes. Bake the batter in a rimmed baking sheet lined with parchment paper, then use a round biscuit cutter to stamp out small, individual layers. Pipe a small dollop of the rich custard and a swirl of the white chocolate buttercream on each mini layer for a beautiful, bite-sized presentation that guests can grab easily.
If you want to add a bright, summery note to this comforting classic, consider spreading a thin layer of homemade lemon curd or fresh raspberry jam over the cake layers before adding the cooked custard. The tart fruit flavor cuts through the rich white chocolate frosting and sweet custard, adding a delightful contrast that is incredibly refreshing during the warm months of the year.
This spiced variation of our Classic Vanilla Layer Cake pairs beautifully with a caramel drizzle over the top of the cake, offering a comforting depth of flavor that is reminiscent of cool front-porch afternoons. You can easily transform this dessert into a warm, cozy autumn treat by adding a pinch of ground cinnamon and freshly grated nutmeg to your dry ingredient mixture.
Serve It Southern-Style
When you bring this dessert to the table, let it be the star of the show by displaying it on a beautiful heirloom glass cake stand. Because the custard filling makes slicing your Classic Vanilla Layer Cake rich and luxurious, I like to cut it into thin, elegant wedges using a sharp, warm knife. Keep a tall pitcher of unsweetened iced tea or a pot of hot chicory coffee nearby, as the slight bitterness of these drinks cuts through the sweetness of the white chocolate buttercream beautifully.
For a cozy Sunday dinner, you can serve each slice alongside a small bowl of fresh, macerated strawberries or peaches. The bright, natural acidity of the fresh fruit provides a wonderful contrast to the rich vanilla notes, making the entire dessert feel lighter. If you are hosting a larger gathering, you might also consider offering a choice of desserts, placing this cake alongside a traditional classic two layer yellow cake chocolate frosting to give your guests the ultimate sweet table experience.
Make sure to let the cake sit out of the refrigerator for about twenty minutes before you plan to serve it. This short rest allows the butter in the cake layers and the white chocolate frosting to soften slightly, giving you that melt-in-your-mouth texture that is the hallmark of fine Southern baking.

From My Kitchen to Yours
Baking a beautiful dessert from scratch is more than just a kitchen task; it is a way to show the people around your table how much you care. This recipe takes a bit of time and patience, but the slow, rhythmic process of cooking the custard and whipping the glossy buttercream is where the soul of baking lives. When you share a slice with a neighbor or set it down at a family reunion, you are offering a taste of comforting home-style tradition.
If you enjoy the rich vanilla flavor of this cake but want to try something a bit simpler for a weekend afternoon, I highly recommend my traditional classic vanilla butter cake. It offers that same comforting, vanilla-forward flavor profile in a single-layer format that is perfect for casual front-porch snacking with a cup of coffee.
I would love to see how your beautiful vanilla creations turn out in your own home kitchens. Share your baking triumphs and kitchen memories with our community on Pinterest, Facebook, and Telegram. Happy baking, and may your kitchen always be filled with warmth, laughter, and the sweet aroma of vanilla.

