Many bakers assume that achieving a painterly, artistic finish requires advanced fine-arts training, but the reality rests entirely on the physics of tool tension and buttercream viscosity.

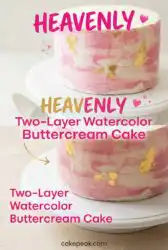
This Two-Layer Watercolor Buttercream Cake demonstrates how precise technique can transform a standard dessert into a visual masterpiece without the need for intricate piping work. By understanding the interaction between chilled frosting and room-temperature swatches, you can create a repeatable finish that looks different every time yet remains technically sound. Our test kitchen focused on the specific timing required to prevent color muddying, ensuring each swipe of frosting remains distinct while still blending at the margins. This method provides a reliable framework for bakers who prioritize both aesthetic impact and structural integrity in their two layer cake designs.
Why This Two-Layer Watercolor Buttercream Cake Works
Prep: 45 min · Serves: 12 · Difficulty: Medium
- Achieves high visual impact without complex piping.
- Utilizes basic physics to blend colors smoothly.
- Maintains structural stability through specific chilling cycles.
- Provides a repeatable framework for custom palettes.
- Eliminates the need for specialized decorating equipment.
Precision in temperature control ensures a consistent and repeatable finish for your classic vanilla bean layer cake base.
Get The Full Cake Recipe
Print
Two-Layer Watercolor Buttercream Cake
- Total Time: 1 hour 15 mins
- Yield: 12 servings
Description
Create an artistic, painterly finish on your cakes using a simple yet effective buttercream smearing technique. This reliable method ensures a stunning, unique result every time by masterfully balancing frosting viscosity with precise tool pressure.
Ingredients
- Unsalted butter, softened
- Confectioners sugar
- Gel food coloring
- Heavy cream
- Vanilla bean paste
Instructions
- Apply base foundation. Place a chilled cake on a rotating stand and apply a quarter-inch layer of base-color buttercream, smoothing the sides and top with an icing smoother to create a level anchor.
- Prepare tinted swatches. Divide remaining buttercream into bowls and mix in gel food coloring to create desired hues, ensuring the frosting remains at room temperature for optimal spreading consistency.
- Paint surface swatches. Use an offset spatula to apply small, random, irregular swatches of tinted buttercream around the sides of the cake, leaving gaps of the base color visible between each application.
- Refine the finish. Position an icing smoother vertically against the cake side and rotate the stand in one continuous, steady motion to smear the swatches into a cohesive, watercolor-inspired finish.
- Blend and set. Clean the smoother blade between passes, touch up any sparse areas with additional tint if needed, and refrigerate the cake for at least 15 minutes to lock in the design.
Notes
- Ensure your base cake is properly chilled to prevent the frosting layers from sliding or smearing during the smoothing process.
- Use gel colors exclusively to maintain the density of the buttercream emulsion without thinning the frosting consistency.
- Rotate the cake stand in a single, fluid motion to avoid creating muddy color streaks from excessive blade passes.
- Hand-beat your buttercream with a rubber spatula before adding color to eliminate large air pockets for a glass-like finish.
- Prep Time: 45 mins
- Cook Time: 0 mins
- Category: Dessert
- Method: Decoration
- Cuisine: Modern American
The Working Components

The success of this technique depends on the stability of your frosting and the concentration of your pigments. Using a high-fat buttercream provides the necessary slip for the smoother, while gel colors ensure the hue remains saturated without thinning the emulsion. Each component must be measured by weight to maintain the specific gravity required for the watercolor effect.
- Unsalted Butter: Provides the structural fat base that allows for a smooth, matte finish when chilled.
- Confectioners Sugar: Acts as the primary stabilizer and bulking agent for the frosting texture.
- Gel Food Coloring: Delivers high-density pigment without adding excess liquid to the buttercream.
- Heavy Cream: Adjusts the viscosity to ensure the secondary colors spread without resisting the smoother.
- Vanilla Bean Paste: Adds visual depth and flavor without the thinning effect of alcohol-based extracts.
| Ingredient | Why It Matters |
|---|---|
| Gel Coloring | Prevents the buttercream from becoming too soft or runny during application. |
| Unsalted Butter | Ensures the base layer sets firmly enough to withstand the scraping process. |
| Heavy Cream | Creates the necessary ‘glide’ for the watercolor swatches to blend effectively. |
How to Bake It, Precisely

Step 1: Applying the Base Foundation
Begin by placing your chilled cake on a rotating cake stand to ensure even pressure during the frosting application. Apply approximately 2 cups of the base color buttercream to the sides and top using an offset spatula, creating a layer that is roughly one-quarter inch thick. Use the icing smoother at a 45-degree angle to create a flat surface, though it does not need to be flawless at this stage. The objective is to create a secure anchor for the secondary colors while maintaining a level vertical profile.
Step 2: Preparing the Tinted Swatches
Divide the remaining buttercream into three separate bowls, reserving a small amount of the white base for final corrections if needed. Add gel food coloring to each bowl in incremental amounts, stirring slowly with a spatula to avoid incorporating excess air bubbles into the frosting. We found that colors near each other on the color wheel, such as blues and greens, blend more cleanly than contrasting hues. Ensure each tinted portion is at a consistent room temperature of roughly 70°F to facilitate easy spreading against the cold base.
Step 3: Painting the Surface Swatches
Using the tip of your offset spatula, apply small, irregular swatches of the tinted buttercream around the circumference of the cake. Place these swatches randomly, ensuring you leave gaps of the base color visible between the new pigment applications. The thickness of these swatches should be approximately half the thickness of the base layer to prevent the cake from becoming overly bulky. Focus on placing the most saturated colors near the bottom to create a grounded visual weight for the Two-Layer Watercolor Buttercream Cake.
Step 4: Refining the Two-Layer Watercolor Buttercream Cake Finish
Position the icing smoother against the side of the cake, making sure the blade is perfectly vertical and touching the surface lightly. Begin rotating the cake stand in a slow, continuous motion while holding the smoother steady in your dominant hand. As the cake turns, the smoother will catch the raised swatches and smear them across the base layer, creating the watercolor effect. Stop after one full rotation to assess the blend, as over-rotating will cause the colors to turn grey or muddy.
Step 5: Final Blending and Setting
Clean the blade of your icing smoother thoroughly between every pass to prevent unwanted color transfer to the next section. If you identify gaps where the base color is too prominent, add a small dab of tinted frosting and perform one final, light pass with the smoother. Once the sides are smooth and the colors are blended to your satisfaction, use the offset spatula to pull the top edges inward toward the center. Place the cake in the refrigerator for at least 15 minutes to lock the colors in place and set the fat structure.
Test Kitchen Notes

Maintaining the correct temperature is the single most important factor in preventing a failed finish. If the base cake is too warm, the secondary colors will slide off rather than blending into the surface. Conversely, if the base is frozen, the swatches will seize and become difficult to smear, leading to a jagged and uneven texture. We recommend chilling the crumb-coated cake for exactly 30 minutes before the final application to reach the ideal thermal equilibrium.
Air bubbles are the enemy of a smooth watercolor finish and usually occur during the mixing phase. To fix this, use a rubber spatula to hand-beat the buttercream for 2 minutes before tinting to press out any large pockets of air. This ensures that the icing smoother creates a glass-like surface without the ‘pitting’ that often ruins professional-looking results. For more on achieving the right consistency, see our guide on classic two layer yellow cake chocolate frosting techniques.
If the colors appear too muddy after the first rotation, you have likely applied too much pressure to the icing smoother. The goal is to skim the surface, not to scrape away the frosting you just applied to the cake sides. Lighten your grip and ensure the smoother is held at a shallow angle to the cake surface to encourage blending rather than removal. You can find further technical details on how to blend watercolor frosting through professional pastry studies.
The choice of food coloring significantly impacts the final result because liquid dyes can break the fat emulsion of the buttercream. Always opt for concentrated gel or paste colors which provide intense saturation without altering the ratio of liquid to fat. If you notice the buttercream curdling or becoming grainy, it is likely due to the temperature of the coloring agent or the speed of incorporation. Slow, steady folding is the most reliable method for maintaining a homogenous mixture.
Precision in the rotation of the cake stand is often overlooked by home bakers, but it determines the length of the ‘streaks’ in your design. A heavy, cast-iron rotating stand provides the necessary momentum for a single, smooth 360-degree turn which is superior to multiple jerky movements. Practicing the rotation without touching the cake first allows you to find a comfortable pace and hand position. This mechanical consistency is what separates a haphazard smudge from a intentional, painterly watercolor effect.
Frequently Asked Questions
How do I prevent the colors from blending into a single grey mess?
The most common cause of muddy colors is over-working the buttercream with too many rotations of the smoother. Limit yourself to three full rotations maximum, and always clean your tool between passes. Additionally, choosing colors that are adjacent on the color wheel, such as blue and violet, will ensure the transition remains clean.
Can I use this technique with store-bought frosting?
Commercial frostings often lack the structural fat and sugar density required to hold a smooth edge under the pressure of an icing smoother. For a repeatable and consistent result, a high-ratio Swiss meringue or a stiff American buttercream is necessary. These frostings set firmly when chilled, which is a requirement for the watercolor smearing process.
What should I do if my buttercream is too soft to scrape?
If the frosting feels soupy or loses its shape, the butter has likely passed its melting point of roughly 90°F. Place the entire bowl of buttercream in the refrigerator for 10 minutes, then re-whip it by hand to restore the emulsion. Always work in a cool kitchen environment to maintain the structural integrity of the fat.
How long will the watercolor finish stay fresh?
Once the cake is fully frosted and chilled, the buttercream acts as a seal to keep the moisture inside the cake layers. It can be stored in the refrigerator for up to three days, provided it is kept in a box to prevent the frosting from absorbing odors. For the best texture, allow the cake to sit at room temperature for 2 hours before serving.
Do I need a crumb coat for a watercolor cake?
Yes, a crumb coat is an essential step to lock in loose particles and provide a level surface for the final layer. Without a firm, chilled crumb coat, you risk pulling bits of cake into your colorful watercolor swatches. This would ruin the clarity of the design and introduce unwanted texture into the smooth finish.
Can I use natural liquid food dyes for this recipe?
Natural dyes are often water-based and much less concentrated than synthetic gels, which can lead to a broken buttercream emulsion. The high water content in natural dyes may cause the colors to bead on the surface rather than blending smoothly. For the specific physics of this technique, highly concentrated gels are the only recommended option.
Ways to Adjust It
For a more dramatic appearance, you can utilize the ombré technique by concentrating the darkest hues at the base and gradually lightening them toward the top. This requires tinting four shades of the same color and applying them in horizontal bands before using the icing smoother. This method works exceptionally well with a double chocolate layer cake to provide a dark, contrasting interior against the colored exterior.
Metallic accents can be added once the watercolor layer has fully set in the refrigerator for at least 30 minutes. Mix a small amount of edible gold or silver luster dust with high-proof grain alcohol to create a paint-like consistency. Use a food-safe brush to flick the mixture onto the cake for a speckled effect, or carefully paint the top edge for a defined border. This variation adds a layer of sophistication that complements the soft edges of the watercolor blending.
Finishing & Plating
When presenting this cake, use a minimalist cake stand to ensure the focus remains on the artistic finish of the frosting. We have found that a simple white or glass pedestal provides the best neutral background for the saturated watercolor tones. For a festive touch, you might pair this with a funfetti birthday layer cake recipe inside to surprise guests when the first slice is removed.
To achieve clean slices that do not smear the watercolor design, use a long, thin-bladed knife dipped in hot water and wiped dry between every cut. The heat from the blade melts the butter in the frosting just enough to glide through without pulling. Serve each slice on a slightly chilled plate to maintain the integrity of the buttercream until the moment of consumption.

Recipe Recap
Mastering the watercolor technique is a matter of understanding the mechanics of your tools and the temperature of your ingredients. By following these tested steps, you can produce a professional-grade finish that relies on precision rather than luck. The key takeaway from our test kitchen is that less is more—fewer rotations and lighter pressure always result in a cleaner, more sophisticated blend.
We encourage you to experiment with different color palettes to suit your specific occasion, whether you are aiming for a subtle pastels or bold, saturated hues. For those looking to expand their repertoire, our banana pudding layer cake offers another unique texture to explore. Please share your results and tag us in your baking experiments.
